Discounted Products
-
 Leo Creation 144 TC Cotton Double Jaipuri Prints Flat Bedsheet(Pack of 1, Blue, Gree, Red, Grey, Light Grey)
Original price was: ₹2,999.00.₹329.00Current price is: ₹329.00.
Leo Creation 144 TC Cotton Double Jaipuri Prints Flat Bedsheet(Pack of 1, Blue, Gree, Red, Grey, Light Grey)
Original price was: ₹2,999.00.₹329.00Current price is: ₹329.00.
-
 Home Garage 210 TC Cotton King Floral Fitted (Elastic) Bedsheet(Pack of 1, Grey)
Original price was: ₹999.00.₹299.00Current price is: ₹299.00.
Home Garage 210 TC Cotton King Floral Fitted (Elastic) Bedsheet(Pack of 1, Grey)
Original price was: ₹999.00.₹299.00Current price is: ₹299.00.
-
 Goodrik 140 TC Cotton Double 3D Printed Flat Bedsheet(Pack of 1, Brown)
Original price was: ₹499.00.₹229.00Current price is: ₹229.00.
Goodrik 140 TC Cotton Double 3D Printed Flat Bedsheet(Pack of 1, Brown)
Original price was: ₹499.00.₹229.00Current price is: ₹229.00.
-
 GLOBALSHOP 350 TC Microfiber Double Floral Flat Bedsheet(Pack of 1, Multicolor)
Original price was: ₹1,250.00.₹263.00Current price is: ₹263.00.
GLOBALSHOP 350 TC Microfiber Double Floral Flat Bedsheet(Pack of 1, Multicolor)
Original price was: ₹1,250.00.₹263.00Current price is: ₹263.00.
-
 RisingStar 250 TC Microfiber King Printed Fitted (Elastic) Bedsheet(Pack of 1, FITTED-ROUND-CIRCLES-PREMIUM)
Original price was: ₹2,299.00.₹299.00Current price is: ₹299.00.
RisingStar 250 TC Microfiber King Printed Fitted (Elastic) Bedsheet(Pack of 1, FITTED-ROUND-CIRCLES-PREMIUM)
Original price was: ₹2,299.00.₹299.00Current price is: ₹299.00.
-
 Home Garage 210 TC Cotton King Floral Fitted (Elastic) Bedsheet(Pack of 1, Fitted Black Green)
Original price was: ₹1,299.00.₹299.00Current price is: ₹299.00.
Home Garage 210 TC Cotton King Floral Fitted (Elastic) Bedsheet(Pack of 1, Fitted Black Green)
Original price was: ₹1,299.00.₹299.00Current price is: ₹299.00.
-
 Home Garage 180 TC Cotton King 3D Printed Flat Bedsheet(Pack of 1, White)
Original price was: ₹999.00.₹229.00Current price is: ₹229.00.
Home Garage 180 TC Cotton King 3D Printed Flat Bedsheet(Pack of 1, White)
Original price was: ₹999.00.₹229.00Current price is: ₹229.00.
-
 Home Sizzler 153 cm (5 ft) Polyester Room Darkening Window Curtain (Pack Of 2)(Floral, Maroon)
Original price was: ₹799.00.₹299.00Current price is: ₹299.00.
Home Sizzler 153 cm (5 ft) Polyester Room Darkening Window Curtain (Pack Of 2)(Floral, Maroon)
Original price was: ₹799.00.₹299.00Current price is: ₹299.00.
-
 Panipat Textile Hub 152.4 cm (5 ft) Polyester Window Curtain (Pack Of 2)(Solid, Aqua)
Original price was: ₹1,899.00.₹299.00Current price is: ₹299.00.
Panipat Textile Hub 152.4 cm (5 ft) Polyester Window Curtain (Pack Of 2)(Solid, Aqua)
Original price was: ₹1,899.00.₹299.00Current price is: ₹299.00.
-
 Home Sizzler 214 cm (7 ft) Polyester Semi Transparent Door Curtain (Pack Of 2)(Floral, Maroon)
Original price was: ₹1,199.00.₹399.00Current price is: ₹399.00.
Home Sizzler 214 cm (7 ft) Polyester Semi Transparent Door Curtain (Pack Of 2)(Floral, Maroon)
Original price was: ₹1,199.00.₹399.00Current price is: ₹399.00.
-
 Home Sizzler 153 cm (5 ft) Polyester Room Darkening Window Curtain (Pack Of 2)(Floral, Brown)
Original price was: ₹799.00.₹299.00Current price is: ₹299.00.
Home Sizzler 153 cm (5 ft) Polyester Room Darkening Window Curtain (Pack Of 2)(Floral, Brown)
Original price was: ₹799.00.₹299.00Current price is: ₹299.00.
-
 Stella Creations 214 cm (7 ft) Polyester Room Darkening Door Curtain (Pack Of 2)(Abstract, Brown)
Original price was: ₹1,299.00.₹449.00Current price is: ₹449.00.
Stella Creations 214 cm (7 ft) Polyester Room Darkening Door Curtain (Pack Of 2)(Abstract, Brown)
Original price was: ₹1,299.00.₹449.00Current price is: ₹449.00.
-
 Homefab India 152.5 cm (5 ft) Polyester Room Darkening Window Curtain (Pack Of 2)(Floral, Light Blue)
Original price was: ₹1,199.00.₹319.00Current price is: ₹319.00.
Homefab India 152.5 cm (5 ft) Polyester Room Darkening Window Curtain (Pack Of 2)(Floral, Light Blue)
Original price was: ₹1,199.00.₹319.00Current price is: ₹319.00.
-
 Urban Home 214 cm (7 ft) PVC Transparent Door Curtain Single Curtain(Solid, Off White)
Original price was: ₹699.00.₹203.00Current price is: ₹203.00.
Urban Home 214 cm (7 ft) PVC Transparent Door Curtain Single Curtain(Solid, Off White)
Original price was: ₹699.00.₹203.00Current price is: ₹203.00.
-
 Panipat Textile Hub 213 cm (7 ft) Polyester Door Curtain (Pack Of 2)(Solid, Brown)
Original price was: ₹1,199.00.₹349.00Current price is: ₹349.00.
Panipat Textile Hub 213 cm (7 ft) Polyester Door Curtain (Pack Of 2)(Solid, Brown)
Original price was: ₹1,199.00.₹349.00Current price is: ₹349.00.

Introduction
The Windows Registry is one of the most critical components of the Windows operating system. It acts as the central database where system settings, application configurations, hardware profiles, driver details, user preferences, and internal operating values are stored. Everything from how Windows launches apps to how the system manages memory relies on registry data. Because of this deeply integrated role, the registry is extremely sensitive. A single incorrect modification can destabilize the system, cause application failures, or even prevent Windows from starting at all.
Users often interact with the registry while troubleshooting, customizing system behavior, unlocking hidden features, or resolving compatibility issues. Online tutorials commonly direct users to make registry edits — sometimes without fully explaining the risks. Although registry changes can be powerful and beneficial, they must be made carefully. If a change goes wrong, restoring the registry becomes the quickest path to recovery.
This is why backing up registry settings before modifying them is not just a recommendation — it is a best practice. A proper registry backup allows you to revert the database to an earlier working state, avoiding hours of troubleshooting. Even more importantly, backup and recovery methods are useful not only before editing the registry, but also after corruption events such as:
-
malware infections
-
failed Windows updates
-
driver installation issues
-
software uninstallation failures
-
hardware configuration conflicts
-
accidental deletions or edits
-
user profile corruption
Fortunately, Windows provides multiple safe and reliable ways to back up and restore the registry. Each method varies in scope, ease of use, and level of control — ranging from quick, targeted backups to full system-level recovery options.
In this guide, you’ll learn five proven methods to back up and restore registry settings in Windows. The first method — exporting registry data using the Registry Editor — is ideal for users who want fast, manual control over specific settings or individual keys. It is the simplest and most accessible method, especially for beginners.
Let’s explore Method #1 in depth.
Method 1: Back Up & Restore Registry Using Registry Editor (REGEDIT)
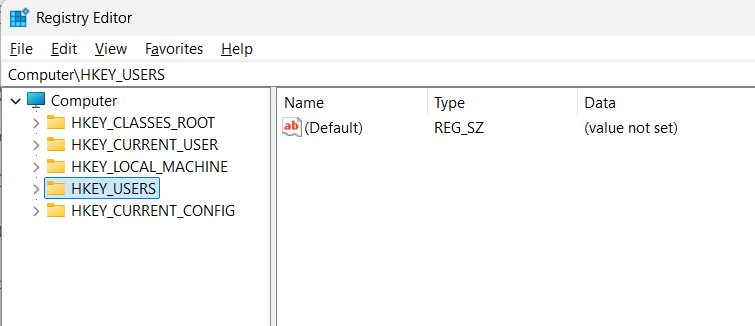
Registry Editor (regedit.exe) is the built-in graphical interface that allows users to view, edit, export, and import registry data. Before performing any modification inside this tool, backing up the registry is essential. Using regedit, users can create two types of backups:
1️⃣ Full Registry Backup — saves the entire registry database.
2️⃣ Selected Key Backup — saves only a specific registry branch.
Both options are extremely useful. A full backup protects the entire system, while selective backups allow targeted recovery without affecting unrelated settings.
Below is the correct and safe process for both backup and restoration.
Backing Up the Registry Using Registry Editor
Step 1: Open Registry Editor
There are multiple ways to open regedit, but the fastest method is:
-
Press:
-
Type:
-
Click OK or press Enter.
If prompted by UAC (User Account Control), click Yes.
Registry Editor will open with a structured tree view of registry keys.
Step 2: Decide What to Back Up
If you plan to make changes to a specific registry key, backing up only that branch may be enough. For example, if modifying:
you can export only that folder.
If you are unsure, or if the change affects multiple paths, create a full registry backup instead — this offers complete protection.
Step 3: Export the Registry Backup File
To back up the entire registry:
-
In the left panel, click Computer (at the top).
-
Go to:
File → Export -
Under Export range, select:
All -
Name your backup file something informative, such as:
“Registry-Backup-Before-Changes.reg” -
Choose a safe storage location — external drive or cloud storage recommended.
-
Click Save.
The file may take a few seconds to generate. Once saved, you now have a full registry backup available for emergency recovery.
To back up a specific registry key:
-
Navigate to the key you want.
-
Right-click the folder key.
-
Select Export.
-
Confirm Export range is set to Selected branch.
-
Save the .reg file.
Selective backups are much faster and smaller, ideal for advanced users performing targeted modifications.
Restoring the Registry from a Backup
Restoring a registry backup is equally simple — but requires caution. Importing a registry file replaces or merges values into the system registry. Always confirm you are using the correct backup file.
Step 1: Open Registry Editor
Open regedit the same way as before.
Step 2: Import the Backup File
There are two ways to restore:
Option A:
-
File → Import → Select .reg file → Open
Option B:
-
Double-click the .reg file from File Explorer
-
Accept prompts
Windows will ask for confirmation:
“Are you sure you want to continue?”
Click Yes.
Registry data will be written back to the system.
Step 3: Restart Your Computer
A system reboot is recommended so that Windows reloads registry data correctly.
After restarting, the system should behave exactly as it did when the backup was created — assuming no other changes have been made.
Why Method 1 Works So Well
Registry Editor backup/restore is powerful because:
-
It is built into Windows — no external software required
-
It supports full and partial backups
-
It works offline or online
-
It is fast and reliable
-
It preserves system integrity
However, there are limitations:
-
REG backups cannot restore permissions or ownership changes
-
Registry imports cannot remove values, only overwrite or add
-
If the registry becomes completely corrupted, Windows may not boot, preventing editor access
This is why additional backup methods are necessary — including System Restore, System Image, Group Policy export, and command-line tools.
Still, for most users performing routine changes, exporting registry data using REGEDIT provides immediate protection and full control.
Method 2: Use System Restore to Back Up and Restore Registry States
System Restore is one of the most powerful and reliable registry protection tools built into Windows. Unlike manual registry exports, which capture only raw registry data, System Restore creates snapshots of multiple critical system components — including registry hives, system files, drivers, installed programs, and Windows settings. When a System Restore point is created, it also stores copies of the registry in a protected configuration state, allowing you to roll back the system to a previous working version if something goes wrong.
This method is especially helpful if you encounter system instability, failed driver installations, software conflicts, or boot errors caused by registry changes. Instead of trying to manually undo changes, you can restore the entire system to a stable state in just a few steps.
How to Create a System Restore Point
Even though Windows generates restore points automatically during major updates or installations, it’s best to create one manually before editing the registry.
Step 1: Open System Properties
-
Press:
-
Type:
-
Press Enter.
The System Properties window opens — this interface provides access to System Restore controls.
Step 2: Enable Protection (If Disabled)
Click the System Protection tab.
Select your Windows installation drive (usually C:).
Click Configure.
Check Turn on system protection.
This setting allows Windows to store registry and system snapshots.
Step 3: Create a Restore Point
-
Click Create.
-
Type a meaningful description — for example:
“Before Registry Edit — Jan 2026” -
Click Create.
Windows will save a restore point — a process that usually takes under a minute.
Once complete, your system is protected.
How to Restore the Registry Using System Restore
If registry changes cause errors or broken functionality, System Restore can reverse the damage even if Windows will not start normally.
Step 1: Access System Restore
Option A — From Windows:
Control Panel → Recovery → Open System Restore
Option B — From Start menu search:
Type “System Restore” and open
Option C — From Windows Recovery Environment (WinRE):
Useful if Windows fails to boot.
Step 2: Select a Restore Point
Choose the restore point you created (or an earlier one generated automatically).
Click Next → Finish.
System Restore will reboot the system and apply registry changes automatically.
After completion, the registry and system state will return to exactly what they were when the restore point was created.
Why Use System Restore Instead of Manual Registry Backup?
System Restore offers greater protection because:
-
It restores all critical hives, not just selected entries
-
It repairs damaged system files related to registry changes
-
It can reverse app and driver installations
-
It works even if regedit exports fail
-
It supports boot recovery
Most importantly, it reverses registry corruption that may prevent Windows from opening or functioning properly — something registry exports cannot do alone.
Limitations of System Restore
Despite its power, there are a few limitations:
-
Restore points require disk space
-
Restores cannot recover unrelated personal files
-
System Restore must be enabled to work
-
Third-party cleanup tools may delete restore points
Still, as a registry safety tool, it remains one of the strongest options available.
Best Use Scenarios
System Restore is ideal when:
-
Running major registry edits
-
Installing new software
-
Updating drivers
-
Removing malware
-
Modifying system-level services
-
Configuring startup entries
-
Troubleshooting unexpected crashes
Because it covers both registry and system components, it provides a far wider safety net than individual .reg exports.
Overall, System Restore is a dependable, built-in recovery tool that every Windows user should keep enabled — especially those who frequently modify registry settings.
Method 3: Back Up and Restore Registry Using System Image Backup
While registry exports and System Restore points are extremely helpful, there is another level of registry protection reserved for users who want complete disaster recovery: System Image Backup. A system image is a full copy of everything stored on the Windows installation drive — including registry hives, operating system data, application files, user settings, and boot sectors.
Unlike registry-only backups, a system image allows you to restore the entire OS to a working state from the ground up, even after total system failure. This includes scenarios where Windows will not boot, where registry corruption blocks startup, or where the drive becomes damaged or overwritten.
What Makes System Image Backup Different?
System image backup provides:
-
complete hard drive restore capability
-
full registry hive restoration
-
protection against hardware failure
-
ability to recover lost partitions
-
exact state replication
-
boot record reconstruction
These advantages make it the most comprehensive recovery method available. For users who rely on mission-critical applications, large registry modifications, or enterprise environments, system imaging is indispensable.
How to Create a System Image in Windows
Windows 10 and Windows 11 still include built-in tools for imaging — even if they are hidden in classic Control Panel.
Step 1: Open Backup and Restore (Windows 7)
Search:
Backup and Restore
or navigate to:
Control Panel → System and Security → Backup and Restore (Windows 7)
Step 2: Create a System Image
Select:
Create a system image (left panel)
Step 3: Choose a Storage Location
You can save the image to:
-
External hard drive (recommended)
-
Network location
-
Secondary internal drive
Saving to a different physical drive is important — if the system drive fails, the backup remains safe.
Step 4: Select Drives to Include
By default, Windows selects the OS partition, which contains registry data. You may include additional drives if desired.
Step 5: Start Backup
Click Start backup.
The imaging process may take 10 minutes to over an hour depending on data size.
Once complete, store the backup safely.
Restoring the Registry Using System Image Recovery
If the system becomes unstable or unbootable due to registry failure, system image recovery can return everything to a working state.
Step 1: Boot Into Windows Recovery Environment (WinRE)
This can occur automatically if Windows fails to start.
Or manually:
Settings → System → Recovery → Advanced startup → Restart now
Step 2: Select System Image Recovery
Navigate through:
Troubleshoot → Advanced options → System Image Recovery
Step 3: Choose the Backup Image
Select the stored image and begin restoration.
Windows will overwrite the OS partition, including registry files, with the preserved version.
When complete, restart the computer — the system will return to the exact condition it was in at the time of backup.
Why System Image Backup Is the Strongest Registry Recovery Method
This method protects against:
-
deep registry corruption
-
malware registry damage
-
bootloader failure
-
hard drive crashes
-
update failure
-
ransomware
-
multi-system errors
It gives you the ability to restore not just registry settings, but the entire operating environment surrounding them.
Limitations to Consider
System image backups:
-
require large storage capacity
-
must be updated regularly to stay relevant
-
cannot restore selective folders
-
overwrite all changes made after backup
But for serious registry work — especially in enterprise or IT settings — system imaging is the ultimate fallback solution.
Method 4: Use Command Prompt & PowerShell Tools to Back Up and Restore the Registry
While Registry Editor and graphical backups are useful for most users, advanced users and IT professionals may prefer command-line methods. Windows supports registry export and import operations through both Command Prompt and PowerShell — providing speed, flexibility, automation support, and remote management capability. These methods are especially helpful in enterprise environments, mass device management, scripting tasks, and automated backup routines.
Both Command Prompt and PowerShell allow full registry backup and restore without opening graphical interfaces — ideal for repairing headless systems, remote computers, or machines running scripts.
Using Command Prompt (REG.EXE) for Registry Backup
Command Prompt includes a built-in tool called REG.EXE, which allows users to export registry data into .reg files.
Step 1: Open Command Prompt (Admin Mode)
-
Press:
-
Select Windows Terminal (Admin) or Command Prompt (Admin).
Administrative privileges are required for full registry access.
Step 2: Export Registry Backup
To export the entire registry hive:
To export a specific branch:
To export all hives using multiple commands:
These commands create .reg backup files that can be restored later.
Restoring Registry Using Command Prompt
Import a registry backup using:
Windows will immediately merge values into the system registry. A restart is recommended afterward.
This method is ideal for scripted restores or large batch operations, but requires caution — imports overwrite existing values without confirmation.
Using PowerShell to Back Up the Registry
PowerShell is even more powerful than Command Prompt for registry management. Using cmdlets, users can export registry keys, automate backups, and integrate with network or cloud storage.
Backup example using PowerShell:
Or export to XML/CSV formats for advanced processing.
PowerShell can also be used to read, write, delete, search, and compare registry paths — making it an excellent tool for long-term registry management.
Why Command-Line Backup Matters
These command-line techniques offer advantages beyond graphical tools:
-
usable in safe mode
-
automatable via batch scripts
-
remote management support
-
faster than GUI export
-
works even when REGEDIT fails
-
integrates with cloud backups
For IT teams managing fleets of Windows devices, automated registry backup scripting can prevent widespread downtime caused by configuration errors.
Using REG LOAD and REG UNLOAD
Windows supports mounting registry hives offline using:
This is extremely useful for restoring registry on non-bootable PCs, external drives, or damaged Windows installations.
For example:
You can then restore or modify registry structure before unloading:
This technique allows offline registry repair — one of the most advanced recovery uses in Windows troubleshooting.
Limitations
Command-line accuracy is critical. Incorrect paths or imports may overwrite settings or enter malformed values. Additionally, REG.EXE does not remove deleted registry values — it only merges new ones.
However, for advanced users, this method offers unmatched control and reliability.
Method 5: Use Third-Party Tools for Advanced Registry Backup & Repair
While Windows provides powerful built-in registry protection, some users prefer third-party software due to its additional features, automation options, user-friendly interfaces, and enhanced recovery tools. Third-party registry backup programs are especially useful for:
-
users who perform frequent registry edits
-
technicians who need recurring scheduled backups
-
small businesses managing multiple devices
-
users who want secure rollback options
-
advanced system recovery needs
These tools go beyond simple export functions. They create structured registry snapshots and catalog backups so users can review, manage, restore, and schedule them.
Common Features Found in Professional Registry Backup Tools
A good third-party solution typically offers:
-
registry change tracking
-
incremental backup support
-
boot-level restore capabilities
-
corruption detection
-
registry defragmentation
-
real-time rollback protection
-
scheduled backup automation
-
full or partial registry snapshot options
-
safe editing environments
These features reduce the risk of registry corruption and shorten recovery time if errors occur.
Popular Registry Backup Applications
Below are trusted examples (not endorsements):
1️⃣ Registry Backup (Tweaking.com)
-
Free utility
-
Creates full registry snapshots
-
Restores using recovery environment
-
Lightweight and fast
2️⃣ ERUNT (Emergency Recovery Utility NT)
-
Classic registry backup tool
-
Generates daily snapshots
-
Allows DOS-mode restore operations
3️⃣ Wise Registry Cleaner / Wise Registry Backup
-
Backup + cleanup functionality
-
Good for performance improvement
4️⃣ Auslogics Registry Cleaner with Backup
-
Registry optimization suite with built-in backup
These tools are safe when downloaded from official sources — but avoid unverified cleanup software, which may cause damage.
How to Use a Third-Party Backup Tool (General Process)
Although steps differ by software, the process usually follows this pattern:
Step 1: Install a trusted registry backup tool
Download from the official website only.
Step 2: Run a full registry backup scan
The software analyzes registry structure and creates a snapshot.
Step 3: Save backup files externally
Store on:
-
USB drive
-
cloud folder
-
external SSD
for maximum safety.
Step 4: Restore backup when needed
Open the tool → Select snapshot → Restore.
Most tools allow restoring even if Windows will not boot normally — using WinRE or bootable iso disks.
Why Use Third-Party Tools Over Windows Tools?
Third-party programs provide significant advantages:
-
easier interface for non-technical users
-
scheduled automatic backups
-
registry protection beyond .reg files
-
ability to undo edits without import/export
-
full registry hive snapshots, not just merged data
-
protection from malware-induced corruption
-
performance optimization options
For example, some software can rebuild corrupt hives that Windows cannot repair on its own. Others detect damage proactively and recommend rollback.
When Third-Party Backup Tools Are Most Useful
These solutions are ideal for:
-
Power users modifying registry weekly
-
Gamers applying system tweaks
-
IT managers deploying configuration changes
-
Businesses standardizing system settings
-
Systems running legacy applications
-
Machines exposed to malware testing
-
Windows installations with unstable drivers
Users benefit from peace of mind, knowing that a complete recovery state is always available.
Limitations & Precautions
Although helpful, third-party tools have risks:
-
Low-quality cleaners may remove essential registry data
-
Backup files may consume storage space
-
Unverified downloads may contain malware
-
Scheduling and automation features must be configured
-
Some tools require licensing fees
The best practice is to select reputable tools with export control, version history, and transparent backup structure.
Bottom Line
Third-party backup software complements — not replaces — built-in Windows tools. It is especially valuable for users who frequently edit the registry and want a faster, more automated, more intelligent backup environment. These tools make restoration less technical and provide safety nets that prevent catastrophic damage in case of user error.
Comparison Table: Registry Backup & Restore Methods
| Method | Best For | Strengths | Weaknesses | Skill Level |
|---|---|---|---|---|
| Registry Editor Export/Import | Quick manual backups | Fast, built-in, selective backups | Cannot rebuild corrupted registry; no boot repair | Beginner to Intermediate |
| System Restore | Fixing system instability or driver issues | Restores full system state including registry | Requires system protection to be enabled; restore points may expire | Beginner |
| System Image Backup | Complete system disaster recovery | Restores OS, registry, apps, boot data, and settings | Requires large storage; overwrites all new data | Intermediate to Advanced |
| Command Prompt & PowerShell | Automation, scripting, remote devices | Works offline, fast, precise, powerful | Risk of incorrect command entry; partial restore complexity | Advanced & IT Professionals |
| Third-Party Tools | Frequent registry edits, optimization | Auto scheduling, full hive backup, rollback features | Must choose reputable tools; may cost money | Beginner to Advanced |
This table highlights key differences so users can choose the right method based on needs — from simple personal protection to enterprise-level recovery.
Conclusion
Backups are essential whenever users modify the Windows Registry, and choosing the right protection strategy depends on how deeply one interacts with the system. The registry is the core of Windows — a repository of vital instructions and configuration data that dictate how hardware, applications, and system components operate.
Because the registry underpins so much functionality, even small errors can lead to major consequences: broken applications, boot loops, system crashes, missing drivers, or unusable Windows environments. Fortunately, registry backup and restore methods give users peace of mind by providing safe rollback paths.
For simple changes, the built-in Registry Editor export feature is quick and effective. For system-wide issues, System Restore offers an excellent recovery tool with minimal effort. When full system recovery is needed, System Image Backup remains the strongest option — restoring every component exactly as it was. Advanced users and IT professionals benefit from command-line tools that support automation, scripting, and remote management. Meanwhile, third-party registry backup software adds scheduling, optimization, and enhanced recovery options that are ideal for users who frequently edit the registry or manage multiple Windows systems.
The key takeaway is this: back up before you modify. Whether you are following a guide, applying tweaks, installing new software, or troubleshooting issues, having a reliable registry backup protects you against the unexpected. Each of the five methods in this guide offers a different level of control and reliability — and using more than one method together is often the smartest approach.
Once a backup exists, you never have to fear experimenting with registry edits or repairing damaged settings. With planning and proper tools, Windows systems remain stable, secure, and recoverable — no matter what happens inside the registry.
Disclaimer (Bazaronweb.com)
The information in this article is provided for educational and troubleshooting purposes only. Results may vary depending on hardware, Windows version, registry structure, recovery configuration, and backup methods used. Bazaronweb.com is not responsible for data loss, configuration errors, or system instability that may occur from modifying or restoring registry settings.
Windows, Microsoft, PowerShell, and all related names are trademarks of Microsoft Corporation. Bazaronweb.com is not affiliated with Microsoft.
- Can’t View Comments on YouTube Shorts? 6 Ways to Fix It (Complete Guide)

- How to Block Users From Installing Programs in Windows 11 Complete Step-by-Step Guide for Better Security

- How to Fix Chrome Automatically Deleting Downloaded Files (Complete Step-by-Step Guide)

- How to View Apps That Windows Security Identifies as PUA (Step-by-Step Guide)

- How to Add Custom DNS Server on iPhone to Fix DNS Errors and Improve Internet Speed

Products
-
![Apple Watch Ultra 3 [GPS + Cellular 49mm] Running & Multisport Smartwatch w/Rugged Titanium Case w/Black Titanium Milanese Loop - M. Satellite Communications, Advanced Health & Fitness Tracking](https://bazaronweb.com/retailstores/wp-content/uploads/2025/09/apple-watch-320x320.jpg) Apple Watch Ultra 3 [GPS + Cellular 49mm] Running & Multisport Smartwatch w/Rugged Titanium Case w/Black Titanium Milanese Loop - M. Satellite Communications, Advanced Health & Fitness Tracking
Apple Watch Ultra 3 [GPS + Cellular 49mm] Running & Multisport Smartwatch w/Rugged Titanium Case w/Black Titanium Milanese Loop - M. Satellite Communications, Advanced Health & Fitness Tracking
-
 Apple iPad mini (A17 Pro): Apple Intelligence, 8.3-inch Liquid Retina Display, 256GB, Wi-Fi 6E, 12MP Front/12MP Back Camera, Touch ID, All-Day Battery Life — Purple
-
 Apple AirPods Max Wireless Over-Ear Headphones, Active Noise Cancelling, Transparency Mode, Personalized Spatial Audio, Dolby Atmos, Bluetooth Headphones for iPhone – Space Gray
-
 Apple AirPods Pro 2 Wireless Earbuds, Active Noise Cancellation, Hearing Aid Feature, Bluetooth Headphones, Transparency, Personalized Spatial Audio, High-Fidelity Sound, H2 Chip, USB-C Charging
-
Leo Creation 144 TC Cotton Double Jaipuri Prints Flat Bedsheet(Pack of 1, Blue, Gree, Red, Grey, Light Grey)
Original price was: ₹2,999.00.₹329.00Current price is: ₹329.00.
Leave a Reply