Discounted Products
-
 Leo Creation 144 TC Cotton Double Jaipuri Prints Flat Bedsheet(Pack of 1, Blue, Gree, Red, Grey, Light Grey)
Original price was: ₹2,999.00.₹329.00Current price is: ₹329.00.
Leo Creation 144 TC Cotton Double Jaipuri Prints Flat Bedsheet(Pack of 1, Blue, Gree, Red, Grey, Light Grey)
Original price was: ₹2,999.00.₹329.00Current price is: ₹329.00.
-
 Home Garage 210 TC Cotton King Floral Fitted (Elastic) Bedsheet(Pack of 1, Grey)
Original price was: ₹999.00.₹299.00Current price is: ₹299.00.
Home Garage 210 TC Cotton King Floral Fitted (Elastic) Bedsheet(Pack of 1, Grey)
Original price was: ₹999.00.₹299.00Current price is: ₹299.00.
-
 Goodrik 140 TC Cotton Double 3D Printed Flat Bedsheet(Pack of 1, Brown)
Original price was: ₹499.00.₹229.00Current price is: ₹229.00.
Goodrik 140 TC Cotton Double 3D Printed Flat Bedsheet(Pack of 1, Brown)
Original price was: ₹499.00.₹229.00Current price is: ₹229.00.
-
 GLOBALSHOP 350 TC Microfiber Double Floral Flat Bedsheet(Pack of 1, Multicolor)
Original price was: ₹1,250.00.₹263.00Current price is: ₹263.00.
GLOBALSHOP 350 TC Microfiber Double Floral Flat Bedsheet(Pack of 1, Multicolor)
Original price was: ₹1,250.00.₹263.00Current price is: ₹263.00.
-
 RisingStar 250 TC Microfiber King Printed Fitted (Elastic) Bedsheet(Pack of 1, FITTED-ROUND-CIRCLES-PREMIUM)
Original price was: ₹2,299.00.₹299.00Current price is: ₹299.00.
RisingStar 250 TC Microfiber King Printed Fitted (Elastic) Bedsheet(Pack of 1, FITTED-ROUND-CIRCLES-PREMIUM)
Original price was: ₹2,299.00.₹299.00Current price is: ₹299.00.
-
 Home Garage 210 TC Cotton King Floral Fitted (Elastic) Bedsheet(Pack of 1, Fitted Black Green)
Original price was: ₹1,299.00.₹299.00Current price is: ₹299.00.
Home Garage 210 TC Cotton King Floral Fitted (Elastic) Bedsheet(Pack of 1, Fitted Black Green)
Original price was: ₹1,299.00.₹299.00Current price is: ₹299.00.
-
 Home Garage 180 TC Cotton King 3D Printed Flat Bedsheet(Pack of 1, White)
Original price was: ₹999.00.₹229.00Current price is: ₹229.00.
Home Garage 180 TC Cotton King 3D Printed Flat Bedsheet(Pack of 1, White)
Original price was: ₹999.00.₹229.00Current price is: ₹229.00.
-
 Home Sizzler 153 cm (5 ft) Polyester Room Darkening Window Curtain (Pack Of 2)(Floral, Maroon)
Original price was: ₹799.00.₹299.00Current price is: ₹299.00.
Home Sizzler 153 cm (5 ft) Polyester Room Darkening Window Curtain (Pack Of 2)(Floral, Maroon)
Original price was: ₹799.00.₹299.00Current price is: ₹299.00.
-
 Panipat Textile Hub 152.4 cm (5 ft) Polyester Window Curtain (Pack Of 2)(Solid, Aqua)
Original price was: ₹1,899.00.₹299.00Current price is: ₹299.00.
Panipat Textile Hub 152.4 cm (5 ft) Polyester Window Curtain (Pack Of 2)(Solid, Aqua)
Original price was: ₹1,899.00.₹299.00Current price is: ₹299.00.
-
 Home Sizzler 214 cm (7 ft) Polyester Semi Transparent Door Curtain (Pack Of 2)(Floral, Maroon)
Original price was: ₹1,199.00.₹399.00Current price is: ₹399.00.
Home Sizzler 214 cm (7 ft) Polyester Semi Transparent Door Curtain (Pack Of 2)(Floral, Maroon)
Original price was: ₹1,199.00.₹399.00Current price is: ₹399.00.
-
 Home Sizzler 153 cm (5 ft) Polyester Room Darkening Window Curtain (Pack Of 2)(Floral, Brown)
Original price was: ₹799.00.₹299.00Current price is: ₹299.00.
Home Sizzler 153 cm (5 ft) Polyester Room Darkening Window Curtain (Pack Of 2)(Floral, Brown)
Original price was: ₹799.00.₹299.00Current price is: ₹299.00.
-
 Stella Creations 214 cm (7 ft) Polyester Room Darkening Door Curtain (Pack Of 2)(Abstract, Brown)
Original price was: ₹1,299.00.₹449.00Current price is: ₹449.00.
Stella Creations 214 cm (7 ft) Polyester Room Darkening Door Curtain (Pack Of 2)(Abstract, Brown)
Original price was: ₹1,299.00.₹449.00Current price is: ₹449.00.
-
 Homefab India 152.5 cm (5 ft) Polyester Room Darkening Window Curtain (Pack Of 2)(Floral, Light Blue)
Original price was: ₹1,199.00.₹319.00Current price is: ₹319.00.
Homefab India 152.5 cm (5 ft) Polyester Room Darkening Window Curtain (Pack Of 2)(Floral, Light Blue)
Original price was: ₹1,199.00.₹319.00Current price is: ₹319.00.
-
 Urban Home 214 cm (7 ft) PVC Transparent Door Curtain Single Curtain(Solid, Off White)
Original price was: ₹699.00.₹203.00Current price is: ₹203.00.
Urban Home 214 cm (7 ft) PVC Transparent Door Curtain Single Curtain(Solid, Off White)
Original price was: ₹699.00.₹203.00Current price is: ₹203.00.
-
 Panipat Textile Hub 213 cm (7 ft) Polyester Door Curtain (Pack Of 2)(Solid, Brown)
Original price was: ₹1,199.00.₹349.00Current price is: ₹349.00.
Panipat Textile Hub 213 cm (7 ft) Polyester Door Curtain (Pack Of 2)(Solid, Brown)
Original price was: ₹1,199.00.₹349.00Current price is: ₹349.00.
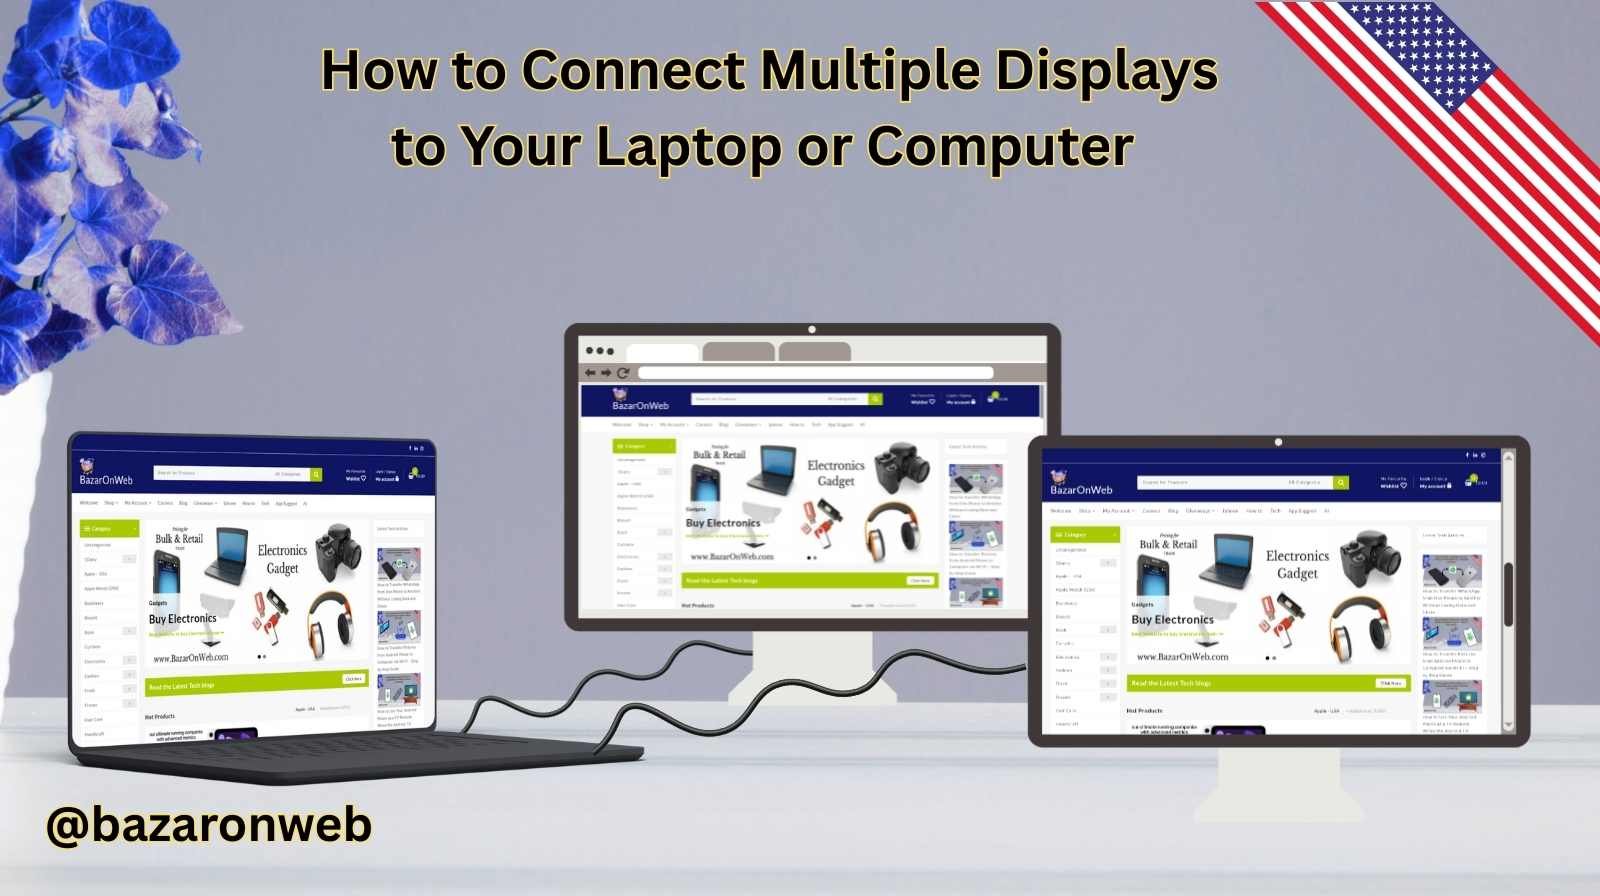
If you’ve ever looked at a professional workspace or a gaming setup, you’ve likely noticed one thing in common—multiple displays. Whether it’s a programmer coding on one screen and referencing documentation on another, a trader monitoring multiple stock charts, or a gamer streaming on one display while playing on another, the ability to connect more than one monitor can massively improve productivity and experience.
But here’s the good news: you don’t need a super high-end workstation to connect multiple displays. Most modern laptops and desktop computers already support it—you just need to know the right way to set it up. In this detailed guide, I’ll walk you through everything you need to know about connecting multiple displays to your laptop or computer, from the basics to advanced setups.
Why Use Multiple Displays?
Before diving into the “how,” let’s quickly cover the “why.”
- Boost Productivity: Studies have shown that people with two or more screens complete tasks faster. You can have your main work on one monitor and communication tools, emails, or research open on another.
- Better Multitasking: Perfect for working professionals who constantly juggle spreadsheets, design software, or coding environments.
- Enhanced Entertainment: Gamers, video editors, and streamers can extend gameplay to one screen while monitoring chats, tools, or editing timelines on another.
- Organization & Focus: Instead of minimizing and switching between tabs endlessly, you can dedicate each screen to a specific task.
Step 1: Check Your Laptop or Computer’s Display Support
Not every system supports unlimited monitors. First, you need to check how many displays your device can handle.
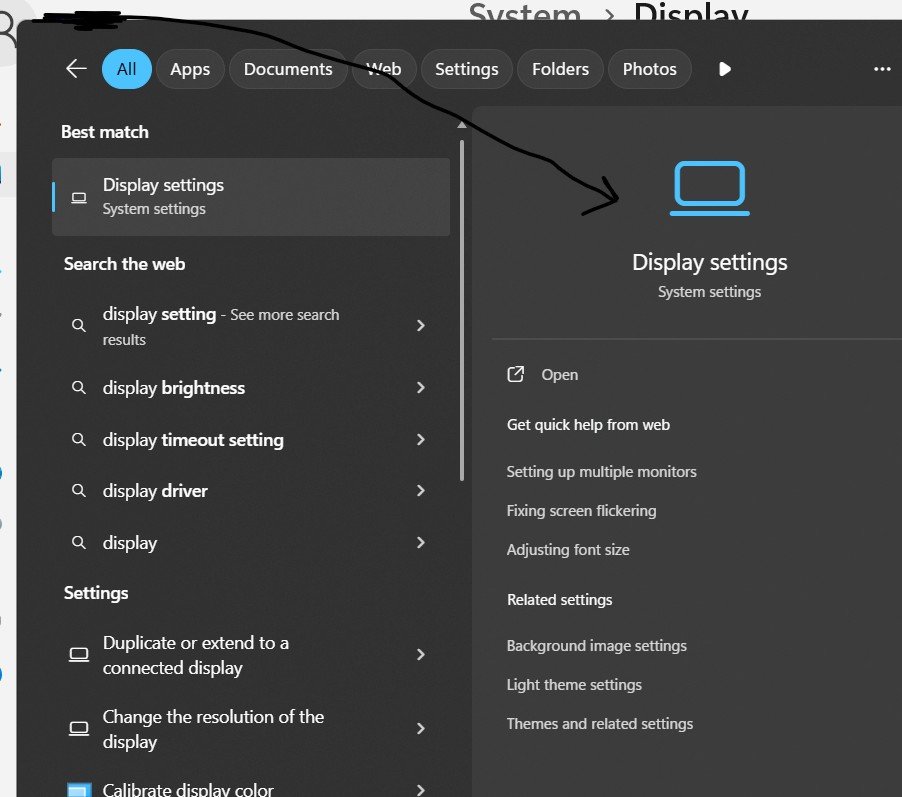
On Windows:
- Right-click on the desktop → Select Display settings.
- Scroll down to Multiple displays.
- If your system detects more than one screen when connected, you’re good to go.
On macOS:
- Click the Apple menu → Select System Settings (or Displays).
- macOS will show connected displays automatically.
- You can arrange them by dragging in the layout screen.
💡 Pro Tip: Most modern laptops (Windows and Mac) can handle at least two displays (laptop screen + one external monitor). High-end devices and desktops can support 3, 4, or even more monitors.
Step 2: Identify Your Ports
The most crucial step is checking what ports your laptop or PC has. Different devices use different types of display connections.
Common Display Ports:
- HDMI: The most common, found on TVs, monitors, and laptops.
- DisplayPort: High refresh rate, often used in gaming monitors.
- USB-C / Thunderbolt 3/4: Found in modern laptops like MacBooks. Supports video, audio, and power in one cable.
- Mini DisplayPort: A smaller version, popular in older laptops.
- VGA (older): Legacy connection, lower resolution—avoid unless necessary.
Check the sides of your laptop or the back of your desktop. Note the available ports—you’ll need this to choose the right cable or adapter.
Step 3: Get the Right Cables or Adapters
If your laptop/PC and monitor share the same port type, great! Just grab the correct cable. But in most cases, you’ll need adapters.
Examples:
- Laptop with HDMI → Monitor with HDMI → Use HDMI-to-HDMI cable.
- Laptop with USB-C → Monitor with HDMI → Use USB-C to HDMI adapter.
- Laptop with Mini DisplayPort → Monitor with DisplayPort → Use Mini DisplayPort to DisplayPort cable.
💡 If your laptop has only one video output but you want more monitors, you’ll need a docking station or USB-C hub.
Step 4: Connect the Monitors
Now, physically connect the monitors using the cables/adapters.
- Plug the cable into your laptop/PC.
- Connect the other end to the monitor.
- Switch on the monitor.
Your computer should detect the display automatically. If not:
- On Windows, press
Windows + P→ Choose from options (Duplicate, Extend, Second screen only). - On Mac, go to System Settings > Displays → Arrange screens.
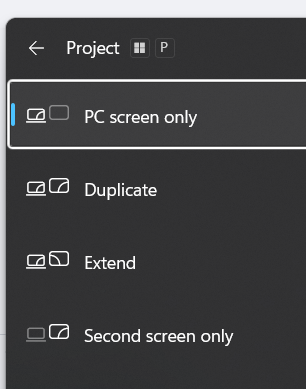
Step 5: Choose Display Mode
When using multiple monitors, you’ll have different modes:
- Duplicate/Mirror: Shows the same screen on all monitors (useful for presentations).
- Extend: Spreads your desktop across multiple screens (most popular for work/gaming).
- Single Display Only: Turns off your laptop screen and uses external monitors only.
Most users prefer Extend mode because it gives extra workspace.
Step 6: Arrange Displays
Once connected, you may find your mouse cursor doesn’t move the way you expect. This is because you need to arrange the displays.
- On Windows: Go to Display Settings → Drag monitors to match their physical layout.
- On Mac: Go to Displays → Drag and arrange monitors accordingly.
For example, if your second monitor is physically on the left of your laptop, drag its representation to the left in settings.
Step 7: Adjust Resolution and Scaling
Sometimes, different monitors have different resolutions (e.g., one is 4K, the other 1080p). To optimize:
- On Windows: In Display settings, select each monitor → adjust resolution and scaling.
- On Mac: Select the display → choose “Default for display” or manually adjust.
💡 Tip: For productivity, keep both displays at the same scaling percentage so fonts and icons don’t look mismatched.
Step 8: Advanced Multi-Monitor Setups
If you want more than two monitors:
- Docking Station: A powerful hub that connects multiple monitors, USB devices, and Ethernet to your laptop.
- External GPU (eGPU): For MacBooks or laptops, an eGPU can handle additional monitors and high-performance tasks.
- Graphics Card (Desktop PC): Check how many outputs your GPU supports (usually 2–4). Some GPUs support up to 6 displays.
Common Issues and Fixes
1. Monitor Not Detected
- Check cables and ports.
- Restart the computer.
- Update graphics drivers.
2. Wrong Resolution
- Adjust resolution in settings.
- Update graphics drivers.
3. Laptop Too Slow with Extra Monitors
- Lower resolution or refresh rate.
- Upgrade RAM or GPU.
4. No Extra Ports
- Use USB-C dock or splitter.
Best Practices for Multi-Monitor Setup
- Use Monitor Arms: Free up desk space and adjust screen positions.
- Match Display Sizes: Using monitors of similar size gives a smoother experience.
- Cable Management: Use clips or sleeves to keep your desk neat.
- Adjust Eye Level: Keep top of the monitor at eye level for comfort.
Conclusion
Connecting multiple displays to your laptop or computer is easier than most people think. With the right cables, ports, and setup, you can transform your workspace into a productivity powerhouse or an immersive entertainment hub.
Whether you’re a professional, student, gamer, or just someone who wants less tab-switching stress, multi-monitor setups are worth it.
Start simple with one extra monitor, and if you love it, expand with docking stations or advanced GPU setups. Trust me, once you experience the convenience, you’ll never want to go back to a single screen again.
- How to Fix Internet Problems with a New SSD Complete Troubleshooting Guide for Stable Connectivity

- 5 Best Ways to Fix Windows 11 Slow Startup

- How to Enable or Disable Reserved Storage on Windows 11: Complete Guide to Managing System Storage Space Efficiently

- How To Block Certain Websites In Google Chrome Browser: A Complete Guide For Better Security And Productivity

- How to Enable or Disable WiFi Calling on iPhone: A Complete Guide for Better Call Quality and Connectivity

Products
-
![Apple Watch Ultra 3 [GPS + Cellular 49mm] Running & Multisport Smartwatch w/Rugged Titanium Case w/Black Titanium Milanese Loop - M. Satellite Communications, Advanced Health & Fitness Tracking](https://bazaronweb.com/retailstores/wp-content/uploads/2025/09/apple-watch-320x320.jpg) Apple Watch Ultra 3 [GPS + Cellular 49mm] Running & Multisport Smartwatch w/Rugged Titanium Case w/Black Titanium Milanese Loop - M. Satellite Communications, Advanced Health & Fitness Tracking
Apple Watch Ultra 3 [GPS + Cellular 49mm] Running & Multisport Smartwatch w/Rugged Titanium Case w/Black Titanium Milanese Loop - M. Satellite Communications, Advanced Health & Fitness Tracking
-
 Apple iPad mini (A17 Pro): Apple Intelligence, 8.3-inch Liquid Retina Display, 256GB, Wi-Fi 6E, 12MP Front/12MP Back Camera, Touch ID, All-Day Battery Life — Purple
-
 Apple AirPods Max Wireless Over-Ear Headphones, Active Noise Cancelling, Transparency Mode, Personalized Spatial Audio, Dolby Atmos, Bluetooth Headphones for iPhone – Space Gray
-
 Apple AirPods Pro 2 Wireless Earbuds, Active Noise Cancellation, Hearing Aid Feature, Bluetooth Headphones, Transparency, Personalized Spatial Audio, High-Fidelity Sound, H2 Chip, USB-C Charging
-
Leo Creation 144 TC Cotton Double Jaipuri Prints Flat Bedsheet(Pack of 1, Blue, Gree, Red, Grey, Light Grey)
Original price was: ₹2,999.00.₹329.00Current price is: ₹329.00.
Leave a Reply