Discounted Products
-
 Leo Creation 144 TC Cotton Double Jaipuri Prints Flat Bedsheet(Pack of 1, Blue, Gree, Red, Grey, Light Grey)
Original price was: ₹2,999.00.₹329.00Current price is: ₹329.00.
Leo Creation 144 TC Cotton Double Jaipuri Prints Flat Bedsheet(Pack of 1, Blue, Gree, Red, Grey, Light Grey)
Original price was: ₹2,999.00.₹329.00Current price is: ₹329.00.
-
 Home Garage 210 TC Cotton King Floral Fitted (Elastic) Bedsheet(Pack of 1, Grey)
Original price was: ₹999.00.₹299.00Current price is: ₹299.00.
Home Garage 210 TC Cotton King Floral Fitted (Elastic) Bedsheet(Pack of 1, Grey)
Original price was: ₹999.00.₹299.00Current price is: ₹299.00.
-
 Goodrik 140 TC Cotton Double 3D Printed Flat Bedsheet(Pack of 1, Brown)
Original price was: ₹499.00.₹229.00Current price is: ₹229.00.
Goodrik 140 TC Cotton Double 3D Printed Flat Bedsheet(Pack of 1, Brown)
Original price was: ₹499.00.₹229.00Current price is: ₹229.00.
-
 GLOBALSHOP 350 TC Microfiber Double Floral Flat Bedsheet(Pack of 1, Multicolor)
Original price was: ₹1,250.00.₹263.00Current price is: ₹263.00.
GLOBALSHOP 350 TC Microfiber Double Floral Flat Bedsheet(Pack of 1, Multicolor)
Original price was: ₹1,250.00.₹263.00Current price is: ₹263.00.
-
 RisingStar 250 TC Microfiber King Printed Fitted (Elastic) Bedsheet(Pack of 1, FITTED-ROUND-CIRCLES-PREMIUM)
Original price was: ₹2,299.00.₹299.00Current price is: ₹299.00.
RisingStar 250 TC Microfiber King Printed Fitted (Elastic) Bedsheet(Pack of 1, FITTED-ROUND-CIRCLES-PREMIUM)
Original price was: ₹2,299.00.₹299.00Current price is: ₹299.00.
-
 Home Garage 210 TC Cotton King Floral Fitted (Elastic) Bedsheet(Pack of 1, Fitted Black Green)
Original price was: ₹1,299.00.₹299.00Current price is: ₹299.00.
Home Garage 210 TC Cotton King Floral Fitted (Elastic) Bedsheet(Pack of 1, Fitted Black Green)
Original price was: ₹1,299.00.₹299.00Current price is: ₹299.00.
-
 Home Garage 180 TC Cotton King 3D Printed Flat Bedsheet(Pack of 1, White)
Original price was: ₹999.00.₹229.00Current price is: ₹229.00.
Home Garage 180 TC Cotton King 3D Printed Flat Bedsheet(Pack of 1, White)
Original price was: ₹999.00.₹229.00Current price is: ₹229.00.
-
 Home Sizzler 153 cm (5 ft) Polyester Room Darkening Window Curtain (Pack Of 2)(Floral, Maroon)
Original price was: ₹799.00.₹299.00Current price is: ₹299.00.
Home Sizzler 153 cm (5 ft) Polyester Room Darkening Window Curtain (Pack Of 2)(Floral, Maroon)
Original price was: ₹799.00.₹299.00Current price is: ₹299.00.
-
 Panipat Textile Hub 152.4 cm (5 ft) Polyester Window Curtain (Pack Of 2)(Solid, Aqua)
Original price was: ₹1,899.00.₹299.00Current price is: ₹299.00.
Panipat Textile Hub 152.4 cm (5 ft) Polyester Window Curtain (Pack Of 2)(Solid, Aqua)
Original price was: ₹1,899.00.₹299.00Current price is: ₹299.00.
-
 Home Sizzler 214 cm (7 ft) Polyester Semi Transparent Door Curtain (Pack Of 2)(Floral, Maroon)
Original price was: ₹1,199.00.₹399.00Current price is: ₹399.00.
Home Sizzler 214 cm (7 ft) Polyester Semi Transparent Door Curtain (Pack Of 2)(Floral, Maroon)
Original price was: ₹1,199.00.₹399.00Current price is: ₹399.00.
-
 Home Sizzler 153 cm (5 ft) Polyester Room Darkening Window Curtain (Pack Of 2)(Floral, Brown)
Original price was: ₹799.00.₹299.00Current price is: ₹299.00.
Home Sizzler 153 cm (5 ft) Polyester Room Darkening Window Curtain (Pack Of 2)(Floral, Brown)
Original price was: ₹799.00.₹299.00Current price is: ₹299.00.
-
 Stella Creations 214 cm (7 ft) Polyester Room Darkening Door Curtain (Pack Of 2)(Abstract, Brown)
Original price was: ₹1,299.00.₹449.00Current price is: ₹449.00.
Stella Creations 214 cm (7 ft) Polyester Room Darkening Door Curtain (Pack Of 2)(Abstract, Brown)
Original price was: ₹1,299.00.₹449.00Current price is: ₹449.00.
-
 Homefab India 152.5 cm (5 ft) Polyester Room Darkening Window Curtain (Pack Of 2)(Floral, Light Blue)
Original price was: ₹1,199.00.₹319.00Current price is: ₹319.00.
Homefab India 152.5 cm (5 ft) Polyester Room Darkening Window Curtain (Pack Of 2)(Floral, Light Blue)
Original price was: ₹1,199.00.₹319.00Current price is: ₹319.00.
-
 Urban Home 214 cm (7 ft) PVC Transparent Door Curtain Single Curtain(Solid, Off White)
Original price was: ₹699.00.₹203.00Current price is: ₹203.00.
Urban Home 214 cm (7 ft) PVC Transparent Door Curtain Single Curtain(Solid, Off White)
Original price was: ₹699.00.₹203.00Current price is: ₹203.00.
-
 Panipat Textile Hub 213 cm (7 ft) Polyester Door Curtain (Pack Of 2)(Solid, Brown)
Original price was: ₹1,199.00.₹349.00Current price is: ₹349.00.
Panipat Textile Hub 213 cm (7 ft) Polyester Door Curtain (Pack Of 2)(Solid, Brown)
Original price was: ₹1,199.00.₹349.00Current price is: ₹349.00.
If you take screenshots even occasionally, Windows 11 probably feels incredibly convenient. Press Win + PrtScn, and—just like that—your screen is captured. No pop-ups, no extra steps, no saving dialog. It’s fast, clean, and perfect for busy days when you’re juggling work, family, and a dozen browser tabs at once.
But there’s a small detail most of us don’t think about at first: where those screenshots are actually saved.
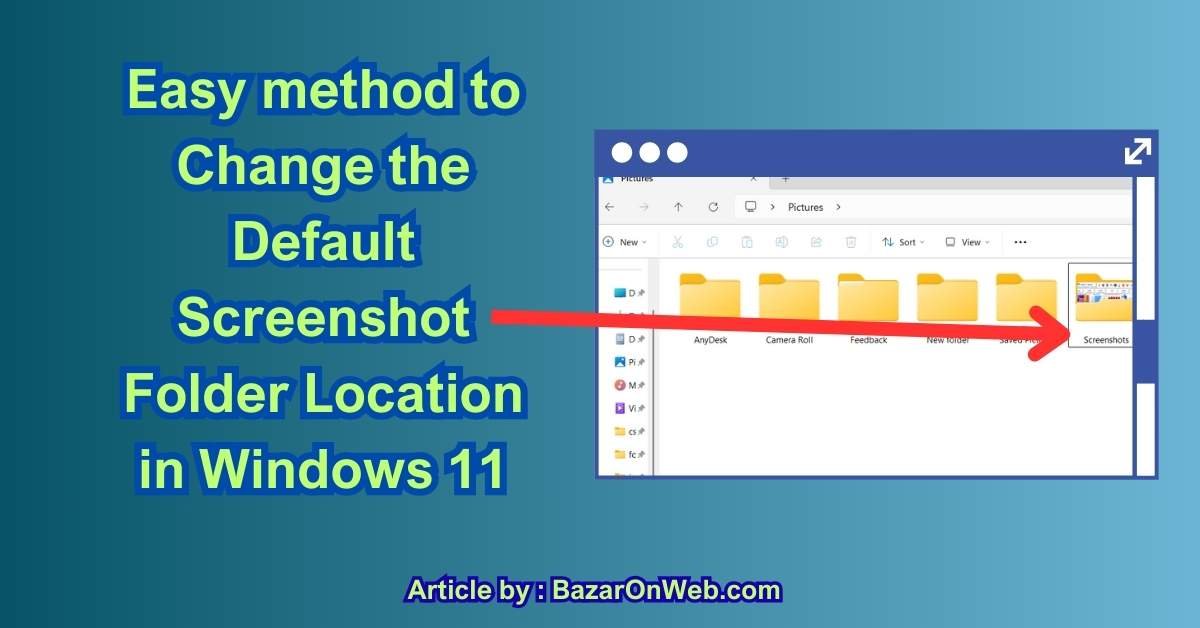
By default, Windows 11 stores screenshots inside:
Pictures → Screenshots
And while that sounds logical, it doesn’t always stay practical for long.
I realized this when my Pictures folder started turning into a cluttered mix of family photos, downloaded images, WhatsApp pictures, and hundreds of screenshots I took for work, tutorials, troubleshooting, and planning. Finding one screenshot suddenly felt like searching for a needle in a haystack.
That’s when I learned something important: Windows 11 lets you change the default screenshot folder location—and it’s surprisingly easy.
In this guide, I’ll show you the simplest and safest way to do it, step by step, without breaking anything or confusing Windows. But first, let’s talk about why changing this folder actually makes sense.
Why You Might Want to Change the Screenshot Folder in the First Place
At first glance, leaving screenshots in the Pictures folder feels fine. But over time, especially if you use your PC daily, a few real problems start showing up.
1. Screenshots and Personal Photos Don’t Belong Together
Your Pictures folder is usually reserved for:
-
Family photos
-
Travel memories
-
Personal images
-
Downloaded pictures
Screenshots are different. They’re functional, temporary, and often disposable. Mixing work screenshots with personal photos makes organization messy and emotionally… annoying. One moment you’re looking for a vacation photo, the next you’re scrolling past error messages and browser screenshots.
Separating them just feels cleaner.
2. Screenshots Pile Up Faster Than You Expect
Screenshots are quick to take—and easy to forget.
You might capture:
-
Payment confirmations
-
Online receipts
-
Meeting notes
-
App settings
-
Tutorials
-
Error messages
Within weeks, that Screenshots folder can contain hundreds of images. Keeping them on your main drive (usually C:) can quietly eat into storage space, especially on laptops with limited SSD capacity.
3. Better Workflow for Work, Teaching, or Content Creation
If you use screenshots for:
-
Training material
-
Blog posts
-
Presentations
-
Social media
-
Tutorials
It’s far more efficient to save them directly to:
-
A work folder
-
A project folder
-
A cloud-synced folder (like OneDrive or Google Drive)
That way, screenshots are instantly where you need them—no copying, moving, or reorganizing later.
4. Keeping Your System Drive Clean
Many Windows 11 laptops come with smaller SSDs. Over time, clutter on the system drive can:
-
Slow down backups
-
Affect performance
-
Reduce free space for updates
Moving screenshots to another drive (like D: or an external SSD) is a small change that helps keep your system lean and tidy.
5. Cloud Sync Control
If your Pictures folder syncs automatically to OneDrive, every screenshot uploads to the cloud—whether you want it or not.
Changing the screenshot folder location gives you control:
-
Sync only important screenshots
-
Keep temporary ones local
-
Avoid filling cloud storage unnecessarily
Once I realized this, changing the folder felt less like a “nice tweak” and more like a smart habit.
The Easy & Recommended Way to Change Screenshot Folder Location in Windows 11
The safest method is built directly into Windows. No registry edits. No third-party apps. No risk.
Windows treats the Screenshots folder as a special system folder, which means you must move it the right way.
Step 1: Open File Explorer
-
Press Windows + E
-
Click Pictures from the left sidebar
Inside the Pictures folder, you’ll see a folder named Screenshots. This is where Windows automatically saves screenshots taken using Win + PrtScn.
Step 2: Right-Click the Screenshots Folder
-
Right-click on the Screenshots folder
-
Click Properties
A new window will open with multiple tabs.
Step 3: Go to the “Location” Tab
In the Properties window:
-
Click on the Location tab
This tab is important—it tells Windows where this special folder lives.
You’ll see the current path, something like:
Step 4: Click “Move…”
-
Click the Move… button
-
Choose the new location where you want screenshots to be saved
You can:
-
Select an existing folder
-
Create a new one (recommended for clarity)
Examples:
-
D:\Screenshots -
Work\Projects\Screenshots -
OneDrive\Screenshots
Once selected, click Select Folder.
Step 5: Apply the Change
-
Click Apply
-
Windows will ask:
“Do you want to move all existing files from the old location to the new location?”
Choose Yes.
This ensures:
-
Old screenshots move safely
-
Windows updates the system path correctly
-
No screenshots are lost or duplicated
Step 6: Test It
Now for the satisfying part.
-
Press Win + PrtScn
-
Open the new folder you selected
You’ll see your screenshot saved there automatically. No extra steps. No copying. Windows now fully recognizes the new location as the default screenshot folder.
What This Method Changes (and What It Doesn’t)
It’s important to understand exactly what happens behind the scenes.
What changes:
-
Screenshot save location updates system-wide
-
Windows recognizes the new folder permanently
-
Future screenshots go directly there
What doesn’t change:
-
Other Pictures subfolders remain untouched
-
Personal photos stay where they are
-
Screenshot shortcuts still work the same way
In other words, it’s a clean and reversible change.
Can You Change It to an External Drive?
Yes—and this is especially useful.
You can move the screenshot folder to:
-
An external SSD
-
A secondary internal drive
Just keep one thing in mind:
-
If the drive isn’t connected, Windows may temporarily fail to save screenshots
If you’re using an external drive, make sure it’s usually plugged in.
Common Mistakes to Avoid
I’ve seen a few things people do that cause confusion later:
-
❌ Manually cutting and pasting the Screenshots folder without using Location → Move
-
❌ Renaming the Screenshots folder instead of relocating it
-
❌ Deleting the folder before changing its location
Always use the Location tab—it tells Windows where to look.
A Small Change That Makes Daily Windows Use Feel Better
Once you move the screenshot folder, you’ll notice the difference immediately:
-
Cleaner Pictures folder
-
Faster organization
-
Less digital clutter
-
More control over your files
It’s one of those Windows tweaks that takes less than two minutes—but keeps paying off every single day you use your PC.
And honestly? Anything that makes everyday tech feel calmer and more organized is absolutely worth doing.
Conclusion (≈500 words)
Changing the default screenshot folder location in Windows 11 might seem like a small tweak, but in daily use, it makes a surprisingly big difference. Screenshots are one of those things we create without thinking—quick captures for work, reference images, error messages, online receipts, study notes, or just something we don’t want to forget. Over time, they quietly pile up, and before we realize it, our Pictures folder turns into a cluttered mix of personal memories and random screen captures.
By moving the Screenshots folder to a location that actually fits your workflow, you take back control over that clutter. Instead of constantly sorting, deleting, or searching, your screenshots automatically land exactly where you expect them to be. That could be a dedicated work folder, a separate drive, or even a cloud-synced location that fits how you organize your digital life.
What I really like about this method is that it’s built into Windows 11 itself. There’s no need to touch the registry, no risk of breaking system behavior, and no dependency on third-party tools. You’re simply telling Windows, “Save my screenshots here instead,” and Windows respects that choice. Once it’s done, everything continues to work exactly the same—same keyboard shortcuts, same capture experience—just with better organization behind the scenes.
This change also supports healthier digital habits. Keeping your system drive cleaner helps with storage management, backups, and even peace of mind. Separating temporary screenshots from personal photos reduces visual noise and makes it easier to focus. And if you rely on cloud sync, it gives you intentional control over what gets uploaded and what doesn’t.
Most importantly, this tweak adapts Windows to you, not the other way around. Whether you’re a student, professional, content creator, teacher, or someone who simply likes things neat and predictable, setting a custom screenshot folder is a practical, long-term improvement. It’s one of those rare adjustments that takes just a minute or two but keeps saving time and frustration every single day.
If you enjoy optimizing small things that quietly improve your daily workflow, this is absolutely one of those changes worth making.
Disclaimer
This article is for informational and educational purposes only. Windows settings and interfaces may change with future updates. Always ensure you select the correct folder location to avoid accidental file misplacement or data loss.
- 10 Best VPNs For Windows 11 in 2026: Complete Buyer’s Guide and Comparison

- How to Fix Windows 11 “Time Not Updating” Issue

- How to Watch FIFA World Cup 2026 from Anywhere for Free: Complete Streaming Guide

- How to Fix ‘There Was a Problem Resetting Your PC’ Error in Windows: Complete Troubleshooting Guide

- How to Enable Music Haptics on iPhone Complete Guide to Feeling Music Through Vibrations

Products
-
![Apple Watch Ultra 3 [GPS + Cellular 49mm] Running & Multisport Smartwatch w/Rugged Titanium Case w/Black Titanium Milanese Loop - M. Satellite Communications, Advanced Health & Fitness Tracking](https://bazaronweb.com/retailstores/wp-content/uploads/2025/09/apple-watch-320x320.jpg) Apple Watch Ultra 3 [GPS + Cellular 49mm] Running & Multisport Smartwatch w/Rugged Titanium Case w/Black Titanium Milanese Loop - M. Satellite Communications, Advanced Health & Fitness Tracking
Apple Watch Ultra 3 [GPS + Cellular 49mm] Running & Multisport Smartwatch w/Rugged Titanium Case w/Black Titanium Milanese Loop - M. Satellite Communications, Advanced Health & Fitness Tracking
-
 Apple iPad mini (A17 Pro): Apple Intelligence, 8.3-inch Liquid Retina Display, 256GB, Wi-Fi 6E, 12MP Front/12MP Back Camera, Touch ID, All-Day Battery Life — Purple
-
 Apple AirPods Max Wireless Over-Ear Headphones, Active Noise Cancelling, Transparency Mode, Personalized Spatial Audio, Dolby Atmos, Bluetooth Headphones for iPhone – Space Gray
-
 Apple AirPods Pro 2 Wireless Earbuds, Active Noise Cancellation, Hearing Aid Feature, Bluetooth Headphones, Transparency, Personalized Spatial Audio, High-Fidelity Sound, H2 Chip, USB-C Charging
-
Leo Creation 144 TC Cotton Double Jaipuri Prints Flat Bedsheet(Pack of 1, Blue, Gree, Red, Grey, Light Grey)
Original price was: ₹2,999.00.₹329.00Current price is: ₹329.00.
Leave a Reply