Discounted Products
-
 Leo Creation 144 TC Cotton Double Jaipuri Prints Flat Bedsheet(Pack of 1, Blue, Gree, Red, Grey, Light Grey)
Original price was: ₹2,999.00.₹329.00Current price is: ₹329.00.
Leo Creation 144 TC Cotton Double Jaipuri Prints Flat Bedsheet(Pack of 1, Blue, Gree, Red, Grey, Light Grey)
Original price was: ₹2,999.00.₹329.00Current price is: ₹329.00.
-
 Home Garage 210 TC Cotton King Floral Fitted (Elastic) Bedsheet(Pack of 1, Grey)
Original price was: ₹999.00.₹299.00Current price is: ₹299.00.
Home Garage 210 TC Cotton King Floral Fitted (Elastic) Bedsheet(Pack of 1, Grey)
Original price was: ₹999.00.₹299.00Current price is: ₹299.00.
-
 Goodrik 140 TC Cotton Double 3D Printed Flat Bedsheet(Pack of 1, Brown)
Original price was: ₹499.00.₹229.00Current price is: ₹229.00.
Goodrik 140 TC Cotton Double 3D Printed Flat Bedsheet(Pack of 1, Brown)
Original price was: ₹499.00.₹229.00Current price is: ₹229.00.
-
 GLOBALSHOP 350 TC Microfiber Double Floral Flat Bedsheet(Pack of 1, Multicolor)
Original price was: ₹1,250.00.₹263.00Current price is: ₹263.00.
GLOBALSHOP 350 TC Microfiber Double Floral Flat Bedsheet(Pack of 1, Multicolor)
Original price was: ₹1,250.00.₹263.00Current price is: ₹263.00.
-
 RisingStar 250 TC Microfiber King Printed Fitted (Elastic) Bedsheet(Pack of 1, FITTED-ROUND-CIRCLES-PREMIUM)
Original price was: ₹2,299.00.₹299.00Current price is: ₹299.00.
RisingStar 250 TC Microfiber King Printed Fitted (Elastic) Bedsheet(Pack of 1, FITTED-ROUND-CIRCLES-PREMIUM)
Original price was: ₹2,299.00.₹299.00Current price is: ₹299.00.
-
 Home Garage 210 TC Cotton King Floral Fitted (Elastic) Bedsheet(Pack of 1, Fitted Black Green)
Original price was: ₹1,299.00.₹299.00Current price is: ₹299.00.
Home Garage 210 TC Cotton King Floral Fitted (Elastic) Bedsheet(Pack of 1, Fitted Black Green)
Original price was: ₹1,299.00.₹299.00Current price is: ₹299.00.
-
 Home Garage 180 TC Cotton King 3D Printed Flat Bedsheet(Pack of 1, White)
Original price was: ₹999.00.₹229.00Current price is: ₹229.00.
Home Garage 180 TC Cotton King 3D Printed Flat Bedsheet(Pack of 1, White)
Original price was: ₹999.00.₹229.00Current price is: ₹229.00.
-
 Home Sizzler 153 cm (5 ft) Polyester Room Darkening Window Curtain (Pack Of 2)(Floral, Maroon)
Original price was: ₹799.00.₹299.00Current price is: ₹299.00.
Home Sizzler 153 cm (5 ft) Polyester Room Darkening Window Curtain (Pack Of 2)(Floral, Maroon)
Original price was: ₹799.00.₹299.00Current price is: ₹299.00.
-
 Panipat Textile Hub 152.4 cm (5 ft) Polyester Window Curtain (Pack Of 2)(Solid, Aqua)
Original price was: ₹1,899.00.₹299.00Current price is: ₹299.00.
Panipat Textile Hub 152.4 cm (5 ft) Polyester Window Curtain (Pack Of 2)(Solid, Aqua)
Original price was: ₹1,899.00.₹299.00Current price is: ₹299.00.
-
 Home Sizzler 214 cm (7 ft) Polyester Semi Transparent Door Curtain (Pack Of 2)(Floral, Maroon)
Original price was: ₹1,199.00.₹399.00Current price is: ₹399.00.
Home Sizzler 214 cm (7 ft) Polyester Semi Transparent Door Curtain (Pack Of 2)(Floral, Maroon)
Original price was: ₹1,199.00.₹399.00Current price is: ₹399.00.
-
 Home Sizzler 153 cm (5 ft) Polyester Room Darkening Window Curtain (Pack Of 2)(Floral, Brown)
Original price was: ₹799.00.₹299.00Current price is: ₹299.00.
Home Sizzler 153 cm (5 ft) Polyester Room Darkening Window Curtain (Pack Of 2)(Floral, Brown)
Original price was: ₹799.00.₹299.00Current price is: ₹299.00.
-
 Stella Creations 214 cm (7 ft) Polyester Room Darkening Door Curtain (Pack Of 2)(Abstract, Brown)
Original price was: ₹1,299.00.₹449.00Current price is: ₹449.00.
Stella Creations 214 cm (7 ft) Polyester Room Darkening Door Curtain (Pack Of 2)(Abstract, Brown)
Original price was: ₹1,299.00.₹449.00Current price is: ₹449.00.
-
 Homefab India 152.5 cm (5 ft) Polyester Room Darkening Window Curtain (Pack Of 2)(Floral, Light Blue)
Original price was: ₹1,199.00.₹319.00Current price is: ₹319.00.
Homefab India 152.5 cm (5 ft) Polyester Room Darkening Window Curtain (Pack Of 2)(Floral, Light Blue)
Original price was: ₹1,199.00.₹319.00Current price is: ₹319.00.
-
 Urban Home 214 cm (7 ft) PVC Transparent Door Curtain Single Curtain(Solid, Off White)
Original price was: ₹699.00.₹203.00Current price is: ₹203.00.
Urban Home 214 cm (7 ft) PVC Transparent Door Curtain Single Curtain(Solid, Off White)
Original price was: ₹699.00.₹203.00Current price is: ₹203.00.
-
 Panipat Textile Hub 213 cm (7 ft) Polyester Door Curtain (Pack Of 2)(Solid, Brown)
Original price was: ₹1,199.00.₹349.00Current price is: ₹349.00.
Panipat Textile Hub 213 cm (7 ft) Polyester Door Curtain (Pack Of 2)(Solid, Brown)
Original price was: ₹1,199.00.₹349.00Current price is: ₹349.00.
Introduction
I’ll be honest—until recently, I completely relied on Windows Security to “just do its thing.” Automatic scans, background protection, silent updates… it all felt reassuring. But one afternoon, after downloading a design file from an unfamiliar source, I found myself clicking through menus thinking, Why does it take this many steps just to run a quick scan?
As someone who balances work deadlines, family responsibilities, and a constantly buzzing laptop, I don’t always have time to dig into Windows Security settings. I want protection that’s not only powerful but also instantly accessible. That’s when I started exploring ways to create Windows Security scan shortcuts in Windows 11.
The good news? Windows 11 gives you several smart ways to trigger scans—right from your desktop, taskbar, Start menu, or even with a single keyboard shortcut. Whether you want a Quick Scan, Full Scan, or Custom Scan, you can set things up so security checks are just one click away.
If you’re like me and prefer speed, clarity, and control, this guide will walk you through the best practical methods to set up Windows Security scan shortcuts in Windows 11—without breaking anything or installing shady tools.
Why Creating Windows Security Scan Shortcuts Is Worth It
Windows Security (formerly Windows Defender) is excellent at real-time protection, but manual scans still matter in everyday situations:
-
After downloading files from unknown sources
-
When connecting external USB drives
-
If your PC suddenly feels slow or unstable
-
Before important presentations or work sessions
-
After kids or guests use your computer
Instead of navigating:
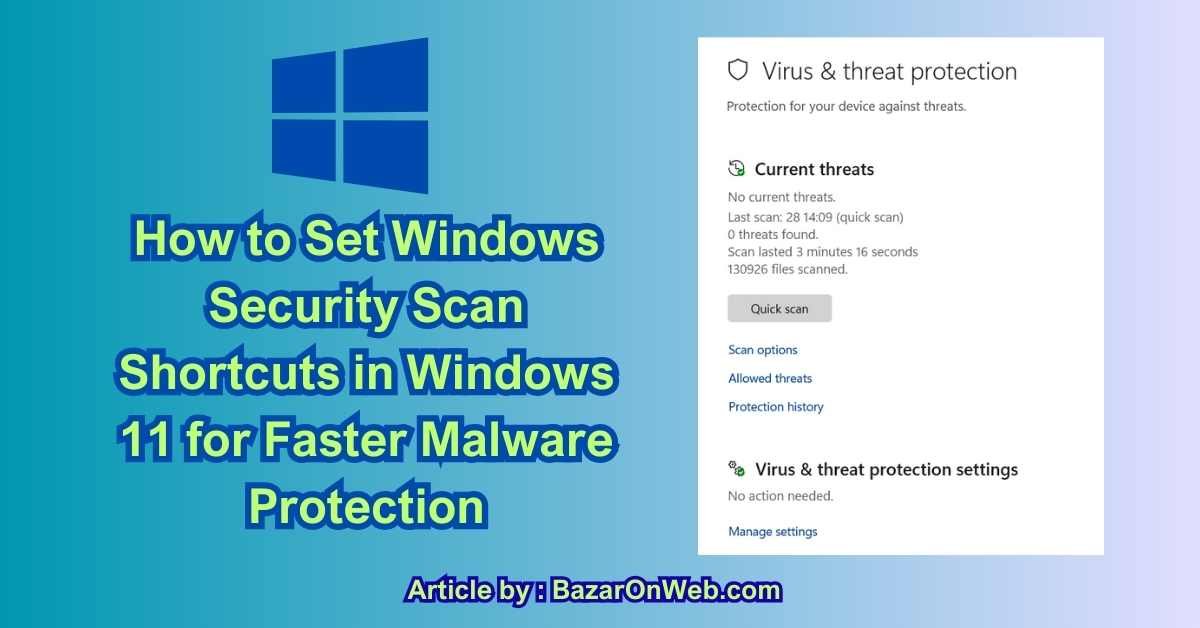
Settings → Privacy & Security → Windows Security → Virus & threat protection → Scan options,
you can trigger scans instantly using shortcuts.
That’s a huge productivity win.
Method 1: Create a Desktop Shortcut for Windows Security Quick Scan
A desktop shortcut is the fastest and most user-friendly option.
Step-by-Step Setup
-
Right-click on an empty area of your Desktop
-
Select New → Shortcut
-
In the location field, paste this command:
-
Click Next
-
Name the shortcut:
Windows Security – Quick Scan -
Click Finish
Now, whenever you double-click this shortcut, Windows Security will immediately start a Quick Scan.
Why Quick Scan Shortcuts Are Useful
-
Scans running processes and common malware locations
-
Takes only a few minutes
-
Ideal for daily or frequent checks
Method 2: Create a Full Scan Shortcut for Deep Protection
Full scans are essential when you suspect deeper issues.
Steps to Create Full Scan Shortcut
-
Right-click on Desktop → New → Shortcut
-
Paste the following command:
-
Click Next
-
Name it:
Windows Security – Full Scan -
Click Finish
Double-clicking this shortcut will start a full system scan, checking every file and directory.
Best Times to Use Full Scan
-
After installing new software
-
When malware symptoms appear
-
Overnight scans
-
Monthly maintenance checks
Method 3: Create a Custom Scan Shortcut for Specific Folders
Custom scans are perfect if you frequently download files to a specific folder.
Example: Scanning Downloads Folder
-
Right-click Desktop → New → Shortcut
-
Enter:
-
Replace YourUsername with your actual Windows username
-
Click Next
-
Name it:
Windows Security – Scan Downloads -
Click Finish
This shortcut scans only the selected folder, saving time while staying secure.
Method 4: Pin Security Scan Shortcuts to Taskbar or Start Menu
Once shortcuts are created, you don’t have to keep them on your desktop.
Pin to Start Menu
-
Right-click the shortcut
-
Select Pin to Start
Pin to Taskbar
-
Right-click the shortcut
-
Choose Show more options
-
Click Pin to taskbar
This gives you one-click security scans, even while multitasking.
Method 5: Run Windows Security Scans Using PowerShell Shortcuts
If you like automation or keyboard-driven workflows, PowerShell is powerful.
Create PowerShell Quick Scan Shortcut
-
Desktop → New → Shortcut
-
Paste:
-
Name it:
PowerShell – Quick Security Scan
Full Scan PowerShell Command
PowerShell-based shortcuts are reliable and preferred by advanced users.
Method 6: Assign a Keyboard Shortcut to Run Security Scans
This is my favorite productivity trick.
Steps
-
Right-click your scan shortcut
-
Select Properties
-
Click inside Shortcut key
-
Press a key combination (example:
Ctrl + Alt + S) -
Click Apply → OK
Now your Windows Security scan launches using just your keyboard.
Method 7: Add Scan Options to Right-Click Context Menu (Advanced)
Windows already allows scanning files via right-click, but you can enhance this.
When you right-click a file or folder and choose Scan with Microsoft Defender, it triggers a targeted scan. While registry editing can extend this further, for most users, the built-in option is already efficient and safe.
This is especially useful for:
-
USB drives
-
Email attachments
-
Downloaded installers
Method 8: Use Task Scheduler for Automated Scan Shortcuts
You can combine shortcuts with scheduled scans:
-
Weekly full scan
-
Daily quick scan
-
Scan at system startup
Create tasks in Task Scheduler, then trigger them manually using desktop shortcuts if needed.
Best Practices for Windows Security Scan Shortcuts
-
Use Quick Scan daily or after downloads
-
Run Full Scan monthly or when suspicious behavior appears
-
Use Custom Scan for high-risk folders
-
Avoid third-party antivirus shortcut tools
-
Keep Windows Security definitions updated
Shortcuts don’t replace real-time protection—they enhance your control over it.
Conclusion: Turning Windows Security Into a One-Click Habit
By the time I finished setting up Windows Security scan shortcuts on my Windows 11 laptop, one thing became very clear to me: security works best when it’s easy to access. Windows Security is already powerful and reliable, but without quick access, most of us end up relying only on automatic scans and hoping nothing slips through. Shortcuts change that behavior completely.
What I love most about these shortcuts is how naturally they fit into daily life. Instead of thinking, “I’ll scan later,” I can just click a desktop icon, hit a taskbar pin, or press a keyboard shortcut and let Windows Security do its job. It removes friction, and when friction disappears, good habits stick. Whether it’s a quick scan after downloading files or a full scan before wrapping up work for the day, everything feels intentional and controlled.
Another big takeaway for me is flexibility. Windows 11 doesn’t force you into one rigid way of working. You can create scan shortcuts that match your lifestyle—desktop shortcuts for visual users, keyboard shortcuts for power users, PowerShell-based scans for advanced workflows, or context-menu scans for quick file checks. There’s no “right” or “wrong” setup here, just what feels most natural for how you use your PC.
I also realized that these shortcuts help reduce anxiety around system safety. Instead of wondering whether my laptop is acting strange or slowing down because of malware, I can immediately run a scan and get clarity. That peace of mind matters, especially when you use your computer for work, family, and personal projects all at once. Security becomes something you actively manage, not something that silently runs in the background and feels out of reach.
One important thing to remember is that shortcuts don’t replace Windows Security’s real-time protection—they complement it. Real-time protection handles threats automatically, while manual scans give you confidence and visibility. Together, they create a balanced and proactive security approach that doesn’t require technical expertise or extra software.
If you’re setting this up for the first time, my advice is simple: start small. Create one Quick Scan shortcut and pin it somewhere convenient. Once that becomes part of your routine, add a Full Scan or Custom Scan shortcut. Over time, you’ll notice that checking your system feels as normal as locking your phone or backing up files.
In the end, Windows 11 already gives you excellent built-in security—you just need to make it accessible. By setting up Windows Security scan shortcuts, you turn protection into a one-click habit instead of a hidden setting. And once security feels effortless, you’re far more likely to stay protected every single day.
Disclaimer
This article is for informational and educational purposes only. The steps and commands shared here use built-in Windows tools and standard system features available in Windows 11. Always ensure you are using official Microsoft features and commands as provided. System behavior may vary depending on Windows version, updates, or device configuration. The author and publisher are not responsible for any issues arising from system changes made by following this guide. It is recommended to keep Windows updated and maintain regular data backups before making system-level changes.
- 10 Best VPNs For Windows 11 in 2026: Complete Buyer’s Guide and Comparison

- How to Fix Windows 11 “Time Not Updating” Issue

- How to Watch FIFA World Cup 2026 from Anywhere for Free: Complete Streaming Guide

- How to Fix ‘There Was a Problem Resetting Your PC’ Error in Windows: Complete Troubleshooting Guide

- How to Enable Music Haptics on iPhone Complete Guide to Feeling Music Through Vibrations

Products
-
![Apple Watch Ultra 3 [GPS + Cellular 49mm] Running & Multisport Smartwatch w/Rugged Titanium Case w/Black Titanium Milanese Loop - M. Satellite Communications, Advanced Health & Fitness Tracking](https://bazaronweb.com/retailstores/wp-content/uploads/2025/09/apple-watch-320x320.jpg) Apple Watch Ultra 3 [GPS + Cellular 49mm] Running & Multisport Smartwatch w/Rugged Titanium Case w/Black Titanium Milanese Loop - M. Satellite Communications, Advanced Health & Fitness Tracking
Apple Watch Ultra 3 [GPS + Cellular 49mm] Running & Multisport Smartwatch w/Rugged Titanium Case w/Black Titanium Milanese Loop - M. Satellite Communications, Advanced Health & Fitness Tracking
-
 Apple iPad mini (A17 Pro): Apple Intelligence, 8.3-inch Liquid Retina Display, 256GB, Wi-Fi 6E, 12MP Front/12MP Back Camera, Touch ID, All-Day Battery Life — Purple
-
 Apple AirPods Max Wireless Over-Ear Headphones, Active Noise Cancelling, Transparency Mode, Personalized Spatial Audio, Dolby Atmos, Bluetooth Headphones for iPhone – Space Gray
-
 Apple AirPods Pro 2 Wireless Earbuds, Active Noise Cancellation, Hearing Aid Feature, Bluetooth Headphones, Transparency, Personalized Spatial Audio, High-Fidelity Sound, H2 Chip, USB-C Charging
-
Leo Creation 144 TC Cotton Double Jaipuri Prints Flat Bedsheet(Pack of 1, Blue, Gree, Red, Grey, Light Grey)
Original price was: ₹2,999.00.₹329.00Current price is: ₹329.00.
Leave a Reply