Discounted Products
-
 Leo Creation 144 TC Cotton Double Jaipuri Prints Flat Bedsheet(Pack of 1, Blue, Gree, Red, Grey, Light Grey)
Original price was: ₹2,999.00.₹329.00Current price is: ₹329.00.
Leo Creation 144 TC Cotton Double Jaipuri Prints Flat Bedsheet(Pack of 1, Blue, Gree, Red, Grey, Light Grey)
Original price was: ₹2,999.00.₹329.00Current price is: ₹329.00.
-
 Home Garage 210 TC Cotton King Floral Fitted (Elastic) Bedsheet(Pack of 1, Grey)
Original price was: ₹999.00.₹299.00Current price is: ₹299.00.
Home Garage 210 TC Cotton King Floral Fitted (Elastic) Bedsheet(Pack of 1, Grey)
Original price was: ₹999.00.₹299.00Current price is: ₹299.00.
-
 Goodrik 140 TC Cotton Double 3D Printed Flat Bedsheet(Pack of 1, Brown)
Original price was: ₹499.00.₹229.00Current price is: ₹229.00.
Goodrik 140 TC Cotton Double 3D Printed Flat Bedsheet(Pack of 1, Brown)
Original price was: ₹499.00.₹229.00Current price is: ₹229.00.
-
 GLOBALSHOP 350 TC Microfiber Double Floral Flat Bedsheet(Pack of 1, Multicolor)
Original price was: ₹1,250.00.₹263.00Current price is: ₹263.00.
GLOBALSHOP 350 TC Microfiber Double Floral Flat Bedsheet(Pack of 1, Multicolor)
Original price was: ₹1,250.00.₹263.00Current price is: ₹263.00.
-
 RisingStar 250 TC Microfiber King Printed Fitted (Elastic) Bedsheet(Pack of 1, FITTED-ROUND-CIRCLES-PREMIUM)
Original price was: ₹2,299.00.₹299.00Current price is: ₹299.00.
RisingStar 250 TC Microfiber King Printed Fitted (Elastic) Bedsheet(Pack of 1, FITTED-ROUND-CIRCLES-PREMIUM)
Original price was: ₹2,299.00.₹299.00Current price is: ₹299.00.
-
 Home Garage 210 TC Cotton King Floral Fitted (Elastic) Bedsheet(Pack of 1, Fitted Black Green)
Original price was: ₹1,299.00.₹299.00Current price is: ₹299.00.
Home Garage 210 TC Cotton King Floral Fitted (Elastic) Bedsheet(Pack of 1, Fitted Black Green)
Original price was: ₹1,299.00.₹299.00Current price is: ₹299.00.
-
 Home Garage 180 TC Cotton King 3D Printed Flat Bedsheet(Pack of 1, White)
Original price was: ₹999.00.₹229.00Current price is: ₹229.00.
Home Garage 180 TC Cotton King 3D Printed Flat Bedsheet(Pack of 1, White)
Original price was: ₹999.00.₹229.00Current price is: ₹229.00.
-
 Home Sizzler 153 cm (5 ft) Polyester Room Darkening Window Curtain (Pack Of 2)(Floral, Maroon)
Original price was: ₹799.00.₹299.00Current price is: ₹299.00.
Home Sizzler 153 cm (5 ft) Polyester Room Darkening Window Curtain (Pack Of 2)(Floral, Maroon)
Original price was: ₹799.00.₹299.00Current price is: ₹299.00.
-
 Panipat Textile Hub 152.4 cm (5 ft) Polyester Window Curtain (Pack Of 2)(Solid, Aqua)
Original price was: ₹1,899.00.₹299.00Current price is: ₹299.00.
Panipat Textile Hub 152.4 cm (5 ft) Polyester Window Curtain (Pack Of 2)(Solid, Aqua)
Original price was: ₹1,899.00.₹299.00Current price is: ₹299.00.
-
 Home Sizzler 214 cm (7 ft) Polyester Semi Transparent Door Curtain (Pack Of 2)(Floral, Maroon)
Original price was: ₹1,199.00.₹399.00Current price is: ₹399.00.
Home Sizzler 214 cm (7 ft) Polyester Semi Transparent Door Curtain (Pack Of 2)(Floral, Maroon)
Original price was: ₹1,199.00.₹399.00Current price is: ₹399.00.
-
 Home Sizzler 153 cm (5 ft) Polyester Room Darkening Window Curtain (Pack Of 2)(Floral, Brown)
Original price was: ₹799.00.₹299.00Current price is: ₹299.00.
Home Sizzler 153 cm (5 ft) Polyester Room Darkening Window Curtain (Pack Of 2)(Floral, Brown)
Original price was: ₹799.00.₹299.00Current price is: ₹299.00.
-
 Stella Creations 214 cm (7 ft) Polyester Room Darkening Door Curtain (Pack Of 2)(Abstract, Brown)
Original price was: ₹1,299.00.₹449.00Current price is: ₹449.00.
Stella Creations 214 cm (7 ft) Polyester Room Darkening Door Curtain (Pack Of 2)(Abstract, Brown)
Original price was: ₹1,299.00.₹449.00Current price is: ₹449.00.
-
 Homefab India 152.5 cm (5 ft) Polyester Room Darkening Window Curtain (Pack Of 2)(Floral, Light Blue)
Original price was: ₹1,199.00.₹319.00Current price is: ₹319.00.
Homefab India 152.5 cm (5 ft) Polyester Room Darkening Window Curtain (Pack Of 2)(Floral, Light Blue)
Original price was: ₹1,199.00.₹319.00Current price is: ₹319.00.
-
 Urban Home 214 cm (7 ft) PVC Transparent Door Curtain Single Curtain(Solid, Off White)
Original price was: ₹699.00.₹203.00Current price is: ₹203.00.
Urban Home 214 cm (7 ft) PVC Transparent Door Curtain Single Curtain(Solid, Off White)
Original price was: ₹699.00.₹203.00Current price is: ₹203.00.
-
 Panipat Textile Hub 213 cm (7 ft) Polyester Door Curtain (Pack Of 2)(Solid, Brown)
Original price was: ₹1,199.00.₹349.00Current price is: ₹349.00.
Panipat Textile Hub 213 cm (7 ft) Polyester Door Curtain (Pack Of 2)(Solid, Brown)
Original price was: ₹1,199.00.₹349.00Current price is: ₹349.00.
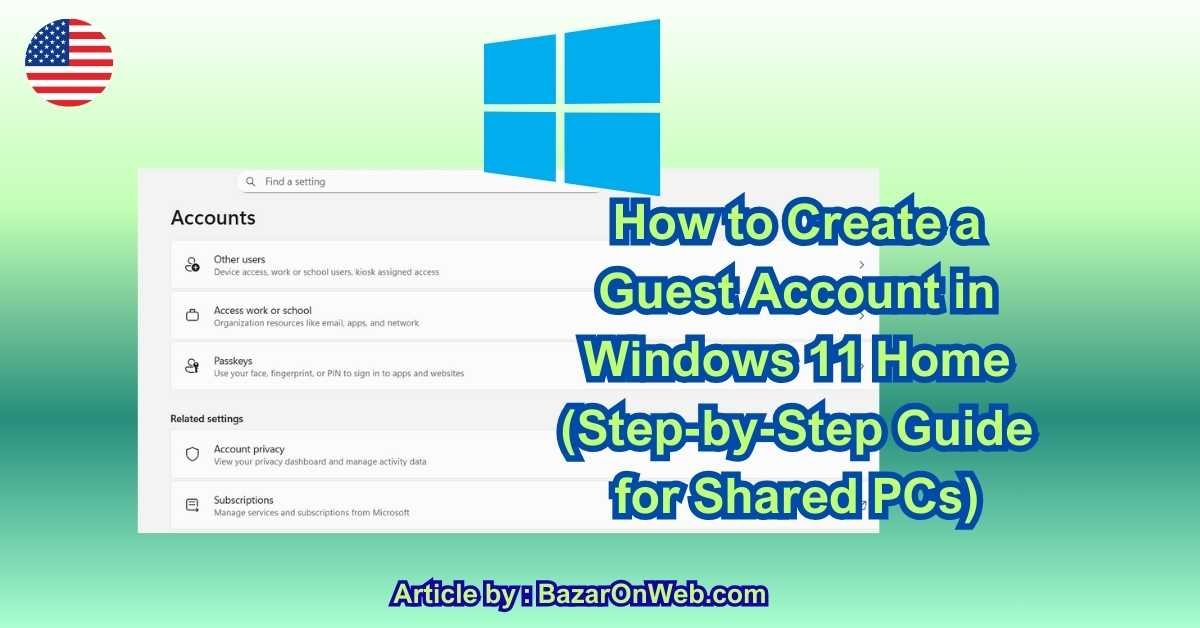
Introduction
Hey, it’s Jessica. If you’re anything like me, your laptop isn’t just your laptop anymore. One minute it’s your personal workspace, the next minute a family member wants to “quickly check email,” a friend needs to “print something,” or your kid wants to “just play a game.” And suddenly you’re panicking about files, browser history, saved passwords, and… everything else.
If you’ve searched for “Guest Account in Windows 11 Home”, you probably noticed something frustrating right away: Microsoft doesn’t make it obvious anymore. In fact, Windows 11 Home does not include a traditional Guest account like older Windows versions did. But don’t worry—this doesn’t mean you’re stuck sharing your personal account.
In this guide, I’ll walk you through practical, safe, and realistic ways to create a guest-like experience in Windows 11 Home. No jargon, no unnecessary theory—just clear steps and explanations so you understand why you’re doing each thing.
By the end of this article, you’ll know:
-
Why Microsoft removed the classic Guest account
-
The best workaround methods that actually work in Windows 11 Home
-
How to keep your files, apps, and settings protected
-
Which method is best for families, friends, or short-term users
Let’s start with the most important question first.
Why Windows 11 Home Doesn’t Have a Traditional Guest Account
In older versions of Windows, the Guest account was simple: temporary access, limited permissions, no personal data saved. But Microsoft quietly phased this out starting with Windows 10 and continued the approach in Windows 11.
Here’s why:
-
Security concerns – Guest accounts were often misused or poorly configured.
-
Microsoft account ecosystem – Windows now pushes cloud sync, OneDrive, and Microsoft services.
-
Simplified user management – Fewer account types, more controlled permissions.
So instead of a built-in “Guest” button, Microsoft expects users to create standard local accounts or Microsoft-linked accounts with limited access.
That sounds complicated—but in practice, it’s actually safer and more flexible.
What “Guest Account” Really Means in Windows 11 Home
Before we jump into steps, let’s reset expectations.
A guest account in modern Windows usually means:
-
No admin rights
-
No access to your personal files
-
Separate desktop, apps, and browser data
-
Ability to use the PC without changing system settings
We’ll recreate exactly that behavior using supported Windows features—without hacks that break after updates.
Method 1: Create a Local Standard User (Best Guest-Like Option)
This is the recommended and safest method for Windows 11 Home.
Why this works
A local standard account:
-
Cannot install software system-wide
-
Cannot access your personal folders
-
Cannot change system settings
-
Keeps files and browser data separate
In real life, this behaves almost exactly like a guest account.
Step-by-Step: Create a Local Guest-Style Account
-
Open Settings
-
Go to Accounts
-
Click Other users
-
Select Add account
-
When asked to sign in, choose I don’t have this person’s sign-in information
-
Click Add a user without a Microsoft account
-
Enter:
-
Username (example:
GuestUserorVisitor) -
Optional password (you can leave it blank for convenience)
-
-
Click Next
That’s it—the account is created.
Now comes the most important part: making sure it stays limited.
Ensure the Account Is NOT an Administrator
-
Stay in Settings → Accounts → Other users
-
Click the new account
-
Select Change account type
-
Set it to Standard User
-
Click OK
This step is critical. A standard user cannot:
-
Access your documents
-
Install system apps
-
Change security settings
-
View your browser data
Method 2: Lock Down Access to Your Personal Files
Even though Windows separates user folders, it’s smart to double-check.
Where your files are protected by default
Your personal files live in:
Other users cannot access this folder unless:
-
You manually shared it
-
Permissions were changed
As long as you didn’t do either, your files are safe.
Extra Safety Tip (Optional but Smart)
Avoid storing sensitive files on:
-
Desktop
-
Public folders
-
Shared drives
Stick to your user Documents folder for maximum privacy.
Method 3: Control App Access for Guest Users
A standard user can still:
-
Use pre-installed apps
-
Browse the web
-
Access Microsoft Store apps
But they cannot install apps for all users.
If you want tighter control:
-
Don’t sign them into Microsoft Store
-
Avoid installing apps “for all users”
-
Use browser guest modes for extra privacy
Method 4: Browser Safety for Guest Users
This is where most privacy issues happen.
What happens by default
Each Windows user gets:
-
Separate browser profiles
-
Separate cookies and history
-
Separate saved passwords
That means your Chrome, Edge, or Firefox data is not shared.
Extra Layer of Protection (Recommended)
Ask guests to use:
-
Guest Mode in Chrome or Edge
-
InPrivate / Incognito browsing
This ensures:
-
No browsing history saved
-
No downloads remembered
-
No logins stored
Method 5: Enable Parental Controls (Optional Use Case)
If your “guest” is actually a child or student, Microsoft Family Safety can help.
You can:
-
Limit screen time
-
Block websites
-
Control app usage
This requires a Microsoft account for the guest—but it’s excellent for long-term shared use.
Common Mistakes to Avoid
Let me save you some frustration:
❌ Trying to enable the old Guest account via Command Prompt
→ It no longer works in Windows 11 Home
❌ Giving guest users admin rights
→ Completely defeats the purpose
❌ Sharing your Microsoft account
→ Risky, messy, and unnecessary
❌ Using the same browser profile
→ Privacy nightmare
Which Method Should You Use?
Here’s the honest answer:
-
Friends or short-term visitors → Local standard user (Method 1)
-
Family members → Standard user + optional parental controls
-
Public or shared PC → Standard user + browser guest mode
-
Kids → Microsoft Family Safety
For most people, Method 1 alone is enough.
Advanced Guest Account Controls in Windows 11 Home
Now that the basic guest-style account is set up, this is where things get interesting. Windows 11 Home may not label anything as a “Guest Account,” but with the right tweaks, you can make a guest user feel almost locked inside a safe bubble—able to use the PC, but not mess it up.
Let’s talk about how to tighten control without breaking usability.
Limiting What Guest Users Can Change
A standard user already has limited permissions, but Windows still allows some personalization. Depending on your situation, you might want to restrict even that.
What a Standard User Can Change
-
Desktop wallpaper
-
Theme (light/dark)
-
Accessibility settings
-
Language and keyboard layout
-
Browser preferences
What They Cannot Change
-
System security settings
-
Installed programs for all users
-
Windows Update behavior
-
Other user accounts
-
Your personal files
For most people, this default balance is perfect. But if you’re using your PC in a semi-public or shared environment, you may want to go further.
Using Local Group Policy (What You Can’t Do in Home)
Quick reality check: Windows 11 Home does not include Group Policy Editor. That means you can’t officially:
-
Disable Control Panel access
-
Lock down Start Menu items
-
Restrict system tools via policy
If you see tutorials telling you to open gpedit.msc, close that tab. It doesn’t apply to Home edition unless you hack the system—and those hacks often break after updates.
So instead of fighting Windows, we work with what Home edition supports.
Smart Workarounds That Actually Work
1. Hide Sensitive Apps from Guest Users
Apps installed only for you won’t appear for other users. So:
-
Avoid installing apps “for all users”
-
Use portable apps for personal tools
-
Keep sensitive software tied to your main account
This alone keeps guest access surprisingly clean.
2. Use Browser-Level Restrictions
The browser is where most damage happens—logins, downloads, history, extensions.
Best practice:
-
Keep your main browser profile logged in only on your account
-
Encourage guest users to use Guest Mode or InPrivate browsing
-
Avoid syncing browsers across accounts
Each Windows account gets a fresh browser environment, which is exactly what you want.
3. Prevent Accidental Data Storage
Guests often forget where they save files.
What happens by default:
-
Files saved by guest users stay in their Documents folder
-
They cannot see your files
-
You cannot accidentally lose your files
If the guest account is temporary, you can later delete the account and Windows will ask whether to remove its files completely.
This makes cleanup painless.
Making a Temporary Guest Account (Underrated Trick)
If someone only needs access for a short time—like a visiting friend or a client—you can treat the account as disposable.
How this works
-
Create a standard local account
-
Let them use it
-
After they’re done:
-
Go to Settings → Accounts → Other users
-
Select the account
-
Click Remove
-
Choose Delete account and data
-
Windows deletes:
-
Desktop files
-
Downloads
-
Browser data
-
App settings
It’s like the guest was never there.
Guest Accounts for Kids vs Adults
This matters more than people think.
Adults / Visitors
-
Local standard account
-
No Microsoft login
-
No password (optional)
-
Easy to remove
Kids / Students
-
Microsoft account recommended
-
Family Safety enabled
-
Screen time limits
-
Website and app controls
Trying to use one setup for both usually causes headaches. Decide upfront.
Performance and Storage Considerations
Every Windows user account consumes:
-
Disk space (profile folder)
-
Cached data
-
Temporary files
Guest accounts don’t slow down your system while idle, but if you create many accounts and never delete them, storage can quietly disappear.
Good habit:
-
Delete unused guest accounts every few months
-
Clear temporary files periodically
Security Myths About Guest Accounts
Let’s kill a few common myths.
❌ “Guests can see my files”
→ No, unless you shared them.
❌ “Guests can install malware”
→ Not system-wide, without admin approval.
❌ “Guests can access my saved passwords”
→ No, browser profiles are separate.
❌ “Guest accounts weaken Windows security”
→ Poor configuration does—not guest accounts themselves.
When done right, guest accounts actually increase security.
Troubleshooting Common Issues
Guest Can’t Install an App
That’s expected behavior. Standard users need admin approval.
Guest Can’t Change System Settings
Again—working as designed.
Guest Forgot Password
Admin account can reset it easily.
Guest Account Won’t Delete
Make sure:
-
The guest is logged out
-
You’re signed in as admin
Final Thoughts (Now It’s Allowed 🙂)
Here’s the honest truth: Microsoft didn’t remove the Guest account to annoy users—it just changed the philosophy. Windows 11 Home expects you to think in terms of users, not “temporary visitors.” Once you accept that shift, the system actually becomes cleaner and safer.
A properly configured standard local account gives you everything a classic Guest account used to offer—plus better isolation and easier cleanup. And unlike hacks or command-line tricks, this approach survives updates and future Windows versions.
If you share your PC even occasionally, this setup is worth the few minutes it takes. Your files stay private, your settings stay untouched, and your stress level stays low.
Conclusion
Creating a guest-style account in Windows 11 Home isn’t about finding a hidden switch—it’s about using the right combination of local accounts, permissions, and smart habits. By setting up a standard local user and avoiding unnecessary access, you create a safe, flexible environment for visitors without risking your personal data.
Whether it’s family, friends, or short-term users, this method gives you full control without complexity. No hacks, no unsupported tweaks—just a clean, modern solution that works the way Windows 11 was designed to work.
Disclaimer:
This guide is for educational purposes only. Windows features and behavior may change with future updates. Always ensure you’re signed in with an administrator account before making account-related changes.
- How to Fix Volume Buttons Not Working on iPhone Complete Step-by-Step Guide
- Chris Titus Download for Windows (Latest Version): Complete Guide to Optimize and Debloat Your PC

- Google Chrome Not Saving Password 8 Proven Ways to Fix It Quickly

- WiFi Settings Turning Off on iPhone? Try These 6 Fixes That Actually Work

- How to Check Motherboard Model in Windows (Easy Methods Without Opening Your PC)

Products
-
![Apple Watch Ultra 3 [GPS + Cellular 49mm] Running & Multisport Smartwatch w/Rugged Titanium Case w/Black Titanium Milanese Loop - M. Satellite Communications, Advanced Health & Fitness Tracking](https://bazaronweb.com/retailstores/wp-content/uploads/2025/09/apple-watch-320x320.jpg) Apple Watch Ultra 3 [GPS + Cellular 49mm] Running & Multisport Smartwatch w/Rugged Titanium Case w/Black Titanium Milanese Loop - M. Satellite Communications, Advanced Health & Fitness Tracking
Apple Watch Ultra 3 [GPS + Cellular 49mm] Running & Multisport Smartwatch w/Rugged Titanium Case w/Black Titanium Milanese Loop - M. Satellite Communications, Advanced Health & Fitness Tracking
-
 Apple iPad mini (A17 Pro): Apple Intelligence, 8.3-inch Liquid Retina Display, 256GB, Wi-Fi 6E, 12MP Front/12MP Back Camera, Touch ID, All-Day Battery Life — Purple
-
 Apple AirPods Max Wireless Over-Ear Headphones, Active Noise Cancelling, Transparency Mode, Personalized Spatial Audio, Dolby Atmos, Bluetooth Headphones for iPhone – Space Gray
-
 Apple AirPods Pro 2 Wireless Earbuds, Active Noise Cancellation, Hearing Aid Feature, Bluetooth Headphones, Transparency, Personalized Spatial Audio, High-Fidelity Sound, H2 Chip, USB-C Charging
-
Leo Creation 144 TC Cotton Double Jaipuri Prints Flat Bedsheet(Pack of 1, Blue, Gree, Red, Grey, Light Grey)
Original price was: ₹2,999.00.₹329.00Current price is: ₹329.00.
Leave a Reply