Discounted Products
-
 Leo Creation 144 TC Cotton Double Jaipuri Prints Flat Bedsheet(Pack of 1, Blue, Gree, Red, Grey, Light Grey)
Original price was: ₹2,999.00.₹329.00Current price is: ₹329.00.
Leo Creation 144 TC Cotton Double Jaipuri Prints Flat Bedsheet(Pack of 1, Blue, Gree, Red, Grey, Light Grey)
Original price was: ₹2,999.00.₹329.00Current price is: ₹329.00.
-
 Home Garage 210 TC Cotton King Floral Fitted (Elastic) Bedsheet(Pack of 1, Grey)
Original price was: ₹999.00.₹299.00Current price is: ₹299.00.
Home Garage 210 TC Cotton King Floral Fitted (Elastic) Bedsheet(Pack of 1, Grey)
Original price was: ₹999.00.₹299.00Current price is: ₹299.00.
-
 Goodrik 140 TC Cotton Double 3D Printed Flat Bedsheet(Pack of 1, Brown)
Original price was: ₹499.00.₹229.00Current price is: ₹229.00.
Goodrik 140 TC Cotton Double 3D Printed Flat Bedsheet(Pack of 1, Brown)
Original price was: ₹499.00.₹229.00Current price is: ₹229.00.
-
 GLOBALSHOP 350 TC Microfiber Double Floral Flat Bedsheet(Pack of 1, Multicolor)
Original price was: ₹1,250.00.₹263.00Current price is: ₹263.00.
GLOBALSHOP 350 TC Microfiber Double Floral Flat Bedsheet(Pack of 1, Multicolor)
Original price was: ₹1,250.00.₹263.00Current price is: ₹263.00.
-
 RisingStar 250 TC Microfiber King Printed Fitted (Elastic) Bedsheet(Pack of 1, FITTED-ROUND-CIRCLES-PREMIUM)
Original price was: ₹2,299.00.₹299.00Current price is: ₹299.00.
RisingStar 250 TC Microfiber King Printed Fitted (Elastic) Bedsheet(Pack of 1, FITTED-ROUND-CIRCLES-PREMIUM)
Original price was: ₹2,299.00.₹299.00Current price is: ₹299.00.
-
 Home Garage 210 TC Cotton King Floral Fitted (Elastic) Bedsheet(Pack of 1, Fitted Black Green)
Original price was: ₹1,299.00.₹299.00Current price is: ₹299.00.
Home Garage 210 TC Cotton King Floral Fitted (Elastic) Bedsheet(Pack of 1, Fitted Black Green)
Original price was: ₹1,299.00.₹299.00Current price is: ₹299.00.
-
 Home Garage 180 TC Cotton King 3D Printed Flat Bedsheet(Pack of 1, White)
Original price was: ₹999.00.₹229.00Current price is: ₹229.00.
Home Garage 180 TC Cotton King 3D Printed Flat Bedsheet(Pack of 1, White)
Original price was: ₹999.00.₹229.00Current price is: ₹229.00.
-
 Home Sizzler 153 cm (5 ft) Polyester Room Darkening Window Curtain (Pack Of 2)(Floral, Maroon)
Original price was: ₹799.00.₹299.00Current price is: ₹299.00.
Home Sizzler 153 cm (5 ft) Polyester Room Darkening Window Curtain (Pack Of 2)(Floral, Maroon)
Original price was: ₹799.00.₹299.00Current price is: ₹299.00.
-
 Panipat Textile Hub 152.4 cm (5 ft) Polyester Window Curtain (Pack Of 2)(Solid, Aqua)
Original price was: ₹1,899.00.₹299.00Current price is: ₹299.00.
Panipat Textile Hub 152.4 cm (5 ft) Polyester Window Curtain (Pack Of 2)(Solid, Aqua)
Original price was: ₹1,899.00.₹299.00Current price is: ₹299.00.
-
 Home Sizzler 214 cm (7 ft) Polyester Semi Transparent Door Curtain (Pack Of 2)(Floral, Maroon)
Original price was: ₹1,199.00.₹399.00Current price is: ₹399.00.
Home Sizzler 214 cm (7 ft) Polyester Semi Transparent Door Curtain (Pack Of 2)(Floral, Maroon)
Original price was: ₹1,199.00.₹399.00Current price is: ₹399.00.
-
 Home Sizzler 153 cm (5 ft) Polyester Room Darkening Window Curtain (Pack Of 2)(Floral, Brown)
Original price was: ₹799.00.₹299.00Current price is: ₹299.00.
Home Sizzler 153 cm (5 ft) Polyester Room Darkening Window Curtain (Pack Of 2)(Floral, Brown)
Original price was: ₹799.00.₹299.00Current price is: ₹299.00.
-
 Stella Creations 214 cm (7 ft) Polyester Room Darkening Door Curtain (Pack Of 2)(Abstract, Brown)
Original price was: ₹1,299.00.₹449.00Current price is: ₹449.00.
Stella Creations 214 cm (7 ft) Polyester Room Darkening Door Curtain (Pack Of 2)(Abstract, Brown)
Original price was: ₹1,299.00.₹449.00Current price is: ₹449.00.
-
 Homefab India 152.5 cm (5 ft) Polyester Room Darkening Window Curtain (Pack Of 2)(Floral, Light Blue)
Original price was: ₹1,199.00.₹319.00Current price is: ₹319.00.
Homefab India 152.5 cm (5 ft) Polyester Room Darkening Window Curtain (Pack Of 2)(Floral, Light Blue)
Original price was: ₹1,199.00.₹319.00Current price is: ₹319.00.
-
 Urban Home 214 cm (7 ft) PVC Transparent Door Curtain Single Curtain(Solid, Off White)
Original price was: ₹699.00.₹203.00Current price is: ₹203.00.
Urban Home 214 cm (7 ft) PVC Transparent Door Curtain Single Curtain(Solid, Off White)
Original price was: ₹699.00.₹203.00Current price is: ₹203.00.
-
 Panipat Textile Hub 213 cm (7 ft) Polyester Door Curtain (Pack Of 2)(Solid, Brown)
Original price was: ₹1,199.00.₹349.00Current price is: ₹349.00.
Panipat Textile Hub 213 cm (7 ft) Polyester Door Curtain (Pack Of 2)(Solid, Brown)
Original price was: ₹1,199.00.₹349.00Current price is: ₹349.00.
(Complete 2026 Accessibility Guide for Better Eye Comfort & Color Vision)
Hi, I’m Jessica, and if you’re like me—juggling work, family time, and way too much screen exposure—your eyes probably feel the strain by the end of the day. Whether you’re dealing with color blindness, light sensitivity, migraines, or just want a more comfortable screen experience, Color Filters on iPhone and iPad are one of the most underrated accessibility features Apple offers.
If you spend a large part of your day on your iPhone or iPad—working, reading, scrolling, or managing family life—you’ve probably experienced eye strain, headaches, or simple visual fatigue. I know I have. As someone who balances a fast-paced work schedule with kids, screen time adds up quickly, and comfort becomes just as important as functionality. That’s where Color Filters on iPhone and iPad quietly make a big difference.
Apple originally designed color filters as an accessibility feature, primarily to support users with color vision deficiencies. But over the years, this feature has evolved into something much more practical for everyday users. Today, color filters are widely used by people who don’t have diagnosed visual conditions but want better screen comfort, reduced eye strain, or improved focus during long device usage.
Color filters work by subtly adjusting how colors appear across your entire screen—apps, text, images, and videos—without changing the actual content. Whether it’s reducing harsh contrasts, softening bright tones, or removing unnecessary colors altogether, these filters can make your screen easier on the eyes, especially during extended use or late at night.
What makes this feature especially valuable is its flexibility. You can turn it on permanently, use it only at night, or activate it instantly with a shortcut when your eyes need a break. It’s not about changing how your device looks for others—it’s about customizing how it works for you.
In this guide, I’ll walk you through exactly how to enable and use color filters on your iPhone or iPad, explain which filters are best for different needs, and show you how to make this setting part of a more comfortable, eye-friendly digital routine. Once you understand it, this small setting can genuinely change how your screen feels day to day.
This guide walks you through everything you need to know—step by step—so you can enable, customize, and use color filters like a pro in 2026.
What Are Color Filters on iPhone & iPad?
Color Filters are part of Apple’s Accessibility features designed to help users who:
-
Have color vision deficiency (color blindness)
-
Experience eye strain or headaches
-
Are sensitive to bright or harsh colors
-
Want improved contrast or readability
Instead of changing the physical display, iOS overlays a filter that adjusts how colors appear on your screen—system-wide.
The best part?
Once enabled, color filters work across apps, photos, videos, Safari, and even the lock screen.
Supported Devices & iOS Versions (2026)
Color Filters are available on:
-
All modern iPhones
-
All iPads
-
Devices running iOS / iPadOS 13 and later (including iOS 18+)
If your device has Accessibility settings, you’re good to go.
Step-by-Step: How to Enable Color Filters on iPhone or iPad
Let’s start with the basics.
Step 1: Open Settings
Go to Settings on your iPhone or iPad.
Step 2: Tap Accessibility
Scroll down and tap Accessibility.
Step 3: Open Display & Text Size
Under the “Vision” section, tap Display & Text Size.
Step 4: Select Color Filters
Scroll down and tap Color Filters.
Step 5: Turn On Color Filters
Toggle Color Filters ON at the top.
Once enabled, you’ll instantly notice changes depending on the filter you select.
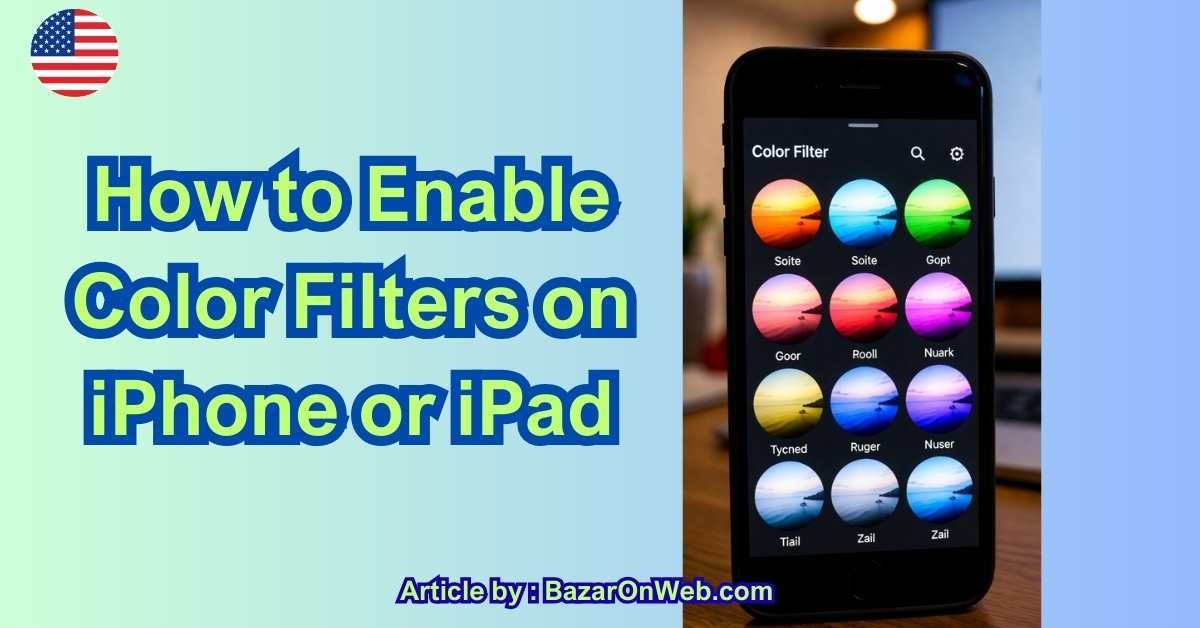
Understanding Each Color Filter (And Who Should Use Them)
Apple offers five main color filter options. Choosing the right one depends on your needs.
1. Grayscale
Removes all color and shows your screen in black and white.
Best for:
-
Reducing screen addiction
-
Minimizing eye fatigue
-
Improving focus
-
Digital wellbeing
Surprisingly calming—many users keep this on during work hours.
2. Red/Green Filter (Protanopia)
Designed for users who struggle to distinguish red and green shades.
Best for:
-
Protanopia (red-blindness)
-
Certain contrast issues in apps
-
Charts and graphs clarity
3. Green/Red Filter (Deuteranopia)
Helps differentiate green and red tones differently than Protanopia.
Best for:
-
Deuteranopia (green-blindness)
-
Text-heavy interfaces
-
Navigation apps
4. Blue/Yellow Filter (Tritanopia)
Adjusts blue and yellow tones.
Best for:
-
Tritanopia
-
Users sensitive to cool light
-
Night-time reading
This pairs nicely with Night Shift or True Tone.
5. Color Tint (Custom Filter)
Lets you apply a custom overlay color and intensity.
Best for:
-
Migraine sufferers
-
Light sensitivity
-
Custom comfort setups
You can adjust:
-
Intensity
-
Hue
This is the most flexible option and my personal favorite.
Fine-Tuning Color Filters for Maximum Comfort
Once a filter is selected, don’t stop there.
Adjust Intensity
Use the Intensity slider to control how strong the filter appears.
Adjust Hue (Color Tint only)
Fine-tune the color overlay to something that feels natural—not overpowering.
Pro tip: Start light, then increase gradually over a day.
Enable Color Filters Instantly Using Accessibility Shortcut
You don’t have to dig into settings every time.
Set Up Triple-Click Shortcut
-
Go to Settings → Accessibility
-
Scroll to Accessibility Shortcut
-
Select Color Filters
Now, triple-click the Side button (or Home button on older devices) to toggle color filters instantly.
This is perfect for:
-
Switching filters at night
-
Turning filters on during long reading sessions
-
Sharing your phone temporarily
Color Filters vs Night Shift vs True Tone
Many users confuse these features, but they work differently.
| Feature | Purpose |
|---|---|
| Color Filters | Adjust how colors appear |
| Night Shift | Reduces blue light |
| True Tone | Adapts screen color to ambient lighting |
💡 Best experience: Use Color Filters with Night Shift for reduced eye strain.
Do Color Filters Affect Apps, Photos, or Screenshots?
Yes—and no.
Apps & Videos
Filters apply system-wide, including apps and videos.
Screenshots
Screenshots do not capture color filters.
They save the original colors—great for sharing content without distortion.
Battery Impact: Should You Worry?
Good news—Color Filters have negligible impact on battery life.
They’re software-based overlays optimized by iOS, not hardware-intensive changes.
Common Problems & Fixes
Colors Look “Wrong”
Try lowering intensity or switching filters.
Some Apps Look Strange
Design-heavy apps may not adapt perfectly—use the shortcut to toggle off temporarily.
Can’t Find Color Filters
Make sure:
-
iOS/iPadOS is updated
-
You’re in Accessibility → Display & Text Size
Who Should Use Color Filters in 2026?
Honestly? Almost everyone.
-
Students & professionals on screens all day
-
Parents managing kids’ screen time
-
Designers & developers testing accessibility
-
Users with migraines or eye strain
-
Anyone with color vision differences
Accessibility isn’t just about disability—it’s about comfort and control.
Final Thoughts from Jessica
Color Filters on iPhone and iPad are one of those features you don’t realize you need—until you turn them on.
Whether you want better focus, less eye strain, or improved color clarity, this single setting can dramatically improve your daily screen experience.
My recommendation?
Enable it, experiment for a day, and adjust slowly. Your eyes will thank you.
- 7 Best Methods to Fix “Undoing Changes Made to Your PC” Error (Complete Guide)

- How to Turn On Spam Blocker on Android: Stop Unwanted Calls and Messages Easily

- Can’t View Comments on YouTube Shorts? 6 Ways to Fix It (Complete Guide)

- How to Block Users From Installing Programs in Windows 11 Complete Step-by-Step Guide for Better Security

- How to Fix Chrome Automatically Deleting Downloaded Files (Complete Step-by-Step Guide)

Products
-
![Apple Watch Ultra 3 [GPS + Cellular 49mm] Running & Multisport Smartwatch w/Rugged Titanium Case w/Black Titanium Milanese Loop - M. Satellite Communications, Advanced Health & Fitness Tracking](https://bazaronweb.com/retailstores/wp-content/uploads/2025/09/apple-watch-320x320.jpg) Apple Watch Ultra 3 [GPS + Cellular 49mm] Running & Multisport Smartwatch w/Rugged Titanium Case w/Black Titanium Milanese Loop - M. Satellite Communications, Advanced Health & Fitness Tracking
Apple Watch Ultra 3 [GPS + Cellular 49mm] Running & Multisport Smartwatch w/Rugged Titanium Case w/Black Titanium Milanese Loop - M. Satellite Communications, Advanced Health & Fitness Tracking
-
 Apple iPad mini (A17 Pro): Apple Intelligence, 8.3-inch Liquid Retina Display, 256GB, Wi-Fi 6E, 12MP Front/12MP Back Camera, Touch ID, All-Day Battery Life — Purple
-
 Apple AirPods Max Wireless Over-Ear Headphones, Active Noise Cancelling, Transparency Mode, Personalized Spatial Audio, Dolby Atmos, Bluetooth Headphones for iPhone – Space Gray
-
 Apple AirPods Pro 2 Wireless Earbuds, Active Noise Cancellation, Hearing Aid Feature, Bluetooth Headphones, Transparency, Personalized Spatial Audio, High-Fidelity Sound, H2 Chip, USB-C Charging
-
Leo Creation 144 TC Cotton Double Jaipuri Prints Flat Bedsheet(Pack of 1, Blue, Gree, Red, Grey, Light Grey)
Original price was: ₹2,999.00.₹329.00Current price is: ₹329.00.
Leave a Reply