Discounted Products
-
 Leo Creation 144 TC Cotton Double Jaipuri Prints Flat Bedsheet(Pack of 1, Blue, Gree, Red, Grey, Light Grey)
Original price was: ₹2,999.00.₹329.00Current price is: ₹329.00.
Leo Creation 144 TC Cotton Double Jaipuri Prints Flat Bedsheet(Pack of 1, Blue, Gree, Red, Grey, Light Grey)
Original price was: ₹2,999.00.₹329.00Current price is: ₹329.00.
-
 Home Garage 210 TC Cotton King Floral Fitted (Elastic) Bedsheet(Pack of 1, Grey)
Original price was: ₹999.00.₹299.00Current price is: ₹299.00.
Home Garage 210 TC Cotton King Floral Fitted (Elastic) Bedsheet(Pack of 1, Grey)
Original price was: ₹999.00.₹299.00Current price is: ₹299.00.
-
 Goodrik 140 TC Cotton Double 3D Printed Flat Bedsheet(Pack of 1, Brown)
Original price was: ₹499.00.₹229.00Current price is: ₹229.00.
Goodrik 140 TC Cotton Double 3D Printed Flat Bedsheet(Pack of 1, Brown)
Original price was: ₹499.00.₹229.00Current price is: ₹229.00.
-
 GLOBALSHOP 350 TC Microfiber Double Floral Flat Bedsheet(Pack of 1, Multicolor)
Original price was: ₹1,250.00.₹263.00Current price is: ₹263.00.
GLOBALSHOP 350 TC Microfiber Double Floral Flat Bedsheet(Pack of 1, Multicolor)
Original price was: ₹1,250.00.₹263.00Current price is: ₹263.00.
-
 RisingStar 250 TC Microfiber King Printed Fitted (Elastic) Bedsheet(Pack of 1, FITTED-ROUND-CIRCLES-PREMIUM)
Original price was: ₹2,299.00.₹299.00Current price is: ₹299.00.
RisingStar 250 TC Microfiber King Printed Fitted (Elastic) Bedsheet(Pack of 1, FITTED-ROUND-CIRCLES-PREMIUM)
Original price was: ₹2,299.00.₹299.00Current price is: ₹299.00.
-
 Home Garage 210 TC Cotton King Floral Fitted (Elastic) Bedsheet(Pack of 1, Fitted Black Green)
Original price was: ₹1,299.00.₹299.00Current price is: ₹299.00.
Home Garage 210 TC Cotton King Floral Fitted (Elastic) Bedsheet(Pack of 1, Fitted Black Green)
Original price was: ₹1,299.00.₹299.00Current price is: ₹299.00.
-
 Home Garage 180 TC Cotton King 3D Printed Flat Bedsheet(Pack of 1, White)
Original price was: ₹999.00.₹229.00Current price is: ₹229.00.
Home Garage 180 TC Cotton King 3D Printed Flat Bedsheet(Pack of 1, White)
Original price was: ₹999.00.₹229.00Current price is: ₹229.00.
-
 Home Sizzler 153 cm (5 ft) Polyester Room Darkening Window Curtain (Pack Of 2)(Floral, Maroon)
Original price was: ₹799.00.₹299.00Current price is: ₹299.00.
Home Sizzler 153 cm (5 ft) Polyester Room Darkening Window Curtain (Pack Of 2)(Floral, Maroon)
Original price was: ₹799.00.₹299.00Current price is: ₹299.00.
-
 Panipat Textile Hub 152.4 cm (5 ft) Polyester Window Curtain (Pack Of 2)(Solid, Aqua)
Original price was: ₹1,899.00.₹299.00Current price is: ₹299.00.
Panipat Textile Hub 152.4 cm (5 ft) Polyester Window Curtain (Pack Of 2)(Solid, Aqua)
Original price was: ₹1,899.00.₹299.00Current price is: ₹299.00.
-
 Home Sizzler 214 cm (7 ft) Polyester Semi Transparent Door Curtain (Pack Of 2)(Floral, Maroon)
Original price was: ₹1,199.00.₹399.00Current price is: ₹399.00.
Home Sizzler 214 cm (7 ft) Polyester Semi Transparent Door Curtain (Pack Of 2)(Floral, Maroon)
Original price was: ₹1,199.00.₹399.00Current price is: ₹399.00.
-
 Home Sizzler 153 cm (5 ft) Polyester Room Darkening Window Curtain (Pack Of 2)(Floral, Brown)
Original price was: ₹799.00.₹299.00Current price is: ₹299.00.
Home Sizzler 153 cm (5 ft) Polyester Room Darkening Window Curtain (Pack Of 2)(Floral, Brown)
Original price was: ₹799.00.₹299.00Current price is: ₹299.00.
-
 Stella Creations 214 cm (7 ft) Polyester Room Darkening Door Curtain (Pack Of 2)(Abstract, Brown)
Original price was: ₹1,299.00.₹449.00Current price is: ₹449.00.
Stella Creations 214 cm (7 ft) Polyester Room Darkening Door Curtain (Pack Of 2)(Abstract, Brown)
Original price was: ₹1,299.00.₹449.00Current price is: ₹449.00.
-
 Homefab India 152.5 cm (5 ft) Polyester Room Darkening Window Curtain (Pack Of 2)(Floral, Light Blue)
Original price was: ₹1,199.00.₹319.00Current price is: ₹319.00.
Homefab India 152.5 cm (5 ft) Polyester Room Darkening Window Curtain (Pack Of 2)(Floral, Light Blue)
Original price was: ₹1,199.00.₹319.00Current price is: ₹319.00.
-
 Urban Home 214 cm (7 ft) PVC Transparent Door Curtain Single Curtain(Solid, Off White)
Original price was: ₹699.00.₹203.00Current price is: ₹203.00.
Urban Home 214 cm (7 ft) PVC Transparent Door Curtain Single Curtain(Solid, Off White)
Original price was: ₹699.00.₹203.00Current price is: ₹203.00.
-
 Panipat Textile Hub 213 cm (7 ft) Polyester Door Curtain (Pack Of 2)(Solid, Brown)
Original price was: ₹1,199.00.₹349.00Current price is: ₹349.00.
Panipat Textile Hub 213 cm (7 ft) Polyester Door Curtain (Pack Of 2)(Solid, Brown)
Original price was: ₹1,199.00.₹349.00Current price is: ₹349.00.
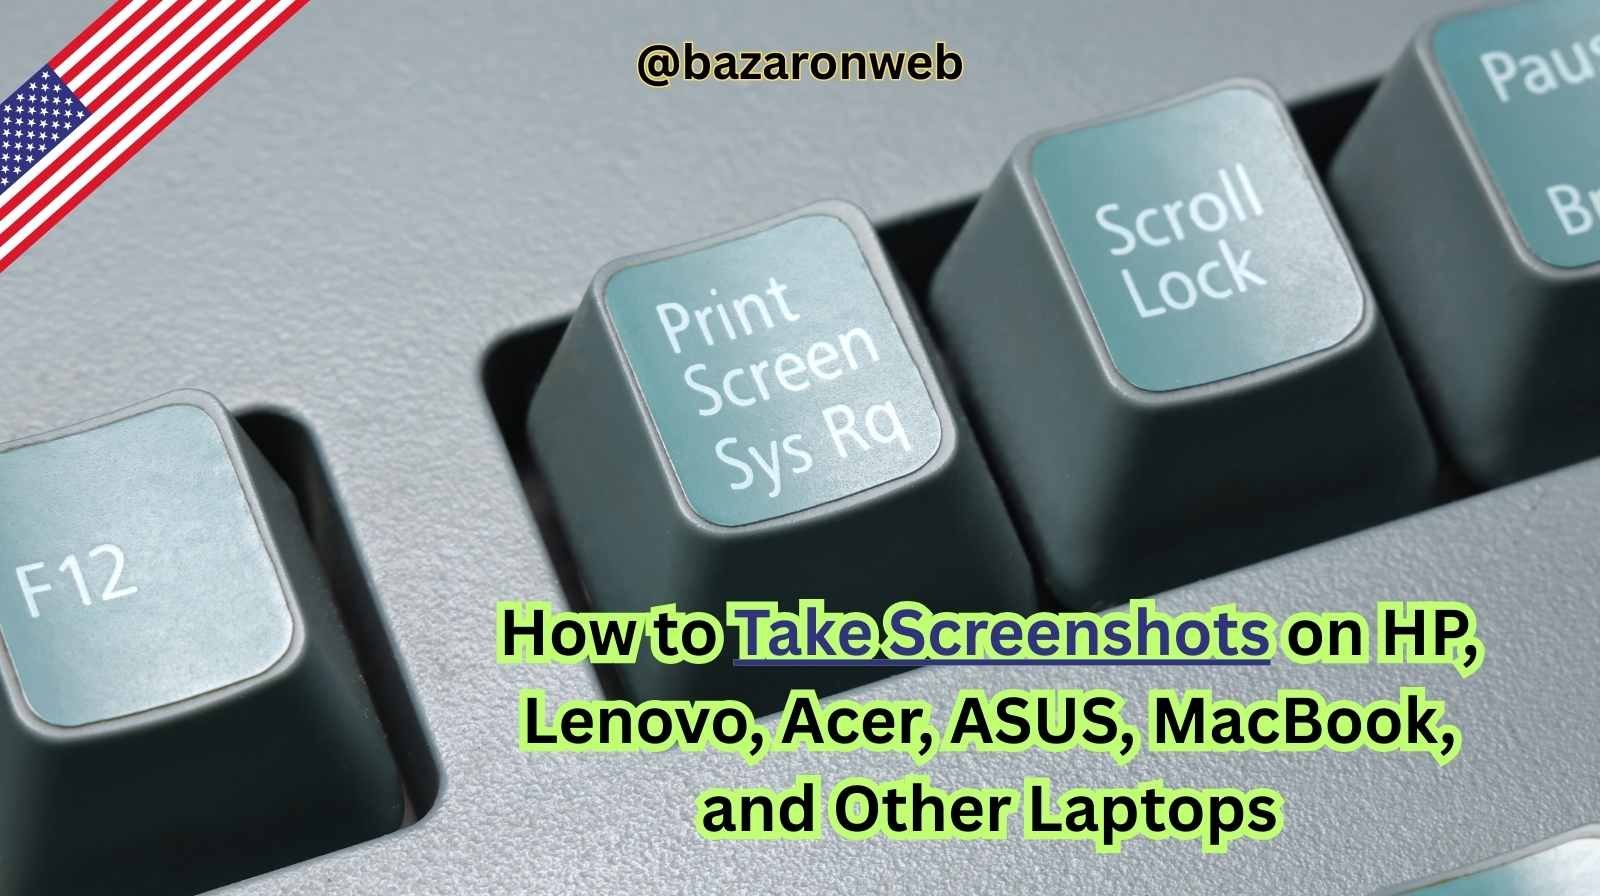
Hi friends, Jessica here! 🌸 Whether you’re working, studying, gaming, or just browsing, screenshots are one of the most useful tools on any laptop. From saving a funny meme to documenting an error message, knowing how to take screenshots quickly can make life so much easier.
In this guide, I’ll walk you through how to take screenshots on different laptops including HP, Lenovo, Acer, ASUS, MacBook, and some general methods that work across most Windows devices. We’ll cover both built-in tools and shortcuts so you’ll never struggle to capture your screen again.
Grab your laptop, and let’s dive right in! 💻✨
Why Taking Screenshots is Useful
Before we get into the brand-specific steps, let’s quickly talk about why screenshots are so handy:
- 📸 Save important information – like tickets, receipts, or instructions.
- 👩💻 Troubleshoot problems – share screenshots of errors with tech support.
- 🎓 Study help – capture slides, notes, or research material.
- 🎮 Gaming fun – save epic game moments.
- 💡 Creativity – use screenshots for tutorials, blogs, or presentations.
Now, let’s go brand by brand.
How to Take Screenshots on HP Laptops
HP laptops run on Windows, so the default Windows methods apply.
1. Using Print Screen (PrtScn)
- Press the PrtScn key (sometimes labeled PrtSc).
- This copies the entire screen to the clipboard.
- Open Paint or any image editor and press Ctrl + V to paste.
- Save as an image.
2. Using Windows + PrtScn
- Press Windows + PrtScn together.
- The screen dims briefly, and the screenshot is automatically saved in Pictures > Screenshots.
3. Snipping Tool / Snip & Sketch
- Search Snipping Tool or Snip & Sketch in Start Menu.
- Select type of screenshot: Rectangular, Freeform, Window, or Full Screen.
- Capture and save.
4. HP Specific Key Combinations (on some models)
- Fn + Windows + Spacebar = Quick screenshot.
How to Take Screenshots on Lenovo Laptops
Lenovo laptops also use Windows shortcuts, but some ThinkPad models have special keys.
1. PrtScn Key
- Works same as HP: PrtScn to copy full screen.
2. Windows + Shift + S
- Opens Snip & Sketch overlay.
- Drag over the area you want.
- Image is copied to clipboard and can be pasted into apps.
3. Fn + Spacebar (Lenovo ThinkPad Shortcut)
- Press Fn + Spacebar.
- Captures the screen and saves it directly to Pictures > Screenshots.
4. Snipping Tool
- Same as HP.
How to Take Screenshots on Acer Laptops
Acer laptops don’t have special keys, but all Windows shortcuts work.
1. Windows + PrtScn
- Best method: takes full-screen screenshot and auto-saves.
2. PrtScn + Paste into Paint
- Basic way to capture.
3. Alt + PrtScn
- Captures only the active window.
- Paste into any editor to save.
4. Windows + Shift + S
- For partial screenshots.
How to Take Screenshots on ASUS Laptops
ASUS laptops follow similar shortcuts, but gaming models often include quick capture tools.
1. Windows + PrtScn
- Saves screenshot to Pictures folder.
2. Alt + PrtScn
- Captures active window only.
3. Fn + PrtScn
- Some ASUS laptops require the Fn key with PrtScn.
4. Xbox Game Bar (for gamers)
- Press Windows + G.
- Click the camera icon in the Game Bar overlay to take a screenshot.
- Saved in Videos > Captures.
How to Take Screenshots on MacBook
MacBooks have their own screenshot system built into macOS.
1. Capture Entire Screen
- Press Command + Shift + 3.
- Screenshot is saved to desktop.
2. Capture Selected Area
- Press Command + Shift + 4.
- Drag to select the area you want to capture.
- Released image saves to desktop.
3. Capture Specific Window
- Press Command + Shift + 4, then press Spacebar.
- Hover over a window and click.
4. Screenshot Toolbar (macOS Mojave and later)
- Press Command + Shift + 5.
- Brings up a toolbar for screen recording and screenshots.
5. Touch Bar (MacBook Pro models with Touch Bar)
- Press Command + Shift + 6 to capture what’s on the Touch Bar.
General Windows Screenshot Tools (for any laptop)
Snip & Sketch
- Shortcut: Windows + Shift + S.
- Lets you capture part of your screen.
Snipping Tool
- Legacy tool, but still useful.
- Can delay capture for menus.
Xbox Game Bar
- Shortcut: Windows + G.
- For gamers who want screenshots during gameplay.
Third-Party Tools
- Lightshot – Simple and lightweight.
- Greenshot – Great for productivity.
- Snagit – Advanced, with editing options.
How to Take Screenshots on Other Laptops (Dell, Toshiba, Samsung, etc.)
Even if you don’t use HP, Lenovo, Acer, ASUS, or MacBook, the process is mostly the same.
For Windows Laptops
- Use PrtScn, Alt + PrtScn, Windows + PrtScn, or Windows + Shift + S.
For Chromebooks
- Press Ctrl + Show Windows Key (rectangle with two lines).
- Ctrl + Shift + Show Windows = Capture partial screen.
For Linux Laptops
- Use PrtScn key or Shift + PrtScn.
- Some Linux distros include screenshot tools like Flameshot.
⚡ Tips for Better Screenshot Management
- Organize screenshots – Move them into folders (Work, School, Fun).
- Rename files – Instead of “Screenshot_001.png”, rename it to “Invoice_March2025.png”.
- Use editing tools – Crop, highlight, or annotate screenshots using built-in editors.
- Cloud sync – Save screenshots directly to Google Drive, OneDrive, or iCloud for access anywhere.
Quick Shortcut Recap
Here’s a handy table:
| Brand / OS | Shortcut | Result |
|---|---|---|
| HP | Win + PrtScn | Full-screen screenshot saved |
| Lenovo | Fn + Spacebar (ThinkPad) | Save screenshot directly |
| Acer | Alt + PrtScn | Active window only |
| ASUS | Win + G | Game Bar screenshot |
| MacBook | Cmd + Shift + 3 | Full-screen screenshot |
| Other Windows | Win + Shift + S | Select area |
| Chromebook | Ctrl + Show Windows | Full screenshot |
Taking screenshots on laptops is super easy once you know the right shortcuts. Whether you’re using an HP, Lenovo, Acer, ASUS, MacBook, or another laptop, there are multiple ways to capture your screen.
Personally, I love using Windows + Shift + S on my Windows laptop for quick partial captures and Command + Shift + 4 on my MacBook for area screenshots. It’s fast, flexible, and perfect for work or fun.
So next time you need to share a funny chat, capture a presentation slide, or troubleshoot with tech support, you’ll know exactly which keys to press.
- How to Fix “Can’t Connect to VPN on iPhone” – Complete Troubleshooting Guide

- How to Fix Mouse Lagging Problem in Windows 11 – Complete Step-by-Step Guide for Smooth Performance

- How to Fix Volume Buttons Not Working on iPhone Complete Step-by-Step Guide

- Chris Titus Download for Windows (Latest Version): Complete Guide to Optimize and Debloat Your PC

- Google Chrome Not Saving Password 8 Proven Ways to Fix It Quickly

Products
-
![Apple Watch Ultra 3 [GPS + Cellular 49mm] Running & Multisport Smartwatch w/Rugged Titanium Case w/Black Titanium Milanese Loop - M. Satellite Communications, Advanced Health & Fitness Tracking](https://bazaronweb.com/retailstores/wp-content/uploads/2025/09/apple-watch-320x320.jpg) Apple Watch Ultra 3 [GPS + Cellular 49mm] Running & Multisport Smartwatch w/Rugged Titanium Case w/Black Titanium Milanese Loop - M. Satellite Communications, Advanced Health & Fitness Tracking
Apple Watch Ultra 3 [GPS + Cellular 49mm] Running & Multisport Smartwatch w/Rugged Titanium Case w/Black Titanium Milanese Loop - M. Satellite Communications, Advanced Health & Fitness Tracking
-
 Apple iPad mini (A17 Pro): Apple Intelligence, 8.3-inch Liquid Retina Display, 256GB, Wi-Fi 6E, 12MP Front/12MP Back Camera, Touch ID, All-Day Battery Life — Purple
-
 Apple AirPods Max Wireless Over-Ear Headphones, Active Noise Cancelling, Transparency Mode, Personalized Spatial Audio, Dolby Atmos, Bluetooth Headphones for iPhone – Space Gray
-
 Apple AirPods Pro 2 Wireless Earbuds, Active Noise Cancellation, Hearing Aid Feature, Bluetooth Headphones, Transparency, Personalized Spatial Audio, High-Fidelity Sound, H2 Chip, USB-C Charging
-
Leo Creation 144 TC Cotton Double Jaipuri Prints Flat Bedsheet(Pack of 1, Blue, Gree, Red, Grey, Light Grey)
Original price was: ₹2,999.00.₹329.00Current price is: ₹329.00.
Leave a Reply