Discounted Products
-
 Leo Creation 144 TC Cotton Double Jaipuri Prints Flat Bedsheet(Pack of 1, Blue, Gree, Red, Grey, Light Grey)
Original price was: ₹2,999.00.₹329.00Current price is: ₹329.00.
Leo Creation 144 TC Cotton Double Jaipuri Prints Flat Bedsheet(Pack of 1, Blue, Gree, Red, Grey, Light Grey)
Original price was: ₹2,999.00.₹329.00Current price is: ₹329.00.
-
 Home Garage 210 TC Cotton King Floral Fitted (Elastic) Bedsheet(Pack of 1, Grey)
Original price was: ₹999.00.₹299.00Current price is: ₹299.00.
Home Garage 210 TC Cotton King Floral Fitted (Elastic) Bedsheet(Pack of 1, Grey)
Original price was: ₹999.00.₹299.00Current price is: ₹299.00.
-
 Goodrik 140 TC Cotton Double 3D Printed Flat Bedsheet(Pack of 1, Brown)
Original price was: ₹499.00.₹229.00Current price is: ₹229.00.
Goodrik 140 TC Cotton Double 3D Printed Flat Bedsheet(Pack of 1, Brown)
Original price was: ₹499.00.₹229.00Current price is: ₹229.00.
-
 GLOBALSHOP 350 TC Microfiber Double Floral Flat Bedsheet(Pack of 1, Multicolor)
Original price was: ₹1,250.00.₹263.00Current price is: ₹263.00.
GLOBALSHOP 350 TC Microfiber Double Floral Flat Bedsheet(Pack of 1, Multicolor)
Original price was: ₹1,250.00.₹263.00Current price is: ₹263.00.
-
 RisingStar 250 TC Microfiber King Printed Fitted (Elastic) Bedsheet(Pack of 1, FITTED-ROUND-CIRCLES-PREMIUM)
Original price was: ₹2,299.00.₹299.00Current price is: ₹299.00.
RisingStar 250 TC Microfiber King Printed Fitted (Elastic) Bedsheet(Pack of 1, FITTED-ROUND-CIRCLES-PREMIUM)
Original price was: ₹2,299.00.₹299.00Current price is: ₹299.00.
-
 Home Garage 210 TC Cotton King Floral Fitted (Elastic) Bedsheet(Pack of 1, Fitted Black Green)
Original price was: ₹1,299.00.₹299.00Current price is: ₹299.00.
Home Garage 210 TC Cotton King Floral Fitted (Elastic) Bedsheet(Pack of 1, Fitted Black Green)
Original price was: ₹1,299.00.₹299.00Current price is: ₹299.00.
-
 Home Garage 180 TC Cotton King 3D Printed Flat Bedsheet(Pack of 1, White)
Original price was: ₹999.00.₹229.00Current price is: ₹229.00.
Home Garage 180 TC Cotton King 3D Printed Flat Bedsheet(Pack of 1, White)
Original price was: ₹999.00.₹229.00Current price is: ₹229.00.
-
 Home Sizzler 153 cm (5 ft) Polyester Room Darkening Window Curtain (Pack Of 2)(Floral, Maroon)
Original price was: ₹799.00.₹299.00Current price is: ₹299.00.
Home Sizzler 153 cm (5 ft) Polyester Room Darkening Window Curtain (Pack Of 2)(Floral, Maroon)
Original price was: ₹799.00.₹299.00Current price is: ₹299.00.
-
 Panipat Textile Hub 152.4 cm (5 ft) Polyester Window Curtain (Pack Of 2)(Solid, Aqua)
Original price was: ₹1,899.00.₹299.00Current price is: ₹299.00.
Panipat Textile Hub 152.4 cm (5 ft) Polyester Window Curtain (Pack Of 2)(Solid, Aqua)
Original price was: ₹1,899.00.₹299.00Current price is: ₹299.00.
-
 Home Sizzler 214 cm (7 ft) Polyester Semi Transparent Door Curtain (Pack Of 2)(Floral, Maroon)
Original price was: ₹1,199.00.₹399.00Current price is: ₹399.00.
Home Sizzler 214 cm (7 ft) Polyester Semi Transparent Door Curtain (Pack Of 2)(Floral, Maroon)
Original price was: ₹1,199.00.₹399.00Current price is: ₹399.00.
-
 Home Sizzler 153 cm (5 ft) Polyester Room Darkening Window Curtain (Pack Of 2)(Floral, Brown)
Original price was: ₹799.00.₹299.00Current price is: ₹299.00.
Home Sizzler 153 cm (5 ft) Polyester Room Darkening Window Curtain (Pack Of 2)(Floral, Brown)
Original price was: ₹799.00.₹299.00Current price is: ₹299.00.
-
 Stella Creations 214 cm (7 ft) Polyester Room Darkening Door Curtain (Pack Of 2)(Abstract, Brown)
Original price was: ₹1,299.00.₹449.00Current price is: ₹449.00.
Stella Creations 214 cm (7 ft) Polyester Room Darkening Door Curtain (Pack Of 2)(Abstract, Brown)
Original price was: ₹1,299.00.₹449.00Current price is: ₹449.00.
-
 Homefab India 152.5 cm (5 ft) Polyester Room Darkening Window Curtain (Pack Of 2)(Floral, Light Blue)
Original price was: ₹1,199.00.₹319.00Current price is: ₹319.00.
Homefab India 152.5 cm (5 ft) Polyester Room Darkening Window Curtain (Pack Of 2)(Floral, Light Blue)
Original price was: ₹1,199.00.₹319.00Current price is: ₹319.00.
-
 Urban Home 214 cm (7 ft) PVC Transparent Door Curtain Single Curtain(Solid, Off White)
Original price was: ₹699.00.₹203.00Current price is: ₹203.00.
Urban Home 214 cm (7 ft) PVC Transparent Door Curtain Single Curtain(Solid, Off White)
Original price was: ₹699.00.₹203.00Current price is: ₹203.00.
-
 Panipat Textile Hub 213 cm (7 ft) Polyester Door Curtain (Pack Of 2)(Solid, Brown)
Original price was: ₹1,199.00.₹349.00Current price is: ₹349.00.
Panipat Textile Hub 213 cm (7 ft) Polyester Door Curtain (Pack Of 2)(Solid, Brown)
Original price was: ₹1,199.00.₹349.00Current price is: ₹349.00.
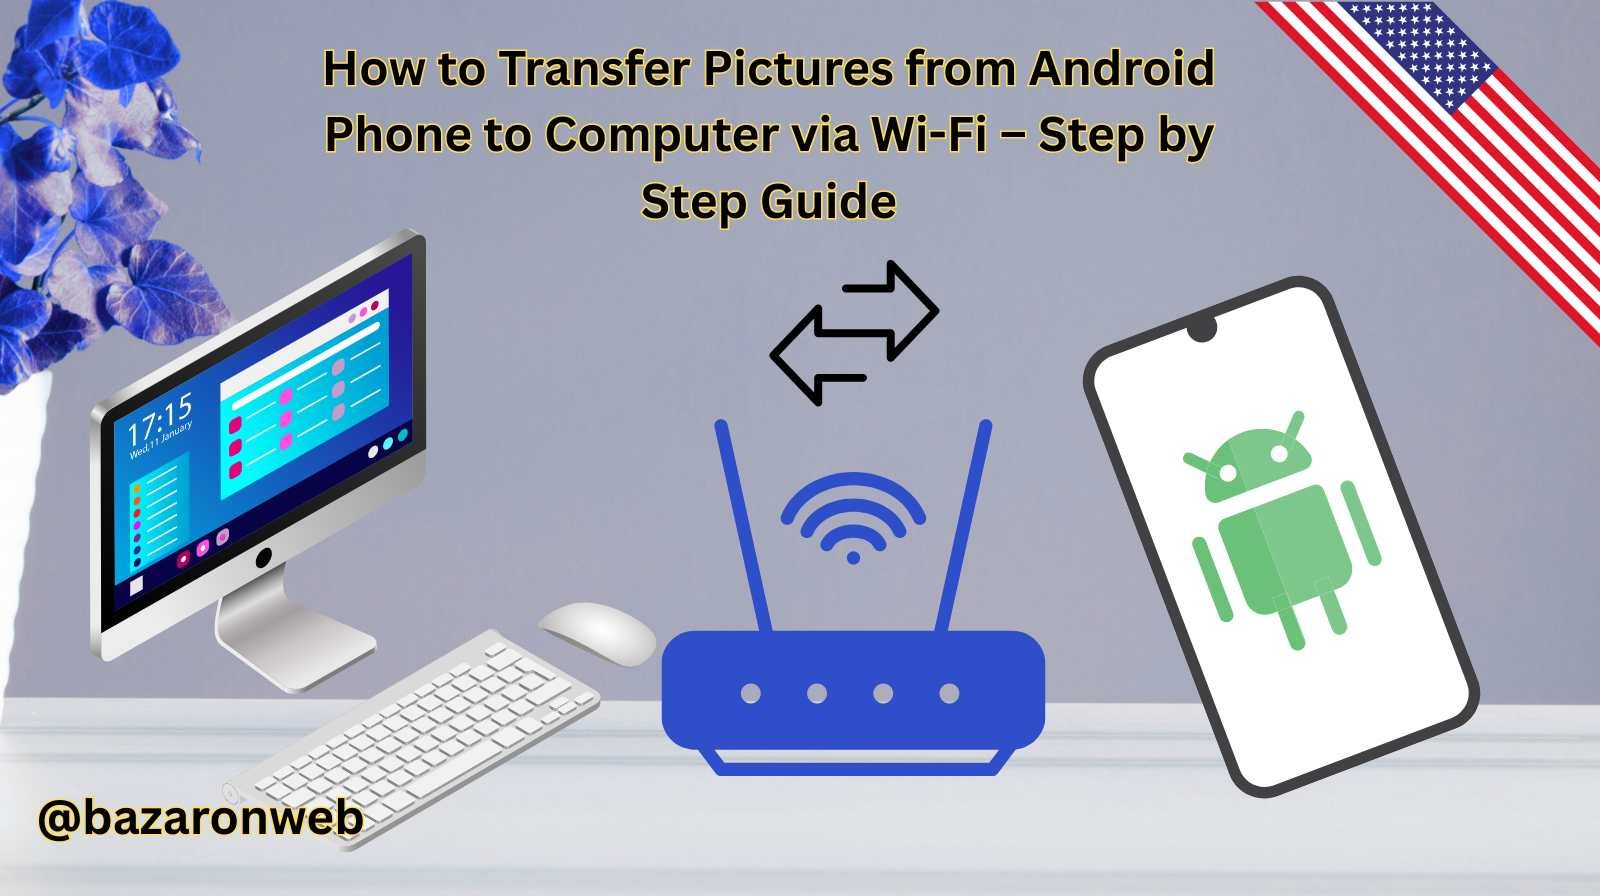
Hi, I’m Jessica, and if you’re like me, your Android phone is packed with beautiful memories—family photos, selfies, travel snapshots, and everything in between. But let’s be honest: phone storage fills up quickly, and transferring those pictures to your computer is a smart way to free up space while keeping your images safe.
Many people still rely on USB cables, but today I’ll show you how to transfer pictures wirelessly via Wi-Fi. This method is super convenient, eliminates messy cables, and works on both Windows PCs and Macs.
In this guide, we’ll explore different wireless transfer methods, step-by-step instructions for each, pros and cons, and some troubleshooting tips to make sure everything goes smoothly.
So, let’s dive in!
Why Transfer Pictures via Wi-Fi Instead of USB?
Before we jump to the how-to, let’s talk about why Wi-Fi transfer is such a lifesaver:
- No cables needed – Forget about searching for that USB-C or micro-USB cable.
- Faster batch transfers – Move hundreds of photos at once with the right app.
- Cross-platform convenience – Works on Windows, Mac, and sometimes even Linux.
- Backup-ready – Many Wi-Fi solutions also double as cloud storage.
- Hands-free automation – Some apps automatically sync photos when connected to Wi-Fi.
If you often transfer pictures, Wi-Fi is the most hassle-free method.
Method 1: Using Google Photos Sync
Google Photos is one of the easiest ways to wirelessly move pictures from Android to computer.
Steps:
- Install Google Photos on your phone
- Open the Google Play Store.
- Search for Google Photos and install it.
- Enable Backup & Sync
- Open Google Photos.
- Go to Settings > Backup & Sync.
- Turn on the toggle to automatically upload your photos to the cloud.
- Access photos on your computer
- On your computer, open a browser and go to photos.google.com.
- Sign in with the same Google account.
- Download any photos you want.
💡 Pro Tip: If you use Google Drive integration, you can access these images directly in Google Drive.
✅ Best for: People who want automatic backups and don’t mind using cloud storage.
Method 2: Wi-Fi Direct File Transfer with “Send Anywhere”
Apps like Send Anywhere let you transfer photos directly between your phone and computer over Wi-Fi—no cloud needed.
Steps:
- Install Send Anywhere on your phone
- Download it from Google Play Store.
- Open Send Anywhere on your phone
- Select the photos you want to transfer.
- Tap Send.
- Open Send Anywhere on your computer
- Go to send-anywhere.com on your PC or Mac.
- Enter the 6-digit key shown on your phone.
- Download the pictures
- The transfer happens directly over Wi-Fi.
✅ Best for: Quick, secure, direct transfers without cloud storage.
Method 3: Using Microsoft’s “Phone Link” (Windows Only)
If you’re on Windows 10 or 11, Microsoft’s Phone Link app makes this seamless.
Steps:
- Set up Phone Link
- On your Windows PC, search for Phone Link in the Start menu.
- Open and sign in with your Microsoft account.
- Install Link to Windows app on your phone
- Download it from the Google Play Store.
- Connect devices
- Make sure both are on the same Wi-Fi network.
- Follow the on-screen instructions to link your phone.
- Access your photos
- In the Phone Link app, click Photos.
- You can view, save, or drag-and-drop them to your computer.
✅ Best for: Windows users who want deep phone-to-PC integration.
Method 4: Using AirDroid
AirDroid is another popular tool for managing Android files wirelessly.
Steps:
- Install AirDroid on your phone
- Get it from Google Play Store.
- Create an account and log in
- Sign up and connect your phone.
- Access AirDroid Web on your PC
- Open a browser on your computer and visit web.airdroid.com.
- Log in with the same account.
- Transfer pictures
- From the dashboard, click Files or Photos.
- Select and download them.
💡 Pro Tip: AirDroid also lets you send text messages and mirror notifications.
✅ Best for: Users who want full phone management alongside file transfer.
Method 5: Using Shared Wi-Fi Network + FTP Apps
If you’re comfortable with a little tech setup, FTP file transfer apps let you turn your phone into a mini server.
Steps:
- Install an FTP app (like WiFi FTP Server or ES File Explorer).
- Open the app and start the FTP server.
- It will show you an FTP address (like
ftp://192.168.0.101:2221).
- It will show you an FTP address (like
- Enter the address on your computer
- Open File Explorer (Windows) or Finder (Mac).
- Type the FTP address into the search bar.
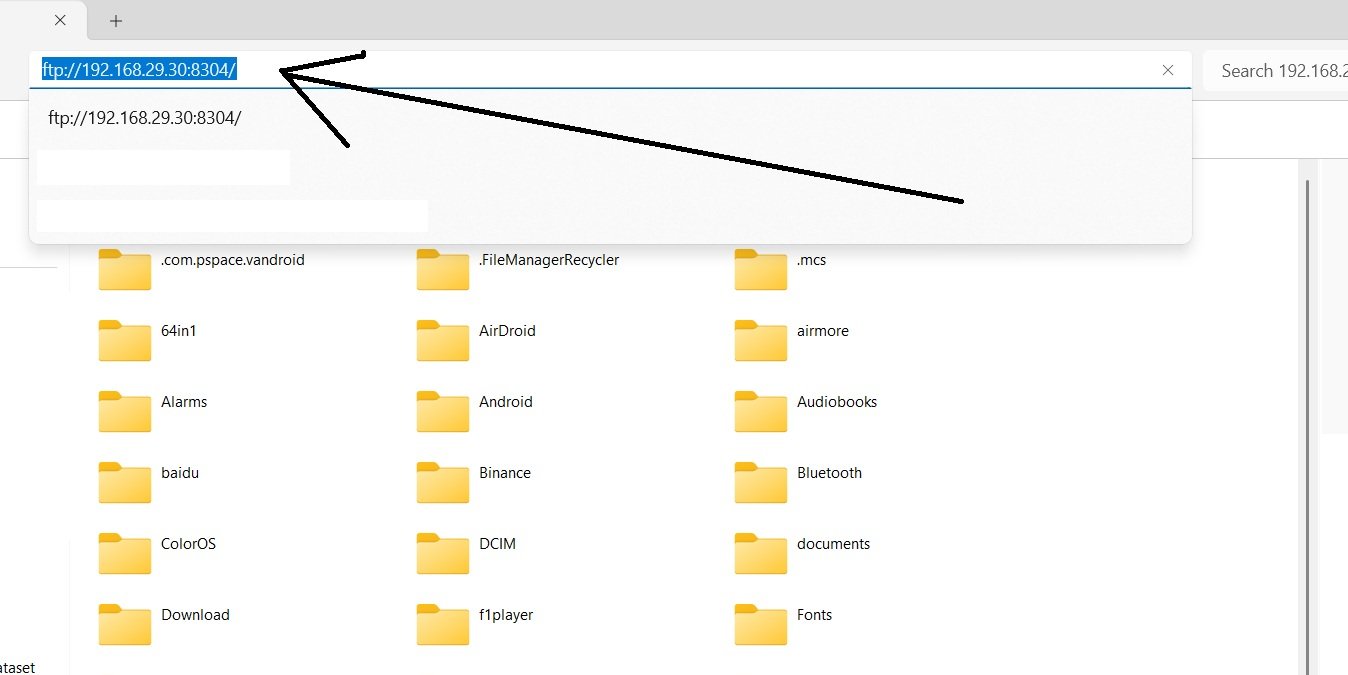
- Access and copy photos
- Drag and drop images from phone to computer.
✅ Best for: Advanced users who want a cable-free direct transfer method.
Method 6: Bluetooth (Slower, But Works Without Wi-Fi)
While not technically Wi-Fi, Bluetooth is another wireless option. It’s slower but handy if you don’t have an internet connection.
Steps:
- Turn on Bluetooth on your phone and computer.
- Pair your phone with your computer.
- Select photos on your phone > Share > Bluetooth > Choose your computer.
- Accept the transfer on your computer.
✅ Best for: Occasional small transfers without internet.
Troubleshooting Common Problems
Sometimes Wi-Fi transfers don’t go as planned. Here’s how to fix issues:
- Photos not showing up – Ensure your phone and computer are on the same Wi-Fi.
- App connection failed – Restart both devices and retry.
- Transfer too slow – Use 5GHz Wi-Fi instead of 2.4GHz.
- Cloud not syncing – Check if backup is enabled and storage isn’t full.
- FTP or AirDroid won’t load – Disable VPNs or firewalls temporarily.
Comparing the Methods
| Method | Speed | Cloud Required? | Best For |
|---|---|---|---|
| Google Photos | Medium | Yes | Auto backup & cross-platform |
| Send Anywhere | Fast | No | Direct transfers |
| Phone Link | Medium | No | Windows users |
| AirDroid | Fast | Optional | Full phone management |
| FTP Apps | Fast | No | Advanced users |
| Bluetooth | Slow | No | Small file transfers offline |
Final Thoughts
Transferring pictures from your Android phone to your computer via Wi-Fi is absolutely possible, secure, and convenient. Depending on your needs, you can go with cloud-based solutions like Google Photos, direct apps like Send Anywhere, integration tools like Phone Link, or advanced setups like FTP servers.
The best part? Once you set it up, you’ll never need to untangle USB cables again. Whether you’re backing up precious family albums, organizing work images, or freeing up storage space, these wireless transfer methods have you covered.
So next time your phone’s gallery is overflowing, try one of these Wi-Fi solutions—and keep your memories safe on your computer.
✅ That’s it! You now know six easy ways to transfer pictures from your Android phone to your computer wirelessly.
- How to Change the Default Audio Output Device on Windows 11

- How to Fix Taskbar and Settings Not Working After a Windows 11 Update

- How to Fix Microsoft Store Logging You Out Randomly on Windows 11

- How to Fix Volume Shadow Copy Service Errors in Windows (Complete Troubleshooting Guide)

- How to Fix Game Lag After a Windows Update (10 Proven Solutions)

Products
-
![Apple Watch Ultra 3 [GPS + Cellular 49mm] Running & Multisport Smartwatch w/Rugged Titanium Case w/Black Titanium Milanese Loop - M. Satellite Communications, Advanced Health & Fitness Tracking](https://bazaronweb.com/retailstores/wp-content/uploads/2025/09/apple-watch-320x320.jpg) Apple Watch Ultra 3 [GPS + Cellular 49mm] Running & Multisport Smartwatch w/Rugged Titanium Case w/Black Titanium Milanese Loop - M. Satellite Communications, Advanced Health & Fitness Tracking
Apple Watch Ultra 3 [GPS + Cellular 49mm] Running & Multisport Smartwatch w/Rugged Titanium Case w/Black Titanium Milanese Loop - M. Satellite Communications, Advanced Health & Fitness Tracking
-
 Apple iPad mini (A17 Pro): Apple Intelligence, 8.3-inch Liquid Retina Display, 256GB, Wi-Fi 6E, 12MP Front/12MP Back Camera, Touch ID, All-Day Battery Life — Purple
-
 Apple AirPods Max Wireless Over-Ear Headphones, Active Noise Cancelling, Transparency Mode, Personalized Spatial Audio, Dolby Atmos, Bluetooth Headphones for iPhone – Space Gray
-
 Apple AirPods Pro 2 Wireless Earbuds, Active Noise Cancellation, Hearing Aid Feature, Bluetooth Headphones, Transparency, Personalized Spatial Audio, High-Fidelity Sound, H2 Chip, USB-C Charging
-
Leo Creation 144 TC Cotton Double Jaipuri Prints Flat Bedsheet(Pack of 1, Blue, Gree, Red, Grey, Light Grey)
Original price was: ₹2,999.00.₹329.00Current price is: ₹329.00.
Leave a Reply