Discounted Products
-
 Leo Creation 144 TC Cotton Double Jaipuri Prints Flat Bedsheet(Pack of 1, Blue, Gree, Red, Grey, Light Grey)
Original price was: ₹2,999.00.₹329.00Current price is: ₹329.00.
Leo Creation 144 TC Cotton Double Jaipuri Prints Flat Bedsheet(Pack of 1, Blue, Gree, Red, Grey, Light Grey)
Original price was: ₹2,999.00.₹329.00Current price is: ₹329.00.
-
 Home Garage 210 TC Cotton King Floral Fitted (Elastic) Bedsheet(Pack of 1, Grey)
Original price was: ₹999.00.₹299.00Current price is: ₹299.00.
Home Garage 210 TC Cotton King Floral Fitted (Elastic) Bedsheet(Pack of 1, Grey)
Original price was: ₹999.00.₹299.00Current price is: ₹299.00.
-
 Goodrik 140 TC Cotton Double 3D Printed Flat Bedsheet(Pack of 1, Brown)
Original price was: ₹499.00.₹229.00Current price is: ₹229.00.
Goodrik 140 TC Cotton Double 3D Printed Flat Bedsheet(Pack of 1, Brown)
Original price was: ₹499.00.₹229.00Current price is: ₹229.00.
-
 GLOBALSHOP 350 TC Microfiber Double Floral Flat Bedsheet(Pack of 1, Multicolor)
Original price was: ₹1,250.00.₹263.00Current price is: ₹263.00.
GLOBALSHOP 350 TC Microfiber Double Floral Flat Bedsheet(Pack of 1, Multicolor)
Original price was: ₹1,250.00.₹263.00Current price is: ₹263.00.
-
 RisingStar 250 TC Microfiber King Printed Fitted (Elastic) Bedsheet(Pack of 1, FITTED-ROUND-CIRCLES-PREMIUM)
Original price was: ₹2,299.00.₹299.00Current price is: ₹299.00.
RisingStar 250 TC Microfiber King Printed Fitted (Elastic) Bedsheet(Pack of 1, FITTED-ROUND-CIRCLES-PREMIUM)
Original price was: ₹2,299.00.₹299.00Current price is: ₹299.00.
-
 Home Garage 210 TC Cotton King Floral Fitted (Elastic) Bedsheet(Pack of 1, Fitted Black Green)
Original price was: ₹1,299.00.₹299.00Current price is: ₹299.00.
Home Garage 210 TC Cotton King Floral Fitted (Elastic) Bedsheet(Pack of 1, Fitted Black Green)
Original price was: ₹1,299.00.₹299.00Current price is: ₹299.00.
-
 Home Garage 180 TC Cotton King 3D Printed Flat Bedsheet(Pack of 1, White)
Original price was: ₹999.00.₹229.00Current price is: ₹229.00.
Home Garage 180 TC Cotton King 3D Printed Flat Bedsheet(Pack of 1, White)
Original price was: ₹999.00.₹229.00Current price is: ₹229.00.
-
 Home Sizzler 153 cm (5 ft) Polyester Room Darkening Window Curtain (Pack Of 2)(Floral, Maroon)
Original price was: ₹799.00.₹299.00Current price is: ₹299.00.
Home Sizzler 153 cm (5 ft) Polyester Room Darkening Window Curtain (Pack Of 2)(Floral, Maroon)
Original price was: ₹799.00.₹299.00Current price is: ₹299.00.
-
 Panipat Textile Hub 152.4 cm (5 ft) Polyester Window Curtain (Pack Of 2)(Solid, Aqua)
Original price was: ₹1,899.00.₹299.00Current price is: ₹299.00.
Panipat Textile Hub 152.4 cm (5 ft) Polyester Window Curtain (Pack Of 2)(Solid, Aqua)
Original price was: ₹1,899.00.₹299.00Current price is: ₹299.00.
-
 Home Sizzler 214 cm (7 ft) Polyester Semi Transparent Door Curtain (Pack Of 2)(Floral, Maroon)
Original price was: ₹1,199.00.₹399.00Current price is: ₹399.00.
Home Sizzler 214 cm (7 ft) Polyester Semi Transparent Door Curtain (Pack Of 2)(Floral, Maroon)
Original price was: ₹1,199.00.₹399.00Current price is: ₹399.00.
-
 Home Sizzler 153 cm (5 ft) Polyester Room Darkening Window Curtain (Pack Of 2)(Floral, Brown)
Original price was: ₹799.00.₹299.00Current price is: ₹299.00.
Home Sizzler 153 cm (5 ft) Polyester Room Darkening Window Curtain (Pack Of 2)(Floral, Brown)
Original price was: ₹799.00.₹299.00Current price is: ₹299.00.
-
 Stella Creations 214 cm (7 ft) Polyester Room Darkening Door Curtain (Pack Of 2)(Abstract, Brown)
Original price was: ₹1,299.00.₹449.00Current price is: ₹449.00.
Stella Creations 214 cm (7 ft) Polyester Room Darkening Door Curtain (Pack Of 2)(Abstract, Brown)
Original price was: ₹1,299.00.₹449.00Current price is: ₹449.00.
-
 Homefab India 152.5 cm (5 ft) Polyester Room Darkening Window Curtain (Pack Of 2)(Floral, Light Blue)
Original price was: ₹1,199.00.₹319.00Current price is: ₹319.00.
Homefab India 152.5 cm (5 ft) Polyester Room Darkening Window Curtain (Pack Of 2)(Floral, Light Blue)
Original price was: ₹1,199.00.₹319.00Current price is: ₹319.00.
-
 Urban Home 214 cm (7 ft) PVC Transparent Door Curtain Single Curtain(Solid, Off White)
Original price was: ₹699.00.₹203.00Current price is: ₹203.00.
Urban Home 214 cm (7 ft) PVC Transparent Door Curtain Single Curtain(Solid, Off White)
Original price was: ₹699.00.₹203.00Current price is: ₹203.00.
-
 Panipat Textile Hub 213 cm (7 ft) Polyester Door Curtain (Pack Of 2)(Solid, Brown)
Original price was: ₹1,199.00.₹349.00Current price is: ₹349.00.
Panipat Textile Hub 213 cm (7 ft) Polyester Door Curtain (Pack Of 2)(Solid, Brown)
Original price was: ₹1,199.00.₹349.00Current price is: ₹349.00.
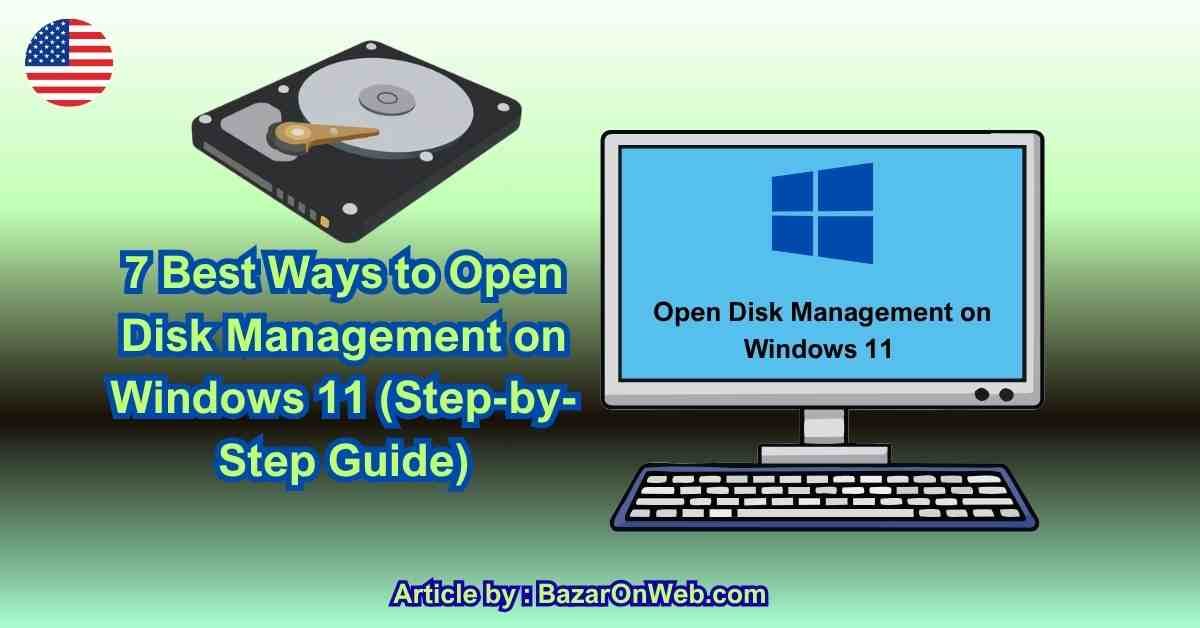
Hi, I’m Jessica, and I still remember the first time I upgraded to Windows 11 and needed to resize a drive urgently. I assumed Disk Management would be easy to find—just like in older Windows versions—but surprisingly, I spent several minutes digging through menus before locating it. If you’ve ever been in a similar situation, you’re not alone. Windows 11 has modernized its interface, but some essential tools like Disk Management feel slightly hidden if you don’t know exactly where to look.
Disk Management is one of the most powerful built-in utilities in Windows. Whether you want to create partitions, extend drives, format disks, or troubleshoot storage issues, this tool is essential for both beginners and advanced users. The good news is that there isn’t just one way to access it—there are multiple quick and efficient methods depending on your preference.
In this guide, I’ll walk you through seven of the best ways to open Disk Management in Windows 11. These methods are practical, easy to follow, and designed to save you time. Whether you prefer keyboard shortcuts, command tools, or navigating through settings, you’ll find an approach that fits your workflow perfectly.
Using the Start Menu Search for Quick Access
One of the simplest and most user-friendly ways to open Disk Management in Windows 11 is through the Start Menu search feature. This method is especially useful if you prefer a visual approach rather than remembering commands or shortcuts. Windows 11 has a powerful search system that allows you to quickly find system tools with just a few keystrokes.
To begin, click on the Start button or press the Windows key on your keyboard. In the search bar, type “Disk Management.” Within seconds, you’ll see an option labeled “Create and format hard disk partitions.” This is the official name of the Disk Management utility. Clicking on it will immediately open the tool.
What makes this method particularly effective is its simplicity. You don’t need any technical knowledge or prior experience to use it. It’s ideal for beginners who are still exploring Windows 11 or for users who rarely access system tools.
Additionally, this method is reliable across all Windows 11 versions and updates. Even if Microsoft changes the layout of settings or menus in the future, the search function remains consistent. If you want a fast, no-fuss way to access Disk Management without navigating through multiple layers, the Start Menu search is one of the best options available.
Opening Disk Management via the Power User Menu
The Power User Menu, also known as the WinX menu, is one of the most efficient ways to access advanced system tools in Windows 11. Many users overlook this feature, but once you start using it, it quickly becomes a favorite due to its speed and convenience.
To open the Power User Menu, simply press Windows + X on your keyboard. Alternatively, you can right-click on the Start button. A menu will appear with several important system options, including Device Manager, Task Manager, and more. Among these options, you will find “Disk Management.”
Clicking on Disk Management from this menu opens the utility instantly without any additional steps. This method is particularly useful for power users and professionals who frequently access system tools and want a faster workflow.
One of the biggest advantages of the Power User Menu is that it centralizes essential administrative tools in one place. You don’t need to search or navigate through settings; everything is just a click away.
This approach is especially helpful when troubleshooting system issues or managing storage quickly. If you want a balance between speed and simplicity, the Power User Menu is one of the most efficient ways to access Disk Management in Windows 11.
Using the Run Command for Faster Execution
If you prefer keyboard shortcuts and quick commands, the Run dialog box is an excellent way to open Disk Management in Windows 11. This method is fast, efficient, and widely used by experienced users who want to save time.
To open the Run dialog box, press Windows + R on your keyboard. A small window will appear where you can type commands. In this box, type “diskmgmt.msc” and press Enter. Instantly, the Disk Management utility will launch.
The Run command method is particularly powerful because it bypasses menus and search results entirely. It allows you to directly access system utilities using specific commands. Once you memorize the command, you can open Disk Management in just a couple of seconds.
This method is also useful in situations where the Start Menu search may not be functioning properly. Since it relies on system commands rather than the interface, it’s more reliable in certain troubleshooting scenarios.
For users who value speed and efficiency, the Run dialog is a must-know tool. It’s especially beneficial for IT professionals, developers, and advanced users who frequently manage system settings and need quick access to administrative utilities.
Accessing Disk Management Through Computer Management
Another effective way to open Disk Management in Windows 11 is through the Computer Management console. This method provides access to multiple system tools in one centralized interface, making it ideal for users who want more control over system administration.
To access this option, right-click on the Start button and select “Computer Management.” Once the window opens, you’ll see a navigation panel on the left side. Under the “Storage” section, click on “Disk Management.” The utility will load on the right side of the window.
This method is particularly useful because it groups related administrative tools together. In addition to Disk Management, you can access Device Manager, Event Viewer, and Shared Folders within the same interface.
Using Computer Management is beneficial for users who are performing multiple system tasks at once. Instead of opening separate tools individually, you can manage everything from a single dashboard.
This approach is often preferred by system administrators and advanced users who need a more comprehensive view of their system. If you’re looking for a method that combines functionality and organization, accessing Disk Management through Computer Management is an excellent choice.
Opening Disk Management via Control Panel
Although Windows 11 emphasizes the Settings app, the traditional Control Panel still plays an important role, especially for accessing certain administrative tools like Disk Management. This method is familiar to users who have worked with older versions of Windows.
To use this approach, open the Control Panel by searching for it in the Start Menu. Once inside, navigate to “System and Security,” then click on “Windows Tools.” From there, you can select “Computer Management” and then access Disk Management from the Storage section.
While this method involves a few extra steps compared to others, it is still reliable and effective. It’s particularly useful for users who prefer the classic Windows interface and are more comfortable navigating through structured menus.
The Control Panel method also provides access to a wide range of system settings, making it a versatile option for managing your computer. If you’re already working within the Control Panel for other tasks, accessing Disk Management from there can be quite convenient.
Despite being slightly more time-consuming, this approach remains a dependable way to access Disk Management in Windows 11, especially for users who prefer traditional navigation methods.
Using Command Prompt to Launch Disk Management
For users who enjoy working with command-line tools, Command Prompt offers a quick and efficient way to open Disk Management in Windows 11. This method is particularly useful for advanced users and IT professionals who are comfortable using commands.
To begin, open Command Prompt by typing “cmd” in the Start Menu search and selecting the application. Once the Command Prompt window appears, type “diskmgmt.msc” and press Enter. This command will immediately launch the Disk Management utility.
One of the advantages of using Command Prompt is its flexibility. You can execute commands quickly without relying on graphical interfaces. This is especially helpful in situations where the user interface is not responding properly.
Additionally, Command Prompt can be used alongside other administrative commands, making it a powerful tool for system management. If you’re already working within the command-line environment, launching Disk Management from there is both logical and efficient.
This method is ideal for users who prefer precision and speed. It eliminates unnecessary clicks and allows you to access essential tools directly through commands, making it a valuable option for advanced workflows.
Opening Disk Management via Windows Terminal
Windows Terminal is a modern alternative to Command Prompt and PowerShell, offering a more advanced and customizable command-line experience. It supports multiple tabs, themes, and shell environments, making it a powerful tool for developers and power users.
To open Disk Management using Windows Terminal, launch the application from the Start Menu. Once it opens, type “diskmgmt.msc” and press Enter. The Disk Management utility will open instantly.
One of the key benefits of Windows Terminal is its versatility. You can switch between Command Prompt, PowerShell, and other shells within the same interface. This makes it highly efficient for users who work with multiple command-line environments.
Using Windows Terminal to access Disk Management is particularly useful when performing advanced system tasks or scripting operations. It integrates seamlessly with modern Windows workflows and provides a smoother user experience compared to traditional command-line tools.
If you’re already using Windows Terminal for development or system administration, this method is a natural extension of your workflow. It combines speed, flexibility, and modern design, making it a preferred choice for many advanced users.
Accessing Disk Management from Settings App
Windows 11 has introduced a redesigned Settings app, which centralizes many system configurations. While Disk Management isn’t directly visible in the main interface, you can still access it indirectly through storage settings.
To begin, open the Settings app by pressing Windows + I. Navigate to “System,” then click on “Storage.” Scroll down and look for “Advanced storage settings.” From there, you can explore options related to disks and volumes.
Although this method does not directly open the traditional Disk Management interface, it provides access to similar functionalities, such as managing storage spaces and viewing disk usage.
This approach is particularly useful for users who prefer a modern, visually appealing interface rather than traditional administrative tools. It’s also a good starting point for beginners who are learning how to manage storage in Windows 11.
While it may not replace Disk Management entirely, the Settings app offers a convenient alternative for basic storage tasks. It reflects Microsoft’s shift toward a more streamlined and user-friendly system management experience.
Creating a Desktop Shortcut for Disk Management
If you frequently use Disk Management, creating a desktop shortcut can save you a significant amount of time. This method allows you to access the utility with a single click, eliminating the need to navigate menus or type commands repeatedly.
To create a shortcut, right-click on your desktop and select “New” followed by “Shortcut.” In the location field, type “diskmgmt.msc” and click Next. Give the shortcut a name, such as “Disk Management,” and click Finish.
Once the shortcut is created, you can double-click it anytime to open Disk Management instantly. You can also pin it to the taskbar or Start Menu for even quicker access.
This method is ideal for users who regularly manage disk partitions or perform storage-related tasks. It enhances productivity by reducing the time spent searching for the tool.
Additionally, customizing your desktop with useful shortcuts can improve your overall workflow. If Disk Management is a tool you rely on frequently, creating a shortcut is a simple yet highly effective solution.
Using Task Manager to Open Disk Management
Task Manager is commonly used to monitor system performance and manage running applications, but it can also be used to launch utilities like Disk Management. This lesser-known method can be surprisingly useful in certain situations.
To use this approach, press Ctrl + Shift + Esc to open Task Manager. Click on “File” in the top menu and select “Run new task.” In the dialog box, type “diskmgmt.msc” and press Enter.
This method is particularly helpful if your system is experiencing issues and other methods are not working properly. Since Task Manager is often accessible even during system slowdowns, it provides a reliable way to launch essential tools.
Using Task Manager in this way highlights its versatility beyond just monitoring processes. It serves as a gateway to various system utilities when needed.
If you’re troubleshooting your system or dealing with performance issues, this method can be a lifesaver. It ensures that you can still access Disk Management even when other parts of the system are unresponsive.
Disclaimer
This article is for informational purposes only and is intended to guide users on accessing Disk Management in Windows 11. Steps and interface elements may vary depending on system updates and configurations. Always proceed carefully when modifying disk partitions or storage settings, as incorrect actions may result in data loss. It is recommended to back up important data before making any changes.
- Why Your iPad Split Screen Isn’t Working: Fixing Multitasking Nightmares and Getting Back to Productivity

- How to Fix Android Bluetooth Connection Issues: Complete Troubleshooting Guide for Pairing, Disconnection, and Audio Problems

- How to Use iOS Rotating WiFi Address: Complete Guide to WiFi Privacy and Device Tracking Prevention

- YouTube Watch History Paused: Complete Guide to Understanding, Managing, and Controlling Your Viewing Data

- How to Fix Battery Drain on Android: Complete Guide to Identifying Power-Consuming Apps and Extending Battery Life

Products
-
![Apple Watch Ultra 3 [GPS + Cellular 49mm] Running & Multisport Smartwatch w/Rugged Titanium Case w/Black Titanium Milanese Loop - M. Satellite Communications, Advanced Health & Fitness Tracking](https://bazaronweb.com/retailstores/wp-content/uploads/2025/09/apple-watch-320x320.jpg) Apple Watch Ultra 3 [GPS + Cellular 49mm] Running & Multisport Smartwatch w/Rugged Titanium Case w/Black Titanium Milanese Loop - M. Satellite Communications, Advanced Health & Fitness Tracking
Apple Watch Ultra 3 [GPS + Cellular 49mm] Running & Multisport Smartwatch w/Rugged Titanium Case w/Black Titanium Milanese Loop - M. Satellite Communications, Advanced Health & Fitness Tracking
-
 Apple iPad mini (A17 Pro): Apple Intelligence, 8.3-inch Liquid Retina Display, 256GB, Wi-Fi 6E, 12MP Front/12MP Back Camera, Touch ID, All-Day Battery Life — Purple
-
 Apple AirPods Max Wireless Over-Ear Headphones, Active Noise Cancelling, Transparency Mode, Personalized Spatial Audio, Dolby Atmos, Bluetooth Headphones for iPhone – Space Gray
-
 Apple AirPods Pro 2 Wireless Earbuds, Active Noise Cancellation, Hearing Aid Feature, Bluetooth Headphones, Transparency, Personalized Spatial Audio, High-Fidelity Sound, H2 Chip, USB-C Charging
-
Leo Creation 144 TC Cotton Double Jaipuri Prints Flat Bedsheet(Pack of 1, Blue, Gree, Red, Grey, Light Grey)
Original price was: ₹2,999.00.₹329.00Current price is: ₹329.00.
Leave a Reply