Discounted Products
-
 Leo Creation 144 TC Cotton Double Jaipuri Prints Flat Bedsheet(Pack of 1, Blue, Gree, Red, Grey, Light Grey)
Original price was: ₹2,999.00.₹329.00Current price is: ₹329.00.
Leo Creation 144 TC Cotton Double Jaipuri Prints Flat Bedsheet(Pack of 1, Blue, Gree, Red, Grey, Light Grey)
Original price was: ₹2,999.00.₹329.00Current price is: ₹329.00.
-
 Home Garage 210 TC Cotton King Floral Fitted (Elastic) Bedsheet(Pack of 1, Grey)
Original price was: ₹999.00.₹299.00Current price is: ₹299.00.
Home Garage 210 TC Cotton King Floral Fitted (Elastic) Bedsheet(Pack of 1, Grey)
Original price was: ₹999.00.₹299.00Current price is: ₹299.00.
-
 Goodrik 140 TC Cotton Double 3D Printed Flat Bedsheet(Pack of 1, Brown)
Original price was: ₹499.00.₹229.00Current price is: ₹229.00.
Goodrik 140 TC Cotton Double 3D Printed Flat Bedsheet(Pack of 1, Brown)
Original price was: ₹499.00.₹229.00Current price is: ₹229.00.
-
 GLOBALSHOP 350 TC Microfiber Double Floral Flat Bedsheet(Pack of 1, Multicolor)
Original price was: ₹1,250.00.₹263.00Current price is: ₹263.00.
GLOBALSHOP 350 TC Microfiber Double Floral Flat Bedsheet(Pack of 1, Multicolor)
Original price was: ₹1,250.00.₹263.00Current price is: ₹263.00.
-
 RisingStar 250 TC Microfiber King Printed Fitted (Elastic) Bedsheet(Pack of 1, FITTED-ROUND-CIRCLES-PREMIUM)
Original price was: ₹2,299.00.₹299.00Current price is: ₹299.00.
RisingStar 250 TC Microfiber King Printed Fitted (Elastic) Bedsheet(Pack of 1, FITTED-ROUND-CIRCLES-PREMIUM)
Original price was: ₹2,299.00.₹299.00Current price is: ₹299.00.
-
 Home Garage 210 TC Cotton King Floral Fitted (Elastic) Bedsheet(Pack of 1, Fitted Black Green)
Original price was: ₹1,299.00.₹299.00Current price is: ₹299.00.
Home Garage 210 TC Cotton King Floral Fitted (Elastic) Bedsheet(Pack of 1, Fitted Black Green)
Original price was: ₹1,299.00.₹299.00Current price is: ₹299.00.
-
 Home Garage 180 TC Cotton King 3D Printed Flat Bedsheet(Pack of 1, White)
Original price was: ₹999.00.₹229.00Current price is: ₹229.00.
Home Garage 180 TC Cotton King 3D Printed Flat Bedsheet(Pack of 1, White)
Original price was: ₹999.00.₹229.00Current price is: ₹229.00.
-
 Home Sizzler 153 cm (5 ft) Polyester Room Darkening Window Curtain (Pack Of 2)(Floral, Maroon)
Original price was: ₹799.00.₹299.00Current price is: ₹299.00.
Home Sizzler 153 cm (5 ft) Polyester Room Darkening Window Curtain (Pack Of 2)(Floral, Maroon)
Original price was: ₹799.00.₹299.00Current price is: ₹299.00.
-
 Panipat Textile Hub 152.4 cm (5 ft) Polyester Window Curtain (Pack Of 2)(Solid, Aqua)
Original price was: ₹1,899.00.₹299.00Current price is: ₹299.00.
Panipat Textile Hub 152.4 cm (5 ft) Polyester Window Curtain (Pack Of 2)(Solid, Aqua)
Original price was: ₹1,899.00.₹299.00Current price is: ₹299.00.
-
 Home Sizzler 214 cm (7 ft) Polyester Semi Transparent Door Curtain (Pack Of 2)(Floral, Maroon)
Original price was: ₹1,199.00.₹399.00Current price is: ₹399.00.
Home Sizzler 214 cm (7 ft) Polyester Semi Transparent Door Curtain (Pack Of 2)(Floral, Maroon)
Original price was: ₹1,199.00.₹399.00Current price is: ₹399.00.
-
 Home Sizzler 153 cm (5 ft) Polyester Room Darkening Window Curtain (Pack Of 2)(Floral, Brown)
Original price was: ₹799.00.₹299.00Current price is: ₹299.00.
Home Sizzler 153 cm (5 ft) Polyester Room Darkening Window Curtain (Pack Of 2)(Floral, Brown)
Original price was: ₹799.00.₹299.00Current price is: ₹299.00.
-
 Stella Creations 214 cm (7 ft) Polyester Room Darkening Door Curtain (Pack Of 2)(Abstract, Brown)
Original price was: ₹1,299.00.₹449.00Current price is: ₹449.00.
Stella Creations 214 cm (7 ft) Polyester Room Darkening Door Curtain (Pack Of 2)(Abstract, Brown)
Original price was: ₹1,299.00.₹449.00Current price is: ₹449.00.
-
 Homefab India 152.5 cm (5 ft) Polyester Room Darkening Window Curtain (Pack Of 2)(Floral, Light Blue)
Original price was: ₹1,199.00.₹319.00Current price is: ₹319.00.
Homefab India 152.5 cm (5 ft) Polyester Room Darkening Window Curtain (Pack Of 2)(Floral, Light Blue)
Original price was: ₹1,199.00.₹319.00Current price is: ₹319.00.
-
 Urban Home 214 cm (7 ft) PVC Transparent Door Curtain Single Curtain(Solid, Off White)
Original price was: ₹699.00.₹203.00Current price is: ₹203.00.
Urban Home 214 cm (7 ft) PVC Transparent Door Curtain Single Curtain(Solid, Off White)
Original price was: ₹699.00.₹203.00Current price is: ₹203.00.
-
 Panipat Textile Hub 213 cm (7 ft) Polyester Door Curtain (Pack Of 2)(Solid, Brown)
Original price was: ₹1,199.00.₹349.00Current price is: ₹349.00.
Panipat Textile Hub 213 cm (7 ft) Polyester Door Curtain (Pack Of 2)(Solid, Brown)
Original price was: ₹1,199.00.₹349.00Current price is: ₹349.00.
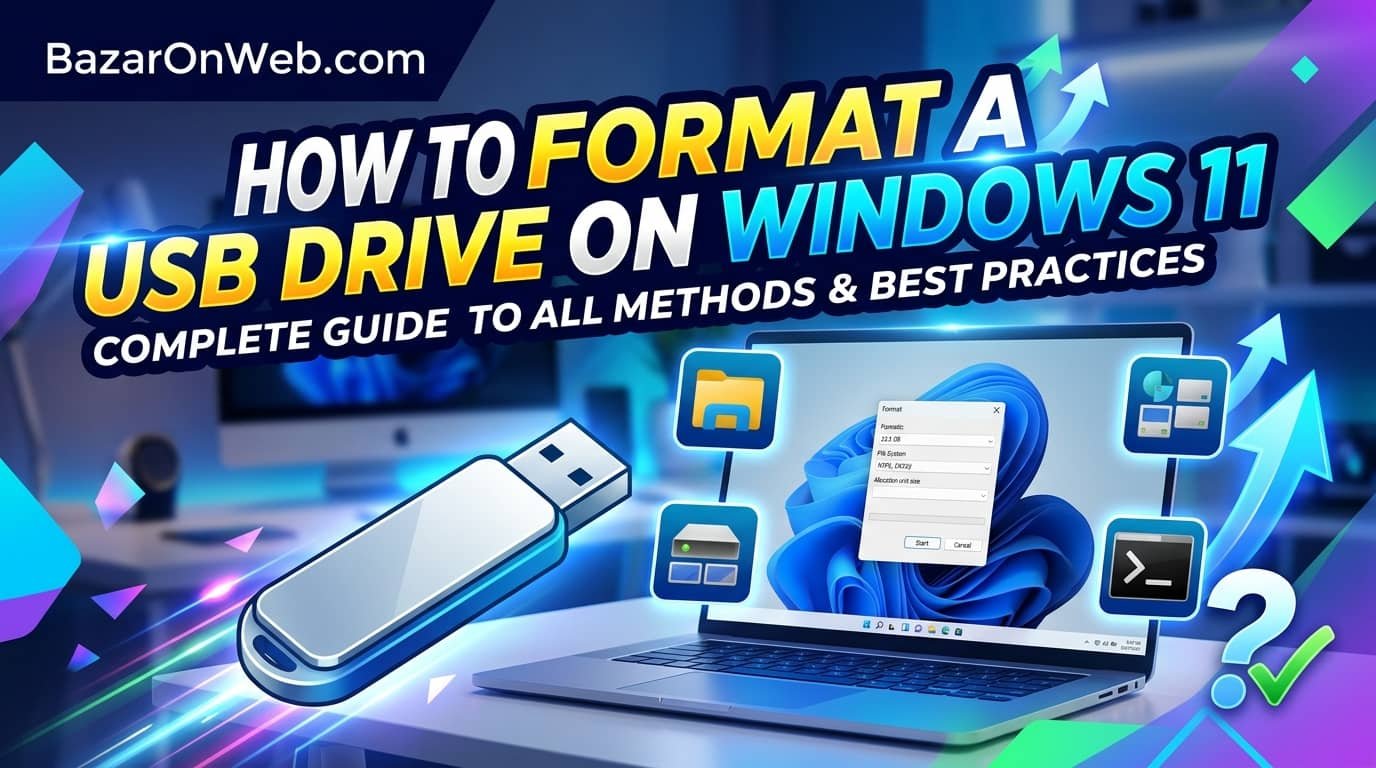
I used to dread formatting USB drives because I thought it required technical knowledge and specialized software. After discovering that Windows 11 includes multiple built-in methods for formatting USB drives, I realized this common task is far simpler than I’d assumed. Formatting a USB drive isn’t just about deleting files—it completely erases all data and de-indexes storage space, making previously-used space available for new files. This makes formatting valuable not only when you want to completely clear a drive but also when you want to restore it to factory conditions or fix issues with corrupted files. Whether you’re preparing a USB drive for file transfer, creating bootable installation media, fixing a malfunctioning drive, or simply clearing sensitive data, understanding the formatting options available on Windows 11 empowers you to handle any situation.
What surprised me most when researching USB formatting is that Windows 11 provides five completely different methods, each suited to different situations and preferences. Some methods are extremely simple and require just a few clicks, while others provide advanced options for users with specific requirements. Understanding these different approaches helps you choose the most appropriate method for your situation rather than fumbling through trial-and-error. In this comprehensive guide, I’ll walk you through every method available for formatting USB drives on Windows 11, explain what each method does and when to use it, and provide step-by-step instructions for implementing each one successfully. I’ll also explain what formatting actually does, why it’s important to understand the difference between quick formatting and full formatting, and how to avoid common formatting mistakes.
Meta Description: Format USB drive on Windows 11 using five methods: File Explorer, Disk Management, Command Prompt, Settings, and third-party tools. Complete step-by-step guide.
Meta Social OG Description: 💾 Need to format USB drive on Windows 11? We show 5 methods from simple to advanced. Quick formatting, full format, everything explained!
1. Understanding USB Formatting: What It Does and Why It Matters
Formatting a USB drive is a process that completely erases all data stored on the drive and prepares it for fresh use. Unlike simply deleting files, which removes file references while leaving data physically on the drive, formatting truly erases data at a deeper level. When you format a drive, the operating system removes the file system structure that organizes files and data into folders. This makes the entire drive appear empty and ready for new files. The drive’s storage space is de-indexed, meaning the space previously occupied by files is now marked as available for new data.
Understanding the difference between quick formatting and full formatting is important. Quick formatting removes file system references but doesn’t actually overwrite data—it simply makes the drive appear empty. Full formatting actually overwrites all storage space with zeros, completely removing any trace of previous data. Quick formatting takes seconds, while full formatting can take minutes to hours depending on drive capacity. For typical users simply clearing a drive for reuse, quick formatting is sufficient. For security-conscious users wanting to ensure deleted data can’t be recovered, full formatting or specialized data wiping tools are more appropriate. Understanding what formatting does helps you appreciate why formatting completely clears a drive and why attempting to recover formatted files is extremely difficult unless you use specialized recovery tools immediately after accidental formatting.
2. Why Formatting USB Drives Becomes Necessary
USB drives occasionally require formatting for various practical reasons. The most common reason is clearing all data to prepare the drive for new use or transfer to another person. When you’ve used a USB drive for file storage and later want to use it for different purposes, formatting ensures old files don’t remain and potentially consume storage space or create confusion. Additionally, formatting is necessary when a USB drive becomes corrupted. If files become inaccessible, the drive shows as full despite appearing empty, or the drive refuses to accept new files, corruption is usually the cause. Formatting often resolves corruption by rebuilding the file system structure from scratch.
Another common reason for formatting is creating bootable installation media. When creating Windows installation media or other bootable drives, formatting ensures the drive is in a clean state before the bootable content is written. Additionally, formatting solves file system incompatibility issues. If a drive is formatted with a file system incompatible with your needs—for example, a drive formatted as NTFS when you need FAT32 for compatibility with specific devices—reformatting with the appropriate file system solves the problem. Furthermore, formatting is necessary for security purposes. Before selling, recycling, or donating a USB drive, formatting ensures personal or sensitive files are removed and the drive can’t be recovered by the recipient. Understanding these various use cases helps you appreciate why formatting is an essential skill and why Windows provides multiple methods to accomplish it.
3. Preparation Before Formatting: Backing Up Important Data
Before formatting any USB drive, the most critical step is backing up any important data you want to preserve. Formatting is permanent—once you format a drive, recovering data requires specialized data recovery software and works only if no new data has been written to the drive. If you format a drive containing important files by mistake, you have a narrow window before recovery becomes impossible. To protect yourself, always identify what data you want to keep and copy it to your computer’s hard drive or another backup location before formatting.
Additionally, ensure you’re formatting the correct drive. Before you begin any formatting process, verify you’ve selected the right USB drive. This is critical because formatting the wrong drive could wipe your entire computer’s hard drive if you accidentally select it. When connecting your USB drive, open File Explorer and note its drive letter (likely D:, E:, or F:). Double-check this drive letter before confirming formatting in any tool. If you’re unsure which drive is which, inspect the drives’ properties to verify capacity and other identifying information. Take extra time for this verification step—it’s far better to spend an extra minute confirming you have the right drive than to accidentally format your computer’s hard drive or another important storage device. After backing up data and confirming you have the correct drive selected, you can confidently proceed with formatting.
4. Method 1: Formatting Through File Explorer (Simplest Approach)
File Explorer provides the simplest method for formatting USB drives, requiring no technical knowledge or specialized tools. Connect your USB drive to your Windows 11 computer via USB port. Open File Explorer by pressing Windows Key + E or clicking the File Explorer icon. Locate your USB drive in the left sidebar under “This PC” or in the main file list. Right-click the USB drive and select “Format” from the context menu. A formatting dialog appears asking you to confirm the action and specify formatting options.
In the formatting dialog, you can name your USB drive (the name you enter becomes the drive label), select the file system (NTFS or FAT32—NTFS is standard for modern Windows, while FAT32 is compatible with older devices), and enable “Quick Format” if desired. NTFS is the recommended choice for most situations, providing better performance and file size capabilities. For drives that need compatibility with older devices like some cameras or car stereos, select FAT32. Leave “Quick Format” checked unless you have specific security requirements demanding full formatting. After configuring settings, click “Start” to begin formatting. A warning appears reminding you that formatting will erase all data. Click “OK” to confirm. The formatting process takes seconds with quick format enabled. When complete, your USB drive is empty and ready for new files. This method is ideal for users seeking simplicity and avoiding technical details.
5. Method 2: Using Disk Management for Advanced Control and Partitioning
Disk Management provides more sophisticated formatting options and allows partitioning USB drives into multiple sections if desired. Open Disk Management by right-clicking the Start button and selecting “Disk Management.” Wait for Disk Management to load and display all storage devices. Find your USB drive in the lower section of the window—it’s identified by its capacity and drive letter. Look for your USB drive name and capacity to ensure you’ve found the correct drive.
Right-click the USB drive’s partition and select “Format.” A dialog appears allowing you to specify the drive label, file system (NTFS, FAT32, or exFAT), and whether to enable quick format. Choose appropriate settings—NTFS is typically best for Windows, while FAT32 provides compatibility with older devices. After configuring settings, click “OK” to confirm formatting. The process completes quickly for quick format. Additionally, Disk Management allows creating multiple partitions on a single USB drive if desired. This is useful for keeping different file types separate or maintaining both bootable content and regular storage. To create partitions, right-click unallocated space and select “New Simple Volume,” then specify the partition size. This method is more complex than File Explorer but provides greater control and flexibility for advanced users with specific requirements.
6. Method 3: Command Prompt for Powerful Control and Scripting
Command Prompt provides powerful formatting capabilities through text-based commands, suitable for advanced users comfortable with command-line interfaces. This method also enables scripting for automating formatting tasks on multiple drives. Open Command Prompt as Administrator by right-clicking Start and selecting “Windows Terminal (Admin),” then switching to the Command Prompt tab. Identify your USB drive by running “wmic logicaldisk get name, size, VolumeName” which lists all drives with their letters, capacity, and names. Find your USB drive by its size or identifying characteristics.
To format using Command Prompt, use the command: “format X: /FS:NTFS /Q” where X is your drive letter, NTFS is the file system, and /Q enables quick format. For example, “format E: /FS:NTFS /Q” formats drive E: as NTFS with quick format. To perform full format (slower but more secure), omit the /Q parameter: “format X: /FS:NTFS”. To format as FAT32, use “format X: /FS:FAT32 /Q”. Before executing formatting commands, verify you have the correct drive letter—formatting the wrong drive has serious consequences. After running the format command, Command Prompt asks for confirmation. Type “Y” and press Enter to proceed. The formatting process begins immediately. Command Prompt displays progress and completion status. This method is powerful but requires caution—command-line interfaces provide no safety confirmations like graphical interfaces, making mistakes more consequential.
7. Method 4: Formatting Through Windows Settings Application
Windows 11’s Settings application provides another intuitive method for formatting USB drives accessible through the modern Windows interface. Connect your USB drive and open Settings by pressing Windows Key + I or clicking Settings in the Start menu. Navigate to System > Storage to view all storage devices connected to your computer. Scroll down to find your USB drive listed under “Other locations.” Click your USB drive to see options for managing it. You’ll see a “Format” button or option—click it to begin formatting.
A dialog appears requesting confirmation and allowing you to specify formatting parameters. Choose your desired file system (NTFS recommended, FAT32 for compatibility), enter a drive label if desired, and confirm that you want to erase all data. After confirming, Windows proceeds with formatting. The process completes quickly, and your USB drive becomes empty and ready for new files. This method combines the simplicity of File Explorer with the additional control of settings options. It’s particularly useful if you prefer using Windows 11’s modern Settings interface rather than legacy tools like Disk Management. The Settings method is reliable and provides appropriate formatting options for typical users without overwhelming technical details. All three graphical methods (File Explorer, Disk Management, and Settings) produce identical results; the choice depends on your preference for interface and familiarity with each tool.
8. Method 5: Third-Party Formatting Tools for Specialized Requirements
Beyond Windows built-in tools, numerous third-party formatting applications provide specialized features for specific formatting needs. Tools like MiniTool Partition Wizard, EaseUS Partition Master, and similar software offer advanced formatting options including secure data wiping, partition recovery, and specialized formatting for specific device types. These tools are valuable when Windows built-in methods fail or when you have specific requirements like creating specialized partition schemes or performing military-grade data destruction.
For secure data wiping ensuring formatted data cannot be recovered, tools like Eraser or CCleaner provide multiple data overwriting passes that make recovery virtually impossible. These are appropriate for formatting drives before recycling or donating them when the drive contained sensitive information. For creating bootable USB drives specifically, tools like Rufus simplify the process of writing bootable images and formatting simultaneously. For recovering data from accidentally formatted drives, data recovery tools like EaseUS Data Recovery or Recuva attempt to recover data if used immediately after accidental formatting. However, for most users, Windows built-in formatting methods are perfectly adequate. Third-party tools are most appropriate when you have specific requirements beyond basic formatting. Choose reputable tools from established developers with strong user reviews and proven track records. Avoid suspicious tools from unknown sources that claim special formatting abilities but lack credibility or user verification.
9. Troubleshooting Formatting Failures and Corrupted Drives
Occasionally USB drives refuse to format or formatting fails with error messages. Understanding common causes and solutions helps resolve these situations. The most common cause is the drive being write-protected—many USB drives include physical write-protection switches that must be disabled before formatting. Inspect your USB drive for a small switch and toggle it to the unlocked position if present. Additionally, some drives have software write protection that can be disabled through manufacturer utilities or specialized tools. If your drive shows as write-protected, searching for your drive model plus “write protection removal” usually provides solutions.
Another common problem is the drive being in use by Windows or another application. If Windows is using the drive for system processes or another application has files open on the drive, formatting fails. Close all applications accessing the drive, and if Windows has files open, reboot your computer then immediately format before any applications automatically access the drive. Additionally, if the drive is severely corrupted and Windows doesn’t recognize it, Disk Management might not display it. In this case, use Command Prompt’s “diskpart” utility to clean and reinitialize the drive. Open Command Prompt as Administrator, type “diskpart”, then “list disk” to see all drives. Type “select disk X” where X is your USB drive number (verify size before selecting), then “clean” to erase the drive completely. This low-level approach resolves corruption that prevents higher-level formatting. If these troubleshooting steps don’t resolve the problem, the drive hardware may be failing and requiring replacement.
10. Best Practices for USB Drive Maintenance and Preventing Formatting Necessity
Rather than frequently formatting USB drives, maintaining them properly prevents corruption and data issues that necessitate formatting. First, always safely eject USB drives before removing them from computers. Open File Explorer, right-click your USB drive, select “Eject,” and wait for Windows confirmation before disconnecting. Safely ejecting ensures all data is written and the drive is properly closed, preventing corruption. Simply unplugging drives risks file system corruption that later requires formatting to resolve.
Second, avoid filling USB drives to absolute capacity. Maintaining at least 10% free space helps with file system operations and prevents performance degradation. Third, don’t store critical files only on USB drives—USB drives are portable and convenient but less reliable than permanent storage. Always maintain backups of important data in multiple locations. Fourth, keep your USB drives clean and protected from physical damage. Protect the connector from bending or corrosion by using drive cases or caps. Store drives in dry environments away from extreme temperatures. Fifth, periodically check your drives for problems by opening File Explorer and verifying files are accessible and the drive functions normally. If you notice slow performance or inaccessible files, address problems immediately rather than waiting for complete failure. Finally, update USB drive firmware if your drive manufacturer provides updates—some firmware updates improve reliability and compatibility. Taking these preventive measures keeps your USB drives functioning properly for years without frequent formatting.
Disclaimer
This article provides guidance on formatting USB drives in Windows 11 using various methods. The information is intended for educational purposes to help users safely format USB drives. Specific procedures, tool availability, and formatting options may vary depending on your USB drive model, Windows 11 version, and individual circumstances.
Important Disclaimers:
- Formatting permanently erases all data on a USB drive; ensure you have backed up important files before formatting
- Verifying you have selected the correct drive is critical—formatting the wrong drive could erase important data
- Some USB drives include write-protection mechanisms that must be disabled before formatting
- Formatting methods described work for USB drives; using these methods on your computer’s hard drive or other system drives could render your system unusable
- Quick format and full format have different security implications; use full format when security of deleted data is important
- Third-party formatting tools may have different interfaces and options than described; follow tool-specific instructions carefully
Backup Requirements:
- Always back up any important data from USB drives before formatting
- Data recovery tools can sometimes recover data after formatting only if used immediately; the longer you wait, the harder recovery becomes
- After accidental formatting, avoid using the drive for new files if you might need to recover previously-stored data
Hardware Considerations:
- Very old USB drives or drives with failing hardware may not format properly
- Write-protection switches must be in the unlocked position for formatting to work
- If drives consistently fail to format despite multiple attempts, hardware failure is likely
- Some USB drives have limited write cycles; excessive formatting may eventually cause hardware failure
File System Selection:
- NTFS is recommended for modern Windows systems and provides better performance and features
- FAT32 is compatible with older devices and some non-Windows systems but has file size limitations
- exFAT provides compatibility between Windows and Mac systems
- Choose the appropriate file system based on your intended use
Drive Compatibility:
- Formatting USB drives works on Windows 11; procedures may differ slightly on other Windows versions or operating systems
- External hard drives and other storage devices can also be formatted using these methods
- Some specialized USB devices may require manufacturer-specific formatting tools
Performance Impact:
- Formatting takes seconds with quick format enabled
- Full format (secure formatting) can take minutes to hours depending on drive capacity
- Very large USB drives (256GB or larger) may take extended time for full formatting
Security Considerations:
- Quick format removes file references but doesn’t prevent data recovery; use full format for security-sensitive deletion
- For maximum security, use specialized data wiping tools that perform multiple overwriting passes
- Before disposing of USB drives containing sensitive information, perform secure formatting or physical destruction
Third-Party Tool Safety:
- Download third-party formatting tools only from official developer websites or reputable software repositories
- Be cautious about tools requiring extensive administrator privileges beyond what’s necessary for formatting
- Read user reviews and verify tool reputation before using third-party tools
- Avoid tools from unknown or suspicious sources
Troubleshooting Caution:
- Command Prompt formatting requires careful attention to drive letter selection; mistakes have serious consequences
- Diskpart commands provide low-level drive control and require caution to avoid data loss
- If unfamiliar with command-line tools, stick to graphical formatting methods
When Professional Help Is Needed:
- If USB drive fails to format despite multiple attempts using different methods, hardware failure may be responsible
- If data recovery is critical after accidental formatting, professional data recovery services may be necessary
- If drives show physical damage, professional assessment is recommended
Liability:
We are not responsible for data loss, accidental formatting of wrong drives, or other consequences resulting from formatting procedures described in this article. Users assume full responsibility for verifying they have selected the correct drive before formatting and for backing up important data beforehand. Formatting is largely irreversible; only attempt recovery if absolutely necessary and using appropriate tools immediately after accidental formatting. Most formatting procedures are straightforward and safe when proper precautions are taken, but mistakes can have serious consequences.
About the Author
Jessica Miller is a marketing manager and Windows power user who believes every user should understand basic drive maintenance and formatting. With expertise in storage management, USB drive troubleshooting, and practical technology solutions, she helps busy professionals maintain their digital storage devices effectively. When she’s not writing comprehensive tech guides or managing her marketing team, she’s exploring storage technologies, testing formatting tools, and helping friends manage their USB drives and storage devices properly.
- How to Format a USB Drive on Windows 11: Complete Guide to All Methods and Best Practices

- “An Error Occurred While Troubleshooting” in Windows 11: Complete Fixes and Solutions

- 5 Methods to Install Missing Drivers on Windows 11: Complete Guide to Finding and Installing Device Drivers

- WinSxS Folder Windows 11: What It Is, Why It’s Growing, and How to Safely Reduce Its Size

- macOS Tahoe Performance Tweaks: New Features and Hidden Settings That Speed Up Your Mac

Products
-
![Apple Watch Ultra 3 [GPS + Cellular 49mm] Running & Multisport Smartwatch w/Rugged Titanium Case w/Black Titanium Milanese Loop - M. Satellite Communications, Advanced Health & Fitness Tracking](https://bazaronweb.com/retailstores/wp-content/uploads/2025/09/apple-watch-320x320.jpg) Apple Watch Ultra 3 [GPS + Cellular 49mm] Running & Multisport Smartwatch w/Rugged Titanium Case w/Black Titanium Milanese Loop - M. Satellite Communications, Advanced Health & Fitness Tracking
Apple Watch Ultra 3 [GPS + Cellular 49mm] Running & Multisport Smartwatch w/Rugged Titanium Case w/Black Titanium Milanese Loop - M. Satellite Communications, Advanced Health & Fitness Tracking
-
 Apple iPad mini (A17 Pro): Apple Intelligence, 8.3-inch Liquid Retina Display, 256GB, Wi-Fi 6E, 12MP Front/12MP Back Camera, Touch ID, All-Day Battery Life — Purple
-
 Apple AirPods Max Wireless Over-Ear Headphones, Active Noise Cancelling, Transparency Mode, Personalized Spatial Audio, Dolby Atmos, Bluetooth Headphones for iPhone – Space Gray
-
 Apple AirPods Pro 2 Wireless Earbuds, Active Noise Cancellation, Hearing Aid Feature, Bluetooth Headphones, Transparency, Personalized Spatial Audio, High-Fidelity Sound, H2 Chip, USB-C Charging
-
Leo Creation 144 TC Cotton Double Jaipuri Prints Flat Bedsheet(Pack of 1, Blue, Gree, Red, Grey, Light Grey)
Original price was: ₹2,999.00.₹329.00Current price is: ₹329.00.
Leave a Reply