Discounted Products
-
 Home Garage 210 TC Cotton King Floral Fitted (Elastic) Bedsheet(Pack of 1, Grey)
Original price was: ₹999.00.₹299.00Current price is: ₹299.00.
Home Garage 210 TC Cotton King Floral Fitted (Elastic) Bedsheet(Pack of 1, Grey)
Original price was: ₹999.00.₹299.00Current price is: ₹299.00.
-
 Goodrik 140 TC Cotton Double 3D Printed Flat Bedsheet(Pack of 1, Brown)
Original price was: ₹499.00.₹229.00Current price is: ₹229.00.
Goodrik 140 TC Cotton Double 3D Printed Flat Bedsheet(Pack of 1, Brown)
Original price was: ₹499.00.₹229.00Current price is: ₹229.00.
-
 GLOBALSHOP 350 TC Microfiber Double Floral Flat Bedsheet(Pack of 1, Multicolor)
Original price was: ₹1,250.00.₹263.00Current price is: ₹263.00.
GLOBALSHOP 350 TC Microfiber Double Floral Flat Bedsheet(Pack of 1, Multicolor)
Original price was: ₹1,250.00.₹263.00Current price is: ₹263.00.
-
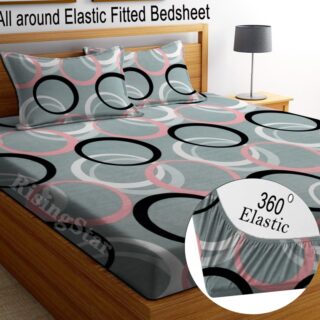 RisingStar 250 TC Microfiber King Printed Fitted (Elastic) Bedsheet(Pack of 1, FITTED-ROUND-CIRCLES-PREMIUM)
Original price was: ₹2,299.00.₹299.00Current price is: ₹299.00.
RisingStar 250 TC Microfiber King Printed Fitted (Elastic) Bedsheet(Pack of 1, FITTED-ROUND-CIRCLES-PREMIUM)
Original price was: ₹2,299.00.₹299.00Current price is: ₹299.00.
-
 Home Garage 210 TC Cotton King Floral Fitted (Elastic) Bedsheet(Pack of 1, Fitted Black Green)
Original price was: ₹1,299.00.₹299.00Current price is: ₹299.00.
Home Garage 210 TC Cotton King Floral Fitted (Elastic) Bedsheet(Pack of 1, Fitted Black Green)
Original price was: ₹1,299.00.₹299.00Current price is: ₹299.00.
-
 Home Garage 180 TC Cotton King 3D Printed Flat Bedsheet(Pack of 1, White)
Original price was: ₹999.00.₹229.00Current price is: ₹229.00.
Home Garage 180 TC Cotton King 3D Printed Flat Bedsheet(Pack of 1, White)
Original price was: ₹999.00.₹229.00Current price is: ₹229.00.
-
 Panipat Textile Hub 152.4 cm (5 ft) Polyester Window Curtain (Pack Of 2)(Solid, Aqua)
Original price was: ₹1,899.00.₹299.00Current price is: ₹299.00.
Panipat Textile Hub 152.4 cm (5 ft) Polyester Window Curtain (Pack Of 2)(Solid, Aqua)
Original price was: ₹1,899.00.₹299.00Current price is: ₹299.00.
-
 Home Sizzler 214 cm (7 ft) Polyester Semi Transparent Door Curtain (Pack Of 2)(Floral, Maroon)
Original price was: ₹1,199.00.₹399.00Current price is: ₹399.00.
Home Sizzler 214 cm (7 ft) Polyester Semi Transparent Door Curtain (Pack Of 2)(Floral, Maroon)
Original price was: ₹1,199.00.₹399.00Current price is: ₹399.00.
-
 Home Sizzler 153 cm (5 ft) Polyester Room Darkening Window Curtain (Pack Of 2)(Floral, Brown)
Original price was: ₹799.00.₹299.00Current price is: ₹299.00.
Home Sizzler 153 cm (5 ft) Polyester Room Darkening Window Curtain (Pack Of 2)(Floral, Brown)
Original price was: ₹799.00.₹299.00Current price is: ₹299.00.
-
 Stella Creations 214 cm (7 ft) Polyester Room Darkening Door Curtain (Pack Of 2)(Abstract, Brown)
Original price was: ₹1,299.00.₹449.00Current price is: ₹449.00.
Stella Creations 214 cm (7 ft) Polyester Room Darkening Door Curtain (Pack Of 2)(Abstract, Brown)
Original price was: ₹1,299.00.₹449.00Current price is: ₹449.00.
-
 Homefab India 152.5 cm (5 ft) Polyester Room Darkening Window Curtain (Pack Of 2)(Floral, Light Blue)
Original price was: ₹1,199.00.₹319.00Current price is: ₹319.00.
Homefab India 152.5 cm (5 ft) Polyester Room Darkening Window Curtain (Pack Of 2)(Floral, Light Blue)
Original price was: ₹1,199.00.₹319.00Current price is: ₹319.00.
-
 Urban Home 214 cm (7 ft) PVC Transparent Door Curtain Single Curtain(Solid, Off White)
Original price was: ₹699.00.₹203.00Current price is: ₹203.00.
Urban Home 214 cm (7 ft) PVC Transparent Door Curtain Single Curtain(Solid, Off White)
Original price was: ₹699.00.₹203.00Current price is: ₹203.00.
-
 Panipat Textile Hub 213 cm (7 ft) Polyester Door Curtain (Pack Of 2)(Solid, Brown)
Original price was: ₹1,199.00.₹349.00Current price is: ₹349.00.
Panipat Textile Hub 213 cm (7 ft) Polyester Door Curtain (Pack Of 2)(Solid, Brown)
Original price was: ₹1,199.00.₹349.00Current price is: ₹349.00.
-
 Home Sizzler 214 cm (7 ft) Polyester Semi Transparent Door Curtain (Pack Of 2)(Floral, Brown)
Original price was: ₹999.00.₹349.00Current price is: ₹349.00.
Home Sizzler 214 cm (7 ft) Polyester Semi Transparent Door Curtain (Pack Of 2)(Floral, Brown)
Original price was: ₹999.00.₹349.00Current price is: ₹349.00.
-
 Panipat Textile Hub 213 cm (7 ft) Polyester Semi Transparent Door Curtain (Pack Of 2)(Floral, Brown)
Original price was: ₹899.00.₹299.00Current price is: ₹299.00.
Panipat Textile Hub 213 cm (7 ft) Polyester Semi Transparent Door Curtain (Pack Of 2)(Floral, Brown)
Original price was: ₹899.00.₹299.00Current price is: ₹299.00.
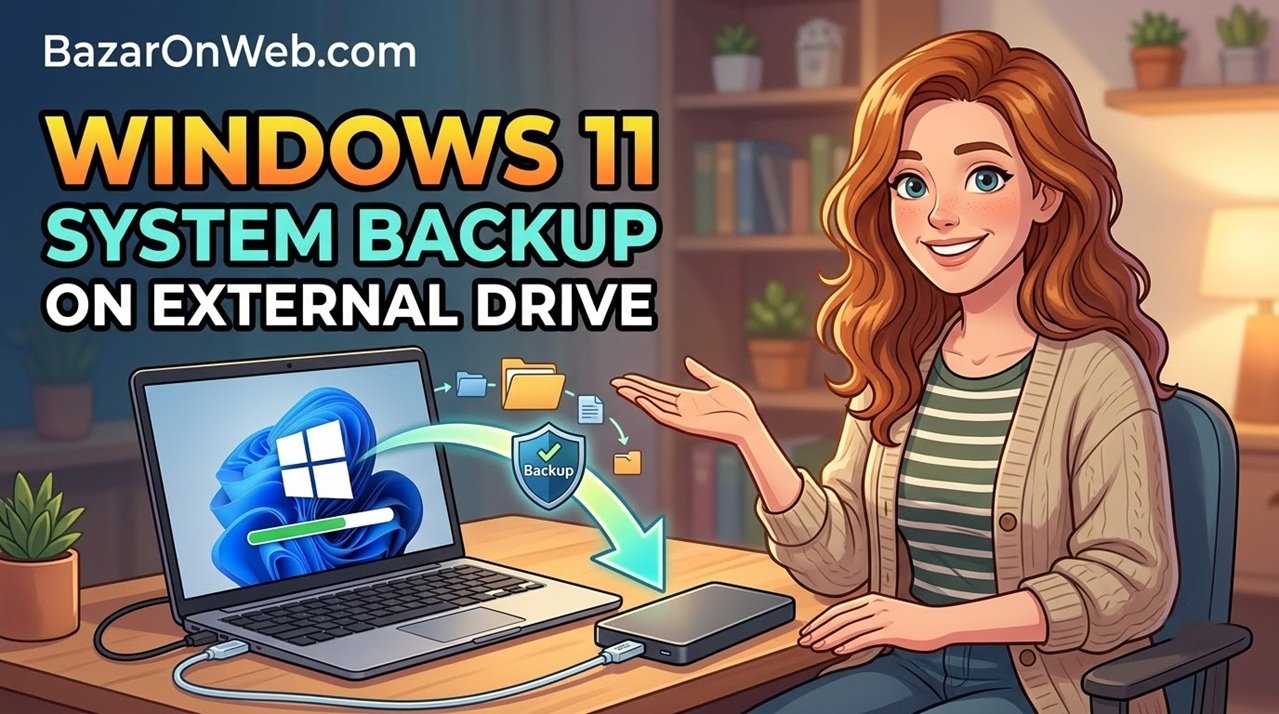
Your computer holds much more than documents and photos. It contains installed applications, personal settings, work projects, and other information you rely on every day. If Windows suddenly stops working or your internal hard drive fails, losing access to that information can be stressful.
The good news is that you can create a backup of your Windows 11 computer and save it to an external hard drive. Windows includes a traditional utility called Backup and Restore (Windows 7) that can create a system image of your Windows installation and selected partitions.
A system image is a snapshot of your computer at a particular point in time. It can help you restore Windows, installed programs, settings, and backed-up files to an earlier state if something goes wrong.
In this guide, I’ll walk you through the process step by step, from connecting your external drive to checking your backup. I’ll also explain how to troubleshoot common problems and prepare for recovery.
What Is a Windows 11 System Image Backup?
A system image is a copy of your Windows installation and the partitions needed to restore it. Depending on your computer’s configuration, it can include Windows, installed applications, system settings, and personal files stored on the selected partitions.
Windows uses snapshot technology to capture data consistently while creating the image. This process is associated with the Volume Shadow Copy Service, commonly known as VSS.
A system image can be useful in several situations:
- Windows becomes corrupted after a software update.
- Your computer experiences a serious system problem.
- Your internal drive fails and you need to restore a backed-up system to a replacement drive.
- You want to recover Windows without reinstalling every application individually.
However, a system image is not necessarily a complete backup of every drive connected to your computer. You should check which partitions are included before starting the process.
For everyday protection, I also recommend keeping a separate backup of important documents, photos, and work files. That way, you have another copy of your most valuable information even if restoring the entire system is unnecessary.
What You Need Before Starting
Before creating your Windows 11 backup, make sure you have the following:
- An external hard drive or SSD: Choose a drive with enough free space for the selected partitions. A 1TB drive may be suitable for many computers, depending on how much data you need to back up.
- A working Windows 11 computer: Keep your laptop connected to its charger or your desktop connected to a reliable power supply.
- A USB connection: Make sure the external drive is connected securely.
- Enough time: The process may take several minutes or a few hours, depending on the amount of data and the speed of your drives.
Check that the external drive does not contain files you might accidentally erase. You generally do not need to format the drive just to start a backup.
How to Back Up Windows 11 to an External Drive
Let’s walk through the process using the traditional Windows backup utility.
Step 1: Connect Your External Hard Drive
Connect your external hard drive or SSD to your computer using a USB port.
Open File Explorer by pressing Windows + E on your keyboard. Select This PC from the left-hand panel and locate your external drive under Devices and drives.
Check the drive letter and available storage. If several drives are connected, make sure you identify the correct one before continuing.
Step 2: Open Backup and Restore
Follow these steps to open the built-in backup utility:
- Press Windows + R to open the Run dialog box.
- Type
controland press Enter. - In Control Panel, select System and Security.
- Click Backup and Restore (Windows 7).
The utility retains its older Windows 7 name, even though it may be available on Windows 11 computers.
If you cannot find the option, try changing the View by setting in Control Panel to Large icons or Small icons. If it is still missing, the feature may not be available in your installation.
Step 3: Select Create a System Image
Once the Backup and Restore window opens, look at the left-hand panel.
- Click Create a system image.
- Wait for Windows to check the available backup destinations.
- Select On a hard disk.
- Choose your connected external hard drive from the dropdown list.
- Click Next.
Double-check the destination before continuing. Selecting the wrong drive could result in saving the backup somewhere you did not intend.
Step 4: Choose the Drives to Back Up
Windows will display the partitions required for the system image. The partitions needed to run Windows are generally selected automatically.
Review the selection carefully. Depending on your computer’s configuration, you may also be able to include additional partitions.
If you keep important documents on another internal partition, check whether that partition is included rather than assuming the system image covers everything.
Once you are satisfied with the selection, click Next.
Step 5: Start the Backup Process
Windows will display a summary of the backup destination and the partitions included in the image.
Follow these steps:
- Review the backup details.
- Confirm that the correct external drive is selected.
- Click Start backup.
- Follow any additional prompts displayed on the screen.
- Wait for Windows to report that the process has finished.
The backup duration depends on the amount of data being copied, the speed of your external drive, and your computer’s performance.
Keep the external drive connected throughout the process. Avoid shutting down your computer or disconnecting the drive while Windows is creating the system image.
Step 6: Verify Your Backup
Once the backup is complete, take a moment to check the result.
- Open File Explorer.
- Navigate to your external hard drive.
- Look for a folder named
WindowsImageBackup. - Confirm that the folder and its contents are present.
Do not rename or move the backup folder if you intend to use Windows recovery tools to restore the image.
Seeing the folder is a useful first check, although it does not guarantee that every backup file is usable. Preparing recovery media and understanding the restoration process can help you avoid unpleasant surprises later.
How to Restore Windows 11 From an External Drive
Creating a backup is only half the job. You should also know how to use it if Windows stops working.
A system image can help restore your Windows installation to the state captured when the image was created. Keep in mind that restoring an image can replace newer data on the affected partitions.
Here is the general recovery process:
- Connect the external drive containing your system image.
- Open Settings and navigate to System > Recovery.
- Under Advanced startup, select Restart now.
- When the Windows Recovery Environment opens, select Troubleshoot.
- Choose Advanced options and look for System Image Recovery.
- Follow the on-screen instructions to locate your backup and complete the restoration.
If Windows will not start, you may need a previously created recovery USB or Windows installation media to access the recovery environment.
Before restoring, save any newer files to another drive. Otherwise, you could lose changes made after the system image was created.
Common Windows 11 Backup Problems and Their Solutions
The External Drive Is Not Detected
If Windows cannot find your external drive, disconnect it and reconnect it. Try another USB port or cable, then check File Explorer again.
If the drive appears in Disk Management but not File Explorer, it may need a drive letter or further troubleshooting. Avoid formatting or initializing a drive containing important files.
There Is Not Enough Storage Space
System images can be large, particularly when Windows and installed applications occupy substantial disk space.
Check the free space on your external drive. If necessary, use a larger drive or remove files you no longer need after confirming they are safely backed up elsewhere.
Never delete your only existing backup simply to make room for a new one unless you have another usable copy.
The Create a System Image Option Is Missing
The traditional system image feature is deprecated, so its availability may vary across Windows installations.
Check Control Panel again. If the option remains unavailable, consider a reputable disk-imaging application that explicitly supports your Windows 11 version.
Remember that ordinary file synchronization and cloud backup tools are not necessarily substitutes for a complete system image.
The Backup Fails Partway Through
A backup may fail because of storage problems, insufficient free space, an unstable USB connection, or issues with the Windows snapshot service.
Restart your computer, reconnect the external drive, and check whether the drive is functioning correctly. Make sure there is enough free space before trying again.
If the problem continues, consider using a supported backup application instead of repeatedly relying on a legacy utility.
Tips for Keeping Your Windows Backup Safe
Creating one backup is a good start, but keeping it current is just as important.
- Back up regularly: Create a fresh backup after major software changes or whenever your system configuration changes significantly.
- Keep separate copies of important files: Documents, photographs, and work projects deserve their own backup.
- Disconnect the drive when finished: Keeping an external backup disconnected when it is not in use can reduce the risk of accidental deletion and some malware-related damage.
- Prepare recovery media: A recovery USB can help you access troubleshooting tools when Windows will not start.
- Protect your BitLocker recovery key: If device encryption is enabled, you may need the recovery key during certain recovery operations.
- Check your backup occasionally: Make sure the drive remains readable and that your backup files have not been accidentally deleted.
For particularly important information, consider keeping another backup on a separate drive or in a trusted cloud storage service. Having multiple copies reduces the risk of losing everything if one storage device fails.
Final Thoughts
Backing up Windows 11 to an external drive gives you another way to recover from serious computer problems. The traditional Backup and Restore utility can create a system image on supported installations, helping you restore Windows, installed applications, settings, and selected files to an earlier state.
Follow the steps above, verify your backup, and prepare recovery media before you need it. Because the legacy system image feature is deprecated, check that it is available on your computer and consider a supported alternative if necessary.
Most importantly, do not rely on a single backup for everything. Combining a system image with regular backups of your personal files is a practical way to protect your digital life.
Disclaimer: Windows features and recovery options can vary by version and device configuration. Always protect important files before attempting system recovery, and verify that your chosen backup method supports your computer.






Products
-
![Apple Watch Ultra 3 [GPS + Cellular 49mm] Running & Multisport Smartwatch w/Rugged Titanium Case w/Black Titanium Milanese Loop - M. Satellite Communications, Advanced Health & Fitness Tracking](https://bazaronweb.com/retailstores/wp-content/uploads/2025/09/apple-watch-320x320.jpg) Apple Watch Ultra 3 [GPS + Cellular 49mm] Running & Multisport Smartwatch w/Rugged Titanium Case w/Black Titanium Milanese Loop - M. Satellite Communications, Advanced Health & Fitness Tracking
Apple Watch Ultra 3 [GPS + Cellular 49mm] Running & Multisport Smartwatch w/Rugged Titanium Case w/Black Titanium Milanese Loop - M. Satellite Communications, Advanced Health & Fitness Tracking
-
 Apple iPad mini (A17 Pro): Apple Intelligence, 8.3-inch Liquid Retina Display, 256GB, Wi-Fi 6E, 12MP Front/12MP Back Camera, Touch ID, All-Day Battery Life — Purple
-
 Apple AirPods Max Wireless Over-Ear Headphones, Active Noise Cancelling, Transparency Mode, Personalized Spatial Audio, Dolby Atmos, Bluetooth Headphones for iPhone – Space Gray
-
 Apple AirPods Pro 2 Wireless Earbuds, Active Noise Cancellation, Hearing Aid Feature, Bluetooth Headphones, Transparency, Personalized Spatial Audio, High-Fidelity Sound, H2 Chip, USB-C Charging
-
Home Garage 210 TC Cotton King Floral Fitted (Elastic) Bedsheet(Pack of 1, Grey)
Original price was: ₹999.00.₹299.00Current price is: ₹299.00.
Leave a Reply