Discounted Products
-
 Leo Creation 144 TC Cotton Double Jaipuri Prints Flat Bedsheet(Pack of 1, Blue, Gree, Red, Grey, Light Grey)
Original price was: ₹2,999.00.₹329.00Current price is: ₹329.00.
Leo Creation 144 TC Cotton Double Jaipuri Prints Flat Bedsheet(Pack of 1, Blue, Gree, Red, Grey, Light Grey)
Original price was: ₹2,999.00.₹329.00Current price is: ₹329.00.
-
 Home Garage 210 TC Cotton King Floral Fitted (Elastic) Bedsheet(Pack of 1, Grey)
Original price was: ₹999.00.₹299.00Current price is: ₹299.00.
Home Garage 210 TC Cotton King Floral Fitted (Elastic) Bedsheet(Pack of 1, Grey)
Original price was: ₹999.00.₹299.00Current price is: ₹299.00.
-
 Goodrik 140 TC Cotton Double 3D Printed Flat Bedsheet(Pack of 1, Brown)
Original price was: ₹499.00.₹229.00Current price is: ₹229.00.
Goodrik 140 TC Cotton Double 3D Printed Flat Bedsheet(Pack of 1, Brown)
Original price was: ₹499.00.₹229.00Current price is: ₹229.00.
-
 GLOBALSHOP 350 TC Microfiber Double Floral Flat Bedsheet(Pack of 1, Multicolor)
Original price was: ₹1,250.00.₹263.00Current price is: ₹263.00.
GLOBALSHOP 350 TC Microfiber Double Floral Flat Bedsheet(Pack of 1, Multicolor)
Original price was: ₹1,250.00.₹263.00Current price is: ₹263.00.
-
 RisingStar 250 TC Microfiber King Printed Fitted (Elastic) Bedsheet(Pack of 1, FITTED-ROUND-CIRCLES-PREMIUM)
Original price was: ₹2,299.00.₹299.00Current price is: ₹299.00.
RisingStar 250 TC Microfiber King Printed Fitted (Elastic) Bedsheet(Pack of 1, FITTED-ROUND-CIRCLES-PREMIUM)
Original price was: ₹2,299.00.₹299.00Current price is: ₹299.00.
-
 Home Garage 210 TC Cotton King Floral Fitted (Elastic) Bedsheet(Pack of 1, Fitted Black Green)
Original price was: ₹1,299.00.₹299.00Current price is: ₹299.00.
Home Garage 210 TC Cotton King Floral Fitted (Elastic) Bedsheet(Pack of 1, Fitted Black Green)
Original price was: ₹1,299.00.₹299.00Current price is: ₹299.00.
-
 Home Garage 180 TC Cotton King 3D Printed Flat Bedsheet(Pack of 1, White)
Original price was: ₹999.00.₹229.00Current price is: ₹229.00.
Home Garage 180 TC Cotton King 3D Printed Flat Bedsheet(Pack of 1, White)
Original price was: ₹999.00.₹229.00Current price is: ₹229.00.
-
 Home Sizzler 153 cm (5 ft) Polyester Room Darkening Window Curtain (Pack Of 2)(Floral, Maroon)
Original price was: ₹799.00.₹299.00Current price is: ₹299.00.
Home Sizzler 153 cm (5 ft) Polyester Room Darkening Window Curtain (Pack Of 2)(Floral, Maroon)
Original price was: ₹799.00.₹299.00Current price is: ₹299.00.
-
 Panipat Textile Hub 152.4 cm (5 ft) Polyester Window Curtain (Pack Of 2)(Solid, Aqua)
Original price was: ₹1,899.00.₹299.00Current price is: ₹299.00.
Panipat Textile Hub 152.4 cm (5 ft) Polyester Window Curtain (Pack Of 2)(Solid, Aqua)
Original price was: ₹1,899.00.₹299.00Current price is: ₹299.00.
-
 Home Sizzler 214 cm (7 ft) Polyester Semi Transparent Door Curtain (Pack Of 2)(Floral, Maroon)
Original price was: ₹1,199.00.₹399.00Current price is: ₹399.00.
Home Sizzler 214 cm (7 ft) Polyester Semi Transparent Door Curtain (Pack Of 2)(Floral, Maroon)
Original price was: ₹1,199.00.₹399.00Current price is: ₹399.00.
-
 Home Sizzler 153 cm (5 ft) Polyester Room Darkening Window Curtain (Pack Of 2)(Floral, Brown)
Original price was: ₹799.00.₹299.00Current price is: ₹299.00.
Home Sizzler 153 cm (5 ft) Polyester Room Darkening Window Curtain (Pack Of 2)(Floral, Brown)
Original price was: ₹799.00.₹299.00Current price is: ₹299.00.
-
 Stella Creations 214 cm (7 ft) Polyester Room Darkening Door Curtain (Pack Of 2)(Abstract, Brown)
Original price was: ₹1,299.00.₹449.00Current price is: ₹449.00.
Stella Creations 214 cm (7 ft) Polyester Room Darkening Door Curtain (Pack Of 2)(Abstract, Brown)
Original price was: ₹1,299.00.₹449.00Current price is: ₹449.00.
-
 Homefab India 152.5 cm (5 ft) Polyester Room Darkening Window Curtain (Pack Of 2)(Floral, Light Blue)
Original price was: ₹1,199.00.₹319.00Current price is: ₹319.00.
Homefab India 152.5 cm (5 ft) Polyester Room Darkening Window Curtain (Pack Of 2)(Floral, Light Blue)
Original price was: ₹1,199.00.₹319.00Current price is: ₹319.00.
-
 Urban Home 214 cm (7 ft) PVC Transparent Door Curtain Single Curtain(Solid, Off White)
Original price was: ₹699.00.₹203.00Current price is: ₹203.00.
Urban Home 214 cm (7 ft) PVC Transparent Door Curtain Single Curtain(Solid, Off White)
Original price was: ₹699.00.₹203.00Current price is: ₹203.00.
-
 Panipat Textile Hub 213 cm (7 ft) Polyester Door Curtain (Pack Of 2)(Solid, Brown)
Original price was: ₹1,199.00.₹349.00Current price is: ₹349.00.
Panipat Textile Hub 213 cm (7 ft) Polyester Door Curtain (Pack Of 2)(Solid, Brown)
Original price was: ₹1,199.00.₹349.00Current price is: ₹349.00.

I never realized how much my Windows 11 audio quality was suffering until I started exploring the sound settings and making strategic adjustments. Like many people, I’d been accepting whatever default audio settings came with my system, assuming Windows had optimized everything perfectly. What I discovered was shocking—Windows 11 has numerous audio quality settings hidden in menus that most users never access, and adjusting these settings dramatically improves sound quality from speakers, headphones, and external audio devices. Whether you’re listening to music, watching movies, gaming, or attending video calls, better audio quality enhances your entire digital experience. I’ve noticed the difference in richness, clarity, and depth after making these adjustments.
In this comprehensive guide, I’ll walk you through the most important sound settings adjustments you can make on Windows 11 to significantly improve audio quality. I’ll explain what each setting does, why it matters for audio quality, and exactly how to adjust it for optimal results. Some adjustments are simple toggle switches, while others involve fine-tuning multiple parameters to achieve best results. I’ll also cover hardware considerations, explain the differences between various audio enhancement options, and help you understand which settings apply to your specific audio devices. By the end of this article, you’ll have made concrete improvements to your Windows 11 audio quality and understand how to maintain optimal audio settings going forward. These changes require no special software, no financial investment, and no technical expertise—just knowledge of where to find these settings and how to configure them properly.
1. Understanding Windows 11 Audio Architecture and Quality Factors
Windows 11’s audio system consists of multiple layers that work together to produce sound through your speakers or headphones. Understanding this architecture helps explain why certain settings matter and how adjusting them affects overall quality. At the foundation is the audio hardware—your sound card, speakers, headphones, or external audio interface. Above that sits the audio driver, which translates Windows audio signals into instructions your hardware understands. Then comes the Windows audio engine, which processes audio data and applies effects before sending it to drivers. Finally, individual applications produce audio that flows through this entire system. Each layer affects final audio quality, which is why improving quality requires optimizing multiple components.
Audio quality is determined by several technical factors including bitrate (amount of data per second), sample rate (how often sound is sampled per second), bit depth (how much detail each sample contains), and frequency response (how completely the system reproduces different sound frequencies). Additionally, audio processing like compression, equalization, and enhancement effects impact perceived quality. Windows 11’s default settings often use conservative configurations that prioritize compatibility over quality, meaning there’s significant room for improvement. The good news is that most improvements involve simply enabling better-quality settings or adjusting parameters already built into Windows. Understanding that audio quality results from multiple factors working together helps you appreciate why making several adjustments produces better results than changing a single setting. The cumulative effect of multiple optimizations creates noticeably better audio than any single change alone.
2. Accessing Sound Settings in Windows 11: Navigation Guide
Before making any adjustments, you need to know where Windows 11’s sound settings are located. Microsoft reorganized settings significantly in Windows 11, so locations differ from previous Windows versions. The primary method is opening Settings by pressing Windows Key + I, then navigating to System > Sound. This opens the comprehensive Sound settings panel where most audio adjustments are made. Alternatively, you can right-click the speaker icon in the system tray (lower right corner of your screen) and select “Open Sound settings” to jump directly to the Sound settings panel. Another approach is right-clicking the speaker icon and selecting “Sound settings,” which accomplishes the same thing. You can also search for “Sound settings” in the Windows search bar and open it directly.
Within Sound settings, you’ll see multiple sections including Volume and device preferences (for adjusting individual app volumes), Advanced options (for audio format and quality settings), and Spatial audio (for immersive sound effects). Some sound adjustments are also available through the audio driver control panel specific to your sound card manufacturer—if you have an NVIDIA, Realtek, Creative, or other brand sound device, opening their proprietary audio control panel provides additional adjustment options beyond Windows settings. Additionally, individual applications like music players or games have their own audio settings that complement Windows system settings. Taking time to explore all these locations ensures you understand all available adjustment options. Most critical adjustments are in Windows Sound settings, but manufacturer-specific drivers often provide additional enhancement options worth exploring. Understanding the various locations where audio settings live helps you make comprehensive adjustments across your entire system.
3. Adjust Audio Format and Sample Rate for Better Quality
The audio format and sample rate are fundamental to audio quality—higher sample rates mean more detailed sound reproduction. Windows 11 allows adjusting these settings in the Sound settings panel under Advanced > Volume and device preferences. Click on your audio device (speakers, headphones, etc.) to access its specific settings. Look for options labeled “Audio format” and “Sample rate.” The sample rate determines how often per second Windows samples audio data. Common sample rates are 44.1 kHz (CD quality), 48 kHz (professional audio standard), 96 kHz (high-resolution audio), and 192 kHz (professional studio quality).
For most listening, 48 kHz provides excellent quality with minimal additional file size or processing overhead compared to 44.1 kHz. If you listen to high-resolution music files or want the absolute best quality, set sample rate to 96 kHz or 192 kHz. Note that your source audio (songs, videos, games) must support these higher rates; setting sample rate higher than your audio source doesn’t improve quality but does use more processing power. Bit depth determines how much detail each audio sample contains—16-bit is standard, while 24-bit and 32-bit provide more detail and are used in professional recording and high-quality music. Set bit depth to the highest available option (usually 24-bit or 32-bit). Audio format options might include PCM (standard uncompressed audio), Dolby Digital, or Dolby Atmos depending on your hardware. PCM is most compatible and reliable. After adjusting these settings, click Apply and test audio quality immediately. You should notice cleaner, more detailed sound, particularly with music and professional audio content.
4. Enable and Configure Spatial Audio for Immersive Sound
Windows 11 includes Spatial Audio features that create immersive, three-dimensional sound experiences particularly valuable for gaming and movies. Spatial Audio uses psychoacoustic techniques to create the illusion that sound is coming from different directions—above, below, and around you—rather than just from your speakers. This technology works with standard stereo headphones or speakers, though surround sound systems benefit most noticeably. To enable Spatial Audio, open Sound settings and scroll to the Spatial Audio section. You’ll see options for different spatial audio formats—Windows Sonic (built-in and free), Dolby Atmos (premium option requiring purchase), or DTS:X (if supported by your audio hardware).
Windows Sonic is an excellent free option that works on any Windows 11 system. Enable it by toggling the Windows Sonic option on. For games and movies, Dolby Atmos provides superior immersive sound if you’re willing to purchase a subscription (typically $14.99 one-time purchase or included with Game Pass Ultimate). After enabling spatial audio, test it with compatible content—many games and streaming services support spatial audio. You’ll immediately notice sound seeming to come from multiple directions rather than just left and right stereo channels. The effect is particularly impressive with headphones, where spatial audio creates convincing directional sound. Note that not all content supports spatial audio, so enabling it doesn’t affect non-compatible content. However, for gaming, movies, and compatible music streaming services, spatial audio dramatically enhances immersion and perceived audio quality. Enabling spatial audio is one of the most noticeable improvements you can make to Windows 11 audio quality with minimal effort.
5. Disable Audio Enhancements to Improve Audio Purity
This section might seem counterintuitive—audio enhancements sound beneficial, but they often degrade audio quality by applying aggressive processing. Windows 11 and most sound card drivers include audio enhancement features that apply equalization, compression, and other effects to modify audio. While these enhancements might sound good initially, they often distort audio, reduce clarity, and eliminate fine details. Disabling enhancements forces audio to pass through your system unmodified, preserving the original quality intended by content creators. To disable audio enhancements, open Sound settings and navigate to Advanced > Volume and device preferences. Click on your audio device, then click “Additional device options.” A window opens showing your audio device properties.
Click the Enhancements tab to access enhancement options. You’ll see various enhancement options like Bass Boost, Loudness Equalization, Virtual Surround, and others—the exact options depend on your audio hardware and drivers. The key action is unchecking all enhancement options. Each unchecked enhancement removes one layer of processing that degrades audio quality. Uncheck all available enhancements, then click Apply and OK. Return to Windows and test audio quality—you’ll likely notice cleaner, more transparent sound with better detail and clarity. Some users initially find un-enhanced audio sounds less “impressive,” but this is because the original recording is cleaner and more accurate rather than enhanced to sound artificially impressive. After a few minutes of listening to un-enhanced audio, your ears adapt and appreciate the clarity. This single adjustment often produces more noticeable quality improvement than any other setting change. If you previously used enhancements and found them necessary, experiment with disabling them for several days before deciding whether to re-enable them.
6. Adjust Volume Levels to Prevent Distortion and Clipping
Volume levels significantly impact perceived audio quality, and improper volume settings cause distortion that degrades quality. When volume is too high, audio clips (distorts as the system can’t reproduce the full signal), causing harsh, unpleasant sound. When volume is too low, audio becomes muddy and loses clarity because subtle details become inaudible. Finding the optimal volume level improves audio quality substantially. First, set your system volume to a moderate level—not maximum or minimum. Open the volume mixer by right-clicking the speaker icon in the system tray and selecting “Open Volume mixer.” This shows volume controls for the system overall and for individual applications.
Set system volume (the main Windows volume) to around 60-80 percent rather than maximum. This provides headroom—leaving some volume capacity in reserve prevents clipping if individual applications try to play audio at maximum levels. Additionally, many applications have their own volume controls. Music players, video players, games, and browsers each have volume settings that should also be adjusted moderately. Set these application volumes to around 70-90 percent, not maximum. If you need audio louder, increase system volume rather than pushing individual apps to maximum. This approach prevents clipping while maintaining quality. Additionally, some audio devices have physical volume knobs or buttons—adjust these moderately as well. Modern audio devices and Windows prevent extreme volume issues through digital limiters, but these limiters degrade audio quality when engaged, so avoiding them through proper volume management is important. Test different volume levels and note which feels best—typically, audio that’s clearly audible but doesn’t feel loud or compressed represents the sweet spot for best quality.
7. Configure Audio Device Settings and Driver Updates
Beyond Windows settings, your specific audio device has manufacturer settings accessed through proprietary driver control panels. If you have a dedicated sound card or high-quality external audio interface, accessing these settings often reveals additional adjustment options that improve quality. To find your audio device driver control panel, open Settings > System > Sound > Volume and device preferences > Advanced. Click on your audio device to see its properties. Look for an option to open the device manufacturer’s control panel—this might say “Open Realtek HD Audio Manager,” “NVIDIA High Definition Audio,” “Creative Audio Control Panel,” or similar depending on your hardware.
Within the manufacturer’s control panel, explore available settings. Many offer equalizers (allowing you to boost or cut specific frequency ranges), virtualization options for surround sound, microphone settings, and other adjustments. These manufacturer settings often provide more sophisticated control than Windows settings alone. Additionally, ensure your audio drivers are completely up to date. Open Device Manager by right-clicking the Start button and selecting “Device Manager.” Expand “Sound, video and game controllers” to see your audio devices. Right-click your audio device and select “Update driver.” Choose “Search automatically for updated driver software” to have Windows find and install the latest version. Updated drivers often include quality improvements and bug fixes. After updating drivers, restart your computer to ensure changes take effect. Additionally, you can visit your audio device manufacturer’s website directly and download drivers from there, which sometimes provides newer versions than Windows Update offers. Keeping drivers current ensures you benefit from all quality improvements and optimizations the manufacturer has released.
8. Optimize Microphone Settings for Better Voice Quality
While microphone quality primarily affects others’ perception of your voice during calls and recordings, optimizing microphone settings is part of comprehensive audio optimization. Open Sound settings and navigate to Input > Choose your input device to select which microphone Windows uses. If you have multiple microphones (built-in, headset microphone, external USB microphone), select the highest-quality option. External USB microphones typically offer better quality than built-in microphones, and dedicated podcast or streaming microphones offer the best quality. Set microphone volume to a moderate level—around 50-70 percent in the input volume meter—which prevents both clipping (if voice is too loud) and noise (if level is too low and you need to amplify).
Open your microphone device’s properties through Sound settings to access additional settings. Some microphones have noise suppression options—enabling these filters out background noise, improving call and recording quality for other participants. Disable microphone enhancements similar to how you disabled speaker enhancements, as these often degrade voice quality through aggressive processing. Test your microphone with a recording application to verify quality. Open Voice Recorder (search for it in the Start menu), record yourself speaking, and play back the recording to assess quality. Tinny, distant, or distorted recording indicates microphone issues or incorrect settings. Adjust settings and test again until voice sounds clear and natural. Additionally, position your microphone correctly—it should be 6-12 inches from your mouth at a slight angle rather than directly facing your mouth, which can cause plosive sounds (harsh P and B sounds). These microphone optimizations improve your communication quality during calls and the quality of any audio recordings you make.
9. Optimize Audio for Gaming and Entertainment Content
Gaming and watching movies benefit from specific audio optimizations beyond general audio quality improvements. For gaming, enable Spatial Audio (discussed earlier) to take full advantage of immersive sound design. Additionally, adjust your gaming audio device settings to optimize for gaming rather than music—games often benefit from enhanced bass and treble. If your audio device manufacturer offers gaming-specific presets or equalizer profiles, enable these. Additionally, in-game audio settings matter significantly. Most modern games have audio quality settings—ensure these are set to “High” or “Ultra” rather than lower quality options. Many games also have audio device selection options; ensure your best audio device is selected.
For watching movies and streaming content, similarly enable any spatial audio options supported by your streaming service and content. Services like Netflix, Disney+, and others support Dolby Atmos and Spatial Audio for compatible content. Ensure your audio settings match the content’s capabilities. Additionally, movies and streaming content often have their own quality settings within the app—set these to the highest available quality (typically labeled “High” or “4K” if watching video). Gaming and movies represent where audio quality improvements are most noticeable, so optimizing specifically for these uses provides the most satisfaction. Test your optimizations by playing a favorite game or watching a favorite movie scene and noting whether audio quality has improved. The combination of Windows optimizations, device optimizations, and content-specific optimizations creates the best possible audio experience for entertainment.
10. Regular Maintenance and Advanced Troubleshooting for Sustained Quality
After optimizing your Windows 11 audio settings, maintaining these optimizations ensures continued quality. Periodically verify your settings haven’t reverted to defaults—sometimes Windows updates reset audio settings. After major Windows updates, return to Sound settings and verify your adjustments are still in place. Additionally, regularly update audio drivers through Windows Update or manufacturer websites. New driver versions sometimes include quality improvements, bug fixes, and compatibility enhancements. Set a monthly reminder to check for driver updates.
If audio quality degrades over time, you might have conflicting applications or background noise issues. Some applications install competing audio drivers or control panels that interfere with Windows settings. Uninstall unnecessary audio applications or driver suites that you don’t actually use. Additionally, check for malware or unwanted applications that might be interfering with audio. Run Windows Defender or another antivirus scanner to identify problematic software. If audio suddenly becomes degraded or distorted, test with different audio output devices (try different speakers or headphones) to determine whether the problem is device-specific or system-wide. If the problem occurs with all devices, it’s likely a Windows setting or driver issue; if it occurs with only one device, the device itself might be failing. Advanced troubleshooting might involve using audio analysis software to verify Windows is outputting audio at the correct sample rate and format you configured. Free tools like RME Totalmix or similar can help diagnose audio issues. Maintaining these optimizations over time ensures your Windows 11 audio quality remains excellent indefinitely.
Disclaimer
This article provides guidance on adjusting Windows 11 sound settings to improve audio quality. The information is intended for educational purposes to help users optimize their audio experience. Specific settings, menu locations, and available options may vary depending on your Windows 11 version, audio hardware, and installed drivers.
Important Disclaimers:
- Audio quality improvements depend on your audio hardware; upgrading to better quality speakers, headphones, or audio devices will produce more significant improvements than software adjustments alone
- Settings and menu locations described may differ slightly from your specific Windows 11 installation due to updates and variations
- Some audio enhancements or features may not be available on all audio devices or driver versions
- Changing spatial audio, sample rate, or other technical settings may affect compatibility with specific applications
- Certain applications or devices may require specific audio settings; adjusting Windows settings may necessitate re-configuring application audio settings
Hardware Considerations:
- Your audio output device (speakers, headphones) ultimately determines maximum achievable audio quality
- Built-in laptop speakers and low-quality headphones have inherent limitations; software optimization cannot overcome poor hardware
- External audio interfaces, quality headphones, and powered speakers provide significantly better audio quality than integrated audio solutions
- USB audio devices and external DACs (digital-to-analog converters) can substantially improve audio quality when properly configured
Compatibility:
- Not all audio devices support high sample rates (96 kHz, 192 kHz); setting rates higher than your device supports may cause audio issues
- Some older applications or devices may not support certain audio formats or spatial audio options
- Spatial audio quality and effectiveness vary depending on your audio device and content support
- Audio enhancements that work well on one system may not be available on other systems with different audio hardware
Performance Impact:
- Higher sample rates and spatial audio processing consume more CPU resources; on older computers or during resource-intensive activities, this may impact system performance
- If you experience lag, stuttering, or performance issues after adjusting audio settings, reverting to lower sample rates or disabling spatial audio may resolve these issues
Troubleshooting:
- If audio distorts, sounds muffled, or exhibits other problems after adjustments, reverting settings often resolves issues
- Not all adjustments produce equally noticeable improvements; some improvements are subtle and require careful listening to appreciate
- Individual listening preferences vary; settings that sound best to one person may not sound optimal to another
- Testing with multiple types of audio content (music, movies, games, podcasts) helps identify which adjustments are most beneficial for your use cases
Driver and Software:
- Audio drivers should be updated regularly for optimal compatibility and performance
- Third-party audio software can sometimes conflict with Windows audio settings; disabling or uninstalling unnecessary audio applications may improve stability
- Malware or unwanted software can degrade audio quality; maintaining antivirus protection ensures system audio integrity
When Professional Help is Needed:
- If audio problems persist despite adjusting all available settings, consult audio device manufacturer support
- For hardware-related audio issues, professional audio technician services may be necessary
- If you suspect audio hardware failure, professional diagnostics can confirm whether hardware replacement is needed
Liability:
We are not responsible for any issues resulting from following these audio optimization steps, including software incompatibility, audio degradation, system performance problems, or hardware conflicts. Users assume full responsibility for adjustments made to their systems. Most audio setting changes are reversible through returning to default settings, but users should understand each adjustment before implementing it. Some changes may require restarting Windows or applications to take effect fully.
About the Author
Jessica Miller is a marketing manager and audio enthusiast who appreciates quality sound across all digital experiences. With expertise in Windows optimization, audio technology, and practical digital improvements, she helps busy professionals enhance their digital environments without requiring technical expertise or expensive upgrades. When she’s not writing comprehensive tech guides or managing her marketing team, she’s enjoying high-quality audio through her optimized systems and exploring the latest audio technology developments.
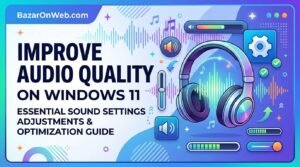
- How to Improve Audio Quality on Windows 11: Essential Sound Settings Adjustments and Optimization Guide
- Spotify Keeps Crashing on iPhone? 7 Ways to Fix It: Complete Troubleshooting Guide

- How to Convert Videos Online: Complete Guide to Free Video Conversion Tools and Techniques

- What is “Aw, Snap! Out of Memory” Error in Browser and How to Prevent It: Complete Technical Guide

- Games Lagging After Installing Windows Update : 8 Best Fixes for Smooth Gaming Performance

Products
-
![Apple Watch Ultra 3 [GPS + Cellular 49mm] Running & Multisport Smartwatch w/Rugged Titanium Case w/Black Titanium Milanese Loop - M. Satellite Communications, Advanced Health & Fitness Tracking](https://bazaronweb.com/retailstores/wp-content/uploads/2025/09/apple-watch-320x320.jpg) Apple Watch Ultra 3 [GPS + Cellular 49mm] Running & Multisport Smartwatch w/Rugged Titanium Case w/Black Titanium Milanese Loop - M. Satellite Communications, Advanced Health & Fitness Tracking
Apple Watch Ultra 3 [GPS + Cellular 49mm] Running & Multisport Smartwatch w/Rugged Titanium Case w/Black Titanium Milanese Loop - M. Satellite Communications, Advanced Health & Fitness Tracking
-
 Apple iPad mini (A17 Pro): Apple Intelligence, 8.3-inch Liquid Retina Display, 256GB, Wi-Fi 6E, 12MP Front/12MP Back Camera, Touch ID, All-Day Battery Life — Purple
-
 Apple AirPods Max Wireless Over-Ear Headphones, Active Noise Cancelling, Transparency Mode, Personalized Spatial Audio, Dolby Atmos, Bluetooth Headphones for iPhone – Space Gray
-
 Apple AirPods Pro 2 Wireless Earbuds, Active Noise Cancellation, Hearing Aid Feature, Bluetooth Headphones, Transparency, Personalized Spatial Audio, High-Fidelity Sound, H2 Chip, USB-C Charging
-
Leo Creation 144 TC Cotton Double Jaipuri Prints Flat Bedsheet(Pack of 1, Blue, Gree, Red, Grey, Light Grey)
Original price was: ₹2,999.00.₹329.00Current price is: ₹329.00.
Leave a Reply