Discounted Products
-
 Home Garage 210 TC Cotton King Floral Fitted (Elastic) Bedsheet(Pack of 1, Grey)
Original price was: ₹999.00.₹299.00Current price is: ₹299.00.
Home Garage 210 TC Cotton King Floral Fitted (Elastic) Bedsheet(Pack of 1, Grey)
Original price was: ₹999.00.₹299.00Current price is: ₹299.00.
-
 Goodrik 140 TC Cotton Double 3D Printed Flat Bedsheet(Pack of 1, Brown)
Original price was: ₹499.00.₹229.00Current price is: ₹229.00.
Goodrik 140 TC Cotton Double 3D Printed Flat Bedsheet(Pack of 1, Brown)
Original price was: ₹499.00.₹229.00Current price is: ₹229.00.
-
 GLOBALSHOP 350 TC Microfiber Double Floral Flat Bedsheet(Pack of 1, Multicolor)
Original price was: ₹1,250.00.₹263.00Current price is: ₹263.00.
GLOBALSHOP 350 TC Microfiber Double Floral Flat Bedsheet(Pack of 1, Multicolor)
Original price was: ₹1,250.00.₹263.00Current price is: ₹263.00.
-
 RisingStar 250 TC Microfiber King Printed Fitted (Elastic) Bedsheet(Pack of 1, FITTED-ROUND-CIRCLES-PREMIUM)
Original price was: ₹2,299.00.₹299.00Current price is: ₹299.00.
RisingStar 250 TC Microfiber King Printed Fitted (Elastic) Bedsheet(Pack of 1, FITTED-ROUND-CIRCLES-PREMIUM)
Original price was: ₹2,299.00.₹299.00Current price is: ₹299.00.
-
 Home Garage 210 TC Cotton King Floral Fitted (Elastic) Bedsheet(Pack of 1, Fitted Black Green)
Original price was: ₹1,299.00.₹299.00Current price is: ₹299.00.
Home Garage 210 TC Cotton King Floral Fitted (Elastic) Bedsheet(Pack of 1, Fitted Black Green)
Original price was: ₹1,299.00.₹299.00Current price is: ₹299.00.
-
 Home Garage 180 TC Cotton King 3D Printed Flat Bedsheet(Pack of 1, White)
Original price was: ₹999.00.₹229.00Current price is: ₹229.00.
Home Garage 180 TC Cotton King 3D Printed Flat Bedsheet(Pack of 1, White)
Original price was: ₹999.00.₹229.00Current price is: ₹229.00.
-
 Panipat Textile Hub 152.4 cm (5 ft) Polyester Window Curtain (Pack Of 2)(Solid, Aqua)
Original price was: ₹1,899.00.₹299.00Current price is: ₹299.00.
Panipat Textile Hub 152.4 cm (5 ft) Polyester Window Curtain (Pack Of 2)(Solid, Aqua)
Original price was: ₹1,899.00.₹299.00Current price is: ₹299.00.
-
 Home Sizzler 214 cm (7 ft) Polyester Semi Transparent Door Curtain (Pack Of 2)(Floral, Maroon)
Original price was: ₹1,199.00.₹399.00Current price is: ₹399.00.
Home Sizzler 214 cm (7 ft) Polyester Semi Transparent Door Curtain (Pack Of 2)(Floral, Maroon)
Original price was: ₹1,199.00.₹399.00Current price is: ₹399.00.
-
 Home Sizzler 153 cm (5 ft) Polyester Room Darkening Window Curtain (Pack Of 2)(Floral, Brown)
Original price was: ₹799.00.₹299.00Current price is: ₹299.00.
Home Sizzler 153 cm (5 ft) Polyester Room Darkening Window Curtain (Pack Of 2)(Floral, Brown)
Original price was: ₹799.00.₹299.00Current price is: ₹299.00.
-
 Stella Creations 214 cm (7 ft) Polyester Room Darkening Door Curtain (Pack Of 2)(Abstract, Brown)
Original price was: ₹1,299.00.₹449.00Current price is: ₹449.00.
Stella Creations 214 cm (7 ft) Polyester Room Darkening Door Curtain (Pack Of 2)(Abstract, Brown)
Original price was: ₹1,299.00.₹449.00Current price is: ₹449.00.
-
 Homefab India 152.5 cm (5 ft) Polyester Room Darkening Window Curtain (Pack Of 2)(Floral, Light Blue)
Original price was: ₹1,199.00.₹319.00Current price is: ₹319.00.
Homefab India 152.5 cm (5 ft) Polyester Room Darkening Window Curtain (Pack Of 2)(Floral, Light Blue)
Original price was: ₹1,199.00.₹319.00Current price is: ₹319.00.
-
 Urban Home 214 cm (7 ft) PVC Transparent Door Curtain Single Curtain(Solid, Off White)
Original price was: ₹699.00.₹203.00Current price is: ₹203.00.
Urban Home 214 cm (7 ft) PVC Transparent Door Curtain Single Curtain(Solid, Off White)
Original price was: ₹699.00.₹203.00Current price is: ₹203.00.
-
 Panipat Textile Hub 213 cm (7 ft) Polyester Door Curtain (Pack Of 2)(Solid, Brown)
Original price was: ₹1,199.00.₹349.00Current price is: ₹349.00.
Panipat Textile Hub 213 cm (7 ft) Polyester Door Curtain (Pack Of 2)(Solid, Brown)
Original price was: ₹1,199.00.₹349.00Current price is: ₹349.00.
-
 Home Sizzler 214 cm (7 ft) Polyester Semi Transparent Door Curtain (Pack Of 2)(Floral, Brown)
Original price was: ₹999.00.₹349.00Current price is: ₹349.00.
Home Sizzler 214 cm (7 ft) Polyester Semi Transparent Door Curtain (Pack Of 2)(Floral, Brown)
Original price was: ₹999.00.₹349.00Current price is: ₹349.00.
-
 Panipat Textile Hub 213 cm (7 ft) Polyester Semi Transparent Door Curtain (Pack Of 2)(Floral, Brown)
Original price was: ₹899.00.₹299.00Current price is: ₹299.00.
Panipat Textile Hub 213 cm (7 ft) Polyester Semi Transparent Door Curtain (Pack Of 2)(Floral, Brown)
Original price was: ₹899.00.₹299.00Current price is: ₹299.00.

I was typing an email on my laptop when my cursor suddenly jumped to the middle of my sentence. Then it jumped again. My text started appearing in random locations. I was completely confused until I realized my palm had accidentally touched the touchpad while typing.
This happens constantly. I’m working on my keyboard, my palm grazes the touchpad, and suddenly my cursor is somewhere completely different. I end up deleting text I didn’t mean to delete, clicking things I didn’t intend to click, and generally making a mess of my work.
I tried being more careful. Adjusting how I position my hands. Keeping my palms further from the touchpad. Nothing worked. My hands were just in the natural position for typing, and the touchpad was in the way.
My solution was simple: just disable the touchpad entirely. I use an external mouse anyway. I don’t need the touchpad. But I didn’t know how to disable it. Windows 11 doesn’t make this obvious. There’s no straightforward “Turn off touchpad” button in Settings.
After investigation, I discovered there are actually multiple ways to disable the touchpad. Some are simple. Some require digging into device settings. Some involve keyboard shortcuts. Some require third-party software.
A frustrated reader emailed: “My laptop touchpad is driving me insane. I keep accidentally clicking things while typing. How do I turn it off permanently?”
I walked them through the different methods with screenshots and explanations. Their reply: “Finally! Why doesn’t Windows just have a simple off switch for this? Problem solved.”
Most Windows 11 laptop users are dealing with accidental touchpad activation when they could just disable it. Once you know how, it’s simple. But the methods aren’t obvious without guidance.
Understanding Touchpad Issues (And Why Disabling Helps)
Before disabling, understanding why touchpad problems occur and why disabling might be the right solution.
Touchpads are sensitive. They have to be to detect light touches. But this sensitivity means they detect accidental touches too. Your palm resting near the edge while typing. Your wrist brushing it. Even static electricity sometimes triggers false activations.
Different laptops have different touchpad sensitivity. Some are hyper-sensitive and detect everything. Others are more forgiving. But all touchpads have the same fundamental problem: they’re in the way of your hands when typing.
Many laptop users disable touchpads because:
- They use an external mouse and don’t need the touchpad
- Accidental activation is too disruptive
- They prefer dedicated mouse buttons over touchpad gestures
- The touchpad is malfunctioning and causes erratic cursor movement
- They want to prevent their kids from using the touchpad and causing chaos
Disabling the touchpad is a legitimate solution. You’re not breaking anything. You can re-enable it anytime if needed.
Method 1: Settings App (If Your Laptop Supports It)
The easiest way to disable touchpad is through Windows Settings, but this only works if your laptop manufacturer includes proper touchpad drivers.
Open Settings (Windows Key + I). Navigate to Bluetooth & devices > Touchpad.
You’ll see touchpad settings if your laptop has proper drivers installed. Look for a toggle that says “Touchpad” or “Disable touchpad.”
Click the toggle to turn the touchpad OFF.
The touchpad immediately stops responding.
Important caveat: Not all laptops show this option. If you don’t see a Touchpad section in Bluetooth & devices, your laptop doesn’t have proper Windows 11 touchpad drivers installed, and you’ll need to use a different method below.
If the option exists and you use it, this is the simplest solution. One toggle and you’re done.
Method 2: Device Manager (More Reliable)
If Settings doesn’t have touchpad options, Device Manager usually does.
Right-click Start menu > select “Device Manager.”
Device Manager opens showing all your hardware devices.
Look for “Mice and other pointing devices” category. Click to expand it.
You’ll see your touchpad listed. It might be called “Synaptics TouchPad,” “Elan Touchpad,” “ALPS Touchpad,” or similar depending on your laptop brand.
Right-click the touchpad device > select “Disable device.”
Windows asks for confirmation. Click “Yes.”
The touchpad is immediately disabled. Your cursor won’t respond to touchpad input.
This method works on almost every Windows 11 laptop because Device Manager is built into Windows.
Method 3: Keyboard Shortcut (Fastest)
Many laptops have a keyboard shortcut to toggle the touchpad on/off instantly.
Look at your laptop’s function keys (F1 through F12). One of them usually has a touchpad icon (looks like a small square with lines or dots).
Press that function key (usually Fn + that F-key). The touchpad toggles on or off.
Most common locations:
- Dell: Fn + F3
- HP: Fn + F9
- Lenovo: Fn + F6 or Fn + F8
- ASUS: Fn + F9
- Acer: Fn + F7
Your specific keyboard shortcut depends on your laptop model. Check your laptop manual or search “(Your Laptop Model) disable touchpad shortcut.”
If this shortcut works for your laptop, it’s the fastest method. Press two keys and the touchpad toggles instantly.
Method 4: Touchpad Driver Settings (Advanced Control)
If you want more control than just on/off, your touchpad driver might have advanced settings.
Right-click Start > Device Manager > expand “Mice and other pointing devices” > right-click your touchpad > select “Properties.”
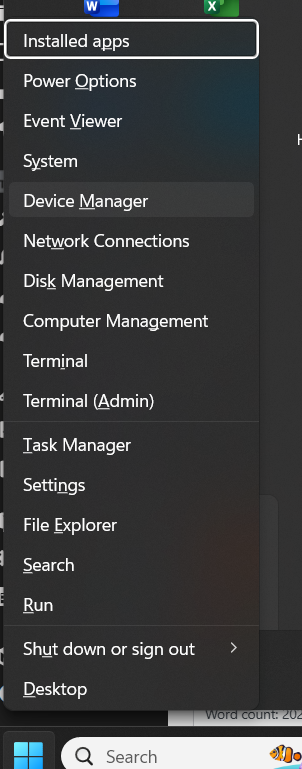
Click the “Driver” tab > look for “Driver Details” or similar button.
Or look for tabs like “Settings,” “Advanced,” or “Configuration” within the Properties window.
Many touchpad drivers let you:
- Disable the touchpad entirely
- Set sensitivity levels
- Disable the touchpad only when typing
- Create custom rules for when touchpad should be disabled
Explore these settings. Your specific options depend on what touchpad driver your laptop has.
Some laptops have dedicated tabs for touchpad configuration. Look for Synaptics Settings, Elan Settings, or similar.
Method 5: BIOS/UEFI Settings (Permanent Hardware Disable)
For maximum control, disable the touchpad at the hardware level through BIOS.
Warning: BIOS modification requires technical comfort. Only do this if you understand BIOS settings.
Restart your computer. While it’s starting up, press the BIOS key (usually Delete, F2, F10, or F12 depending on laptop brand). Timing is critical—you need to press it during startup before Windows loads.
BIOS settings menu appears. Navigate through menus looking for “Integrated Peripherals,” “Onboard Devices,” “System Devices,” or similar section.
Find “Touchpad,” “Internal Pointing Device,” or similar option.
Set it to “Disabled.”
Save and exit BIOS. Your computer restarts with touchpad disabled at hardware level.
This method is most permanent. The touchpad is disabled before Windows even loads.
Method 6: Third-Party Touchpad Management Software
Some laptops include manufacturer-specific software for touchpad management.
Dell: Dell Touchpad software (search in Windows Store or Dell support site)
HP: HP Touchpad settings utility
Lenovo: Lenovo Vantage has touchpad controls
ASUS: ASUS Smart Gesture has advanced controls
Acer: Acer Quick Access has touchpad settings
Install your laptop manufacturer’s software. It usually provides more sophisticated touchpad control than Windows defaults.
These utilities often let you:
- Disable touchpad completely
- Disable touchpad while typing
- Disable touchpad only when external mouse connected
- Set sensitivity and gesture recognition
- Create profiles for different situations
Check your laptop manufacturer’s support website for their touchpad management utility.
Troubleshooting: When Touchpad Won’t Disable
Problem 1: No touchpad option in Settings
Your touchpad drivers might not be installed or updated. Visit your laptop manufacturer’s support website. Download and install touchpad drivers for your specific model.
After installing proper drivers, restart your computer. Settings should now have touchpad options.
Problem 2: Disabled in Device Manager but still works
Windows might have re-enabled it or a driver update re-enabled it.
Try the keyboard shortcut method instead. Some laptops disable touchpad through firmware, not just driver, making it more permanent.
Or use BIOS disable method for hardware-level disabling.
Problem 3: Keyboard shortcut doesn’t work
Your laptop might not have a dedicated touchpad toggle shortcut. Try combinations like Fn + F3, Fn + F9, Fn + F7 to find the right one.
If none work, use Device Manager or Settings method instead.
Problem 4: Children keep re-enabling the touchpad
If you’ve disabled the touchpad but it keeps getting re-enabled, someone is likely turning it back on.
Use BIOS disable for most permanent solution. Or set up parental controls to prevent Settings access.
Re-Enabling the Touchpad (When You Need It Again)
If you disable the touchpad and later need it back, re-enabling is straightforward.
If you used Settings: Settings > Bluetooth & devices > Touchpad > toggle back ON.
If you used Device Manager: Device Manager > right-click touchpad > “Enable device.”
If you used keyboard shortcut: Press the same Fn + function key again to toggle it back on.
If you used BIOS: Restart computer, enter BIOS, set touchpad to “Enabled,” save, restart.
The touchpad reactivates immediately (or after restart for BIOS).
Real User Scenario: The Complete Solution
A reader named Marcus emailed: “I’m a developer working at a standing desk with my laptop. I use an external mouse, so I never need the touchpad. But it keeps activating accidentally when I’m typing, moving my cursor to random places and breaking my code. I’ve tried being careful but it still happens constantly. How do I permanently disable this thing?”
Solution for Marcus:
- Right-click Start > Device Manager
- Expand “Mice and other pointing devices”
- Right-click Synaptics Touchpad
- Select “Disable device”
- Confirm the disable
- Done
Marcus replied: “Perfect. Two minutes and my problem is solved. No more accidental cursor movement. This is life-changing for my workflow.”
When You Want Selective Disabling
Some users don’t want to disable the touchpad completely but want it disabled during specific situations.
Disable touchpad while typing:
Many modern touchpads have “Palm rejection” or “Typing suppression” features. When enabled, the touchpad automatically disables while you’re actively typing.
Check your touchpad driver settings for this option. It’s often the perfect compromise—touchpad available for navigation but disabled when you’re typing.
Disable touchpad when mouse connected:
Some driver software lets you configure the touchpad to auto-disable when an external mouse is detected.
Check your laptop manufacturer’s touchpad management software for this option.
Disable touchpad on schedule:
Use Task Scheduler to automatically disable/enable touchpad at specific times. This requires creating a script, but it’s possible for advanced users.
Prevention: Protecting Against Accidental Re-Enabling
After disabling the touchpad:
Document the method used: Note which method you used (Settings, Device Manager, BIOS, etc.) so you remember if you need to re-enable it later.
Disable through multiple methods: If possible, disable through both Settings/Device Manager AND keyboard shortcut. Multiple layers of disabling make accidental re-enabling less likely.
Password protect BIOS: If you used BIOS disabling, password protect BIOS access so others can’t change it.
Check settings periodically: Occasionally verify the touchpad is still disabled. Windows updates sometimes re-enable disabled devices.
The Reality
Disabling the touchpad is simple once you know how. Most laptop users could benefit from doing this if they use an external mouse.
The frustration is that Windows 11 doesn’t make it obvious. There’s no prominent “Disable touchpad” button. You have to know to look in Settings, Device Manager, function keys, or BIOS.
Once you disable it, your workflow improves noticeably. No more accidental cursor jumps. No more accidentally clicking things while typing. Just clean, intentional mouse input.
If you use an external mouse regularly, disabling the touchpad is genuinely worthwhile. Takes two minutes. Solves months of frustration.
Quick Priority List: Disabling Touchpad
Touchpad driving you crazy?
- Try keyboard shortcut: Fn + F3 (or F6, F7, F8, F9 depending on laptop)
- If that works—done in one second
- If not, try Settings > Bluetooth & devices > Touchpad > toggle OFF
- If that option doesn’t exist, open Device Manager > right-click touchpad > Disable device
- If none work, restart computer, enter BIOS (press Delete/F2 during startup), disable touchpad, save and restart
- Last resort: Check your laptop manufacturer’s website for their touchpad management software
One of these will work for your specific laptop.
Disclaimer: This article provides guidance on disabling Windows 11 touchpad. Touchpad disabling methods vary significantly by laptop manufacturer and model. Some laptops don’t have all methods available. BIOS access and modification requires caution—incorrect BIOS changes can affect system functionality. Some touchpad drivers may re-enable the device after Windows updates. Third-party touchpad software quality varies by manufacturer. Re-enabling procedures are the reverse of disabling but exact steps vary by method used. Keyboard shortcuts vary significantly by laptop brand and model. Users assume responsibility for identifying the correct method for their specific laptop. If unsure about BIOS modification, seek technical support before attempting. Disabling touchpad at BIOS level is most permanent but most technical. Modern touchpads with palm rejection technology often provide better solution than complete disabling.

- Killer Network Service: Is It a Virus or Safe to Disable?

- How to Set Up Parental Controls on Windows 11: A Step-by-Step Guide

- How to Extract Audio From a Video: Easy Ways to Save Audio

- How to Set a Photo Album as Your Wallpaper on iPhone: Step-by-Step Guide

- How to Convert a Bootable USB Drive to an ISO File in Windows

Products
-
![Apple Watch Ultra 3 [GPS + Cellular 49mm] Running & Multisport Smartwatch w/Rugged Titanium Case w/Black Titanium Milanese Loop - M. Satellite Communications, Advanced Health & Fitness Tracking](https://bazaronweb.com/retailstores/wp-content/uploads/2025/09/apple-watch-320x320.jpg) Apple Watch Ultra 3 [GPS + Cellular 49mm] Running & Multisport Smartwatch w/Rugged Titanium Case w/Black Titanium Milanese Loop - M. Satellite Communications, Advanced Health & Fitness Tracking
Apple Watch Ultra 3 [GPS + Cellular 49mm] Running & Multisport Smartwatch w/Rugged Titanium Case w/Black Titanium Milanese Loop - M. Satellite Communications, Advanced Health & Fitness Tracking
-
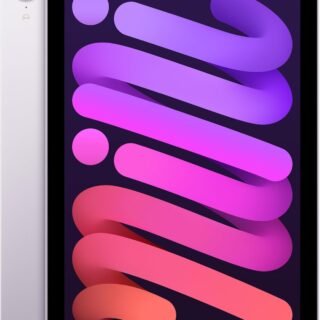 Apple iPad mini (A17 Pro): Apple Intelligence, 8.3-inch Liquid Retina Display, 256GB, Wi-Fi 6E, 12MP Front/12MP Back Camera, Touch ID, All-Day Battery Life — Purple
-
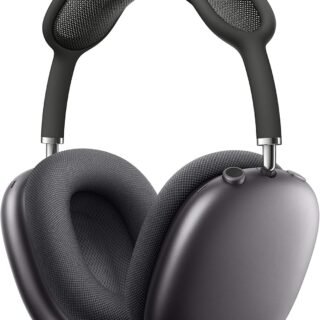 Apple AirPods Max Wireless Over-Ear Headphones, Active Noise Cancelling, Transparency Mode, Personalized Spatial Audio, Dolby Atmos, Bluetooth Headphones for iPhone – Space Gray
-
 Apple AirPods Pro 2 Wireless Earbuds, Active Noise Cancellation, Hearing Aid Feature, Bluetooth Headphones, Transparency, Personalized Spatial Audio, High-Fidelity Sound, H2 Chip, USB-C Charging
-
Home Garage 210 TC Cotton King Floral Fitted (Elastic) Bedsheet(Pack of 1, Grey)
Original price was: ₹999.00.₹299.00Current price is: ₹299.00.
Leave a Reply