Discounted Products
-
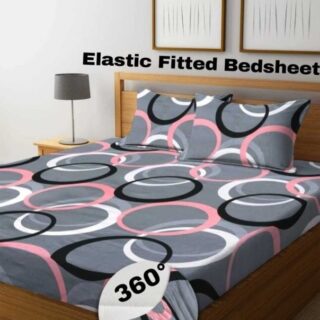 Home Garage 210 TC Cotton King Floral Fitted (Elastic) Bedsheet(Pack of 1, Grey)
Original price was: ₹999.00.₹299.00Current price is: ₹299.00.
Home Garage 210 TC Cotton King Floral Fitted (Elastic) Bedsheet(Pack of 1, Grey)
Original price was: ₹999.00.₹299.00Current price is: ₹299.00.
-
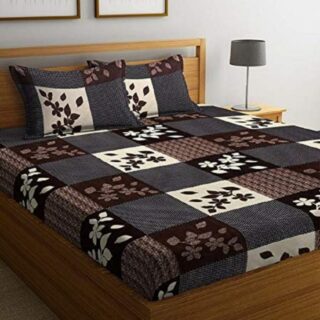 Goodrik 140 TC Cotton Double 3D Printed Flat Bedsheet(Pack of 1, Brown)
Original price was: ₹499.00.₹229.00Current price is: ₹229.00.
Goodrik 140 TC Cotton Double 3D Printed Flat Bedsheet(Pack of 1, Brown)
Original price was: ₹499.00.₹229.00Current price is: ₹229.00.
-
 GLOBALSHOP 350 TC Microfiber Double Floral Flat Bedsheet(Pack of 1, Multicolor)
Original price was: ₹1,250.00.₹263.00Current price is: ₹263.00.
GLOBALSHOP 350 TC Microfiber Double Floral Flat Bedsheet(Pack of 1, Multicolor)
Original price was: ₹1,250.00.₹263.00Current price is: ₹263.00.
-
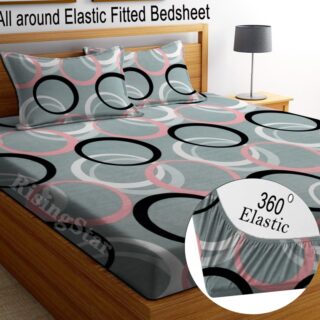 RisingStar 250 TC Microfiber King Printed Fitted (Elastic) Bedsheet(Pack of 1, FITTED-ROUND-CIRCLES-PREMIUM)
Original price was: ₹2,299.00.₹299.00Current price is: ₹299.00.
RisingStar 250 TC Microfiber King Printed Fitted (Elastic) Bedsheet(Pack of 1, FITTED-ROUND-CIRCLES-PREMIUM)
Original price was: ₹2,299.00.₹299.00Current price is: ₹299.00.
-
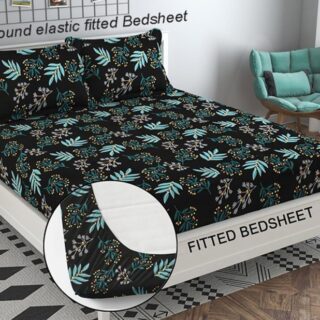 Home Garage 210 TC Cotton King Floral Fitted (Elastic) Bedsheet(Pack of 1, Fitted Black Green)
Original price was: ₹1,299.00.₹299.00Current price is: ₹299.00.
Home Garage 210 TC Cotton King Floral Fitted (Elastic) Bedsheet(Pack of 1, Fitted Black Green)
Original price was: ₹1,299.00.₹299.00Current price is: ₹299.00.
-
 Home Garage 180 TC Cotton King 3D Printed Flat Bedsheet(Pack of 1, White)
Original price was: ₹999.00.₹229.00Current price is: ₹229.00.
Home Garage 180 TC Cotton King 3D Printed Flat Bedsheet(Pack of 1, White)
Original price was: ₹999.00.₹229.00Current price is: ₹229.00.
-
 Panipat Textile Hub 152.4 cm (5 ft) Polyester Window Curtain (Pack Of 2)(Solid, Aqua)
Original price was: ₹1,899.00.₹299.00Current price is: ₹299.00.
Panipat Textile Hub 152.4 cm (5 ft) Polyester Window Curtain (Pack Of 2)(Solid, Aqua)
Original price was: ₹1,899.00.₹299.00Current price is: ₹299.00.
-
 Home Sizzler 214 cm (7 ft) Polyester Semi Transparent Door Curtain (Pack Of 2)(Floral, Maroon)
Original price was: ₹1,199.00.₹399.00Current price is: ₹399.00.
Home Sizzler 214 cm (7 ft) Polyester Semi Transparent Door Curtain (Pack Of 2)(Floral, Maroon)
Original price was: ₹1,199.00.₹399.00Current price is: ₹399.00.
-
 Home Sizzler 153 cm (5 ft) Polyester Room Darkening Window Curtain (Pack Of 2)(Floral, Brown)
Original price was: ₹799.00.₹299.00Current price is: ₹299.00.
Home Sizzler 153 cm (5 ft) Polyester Room Darkening Window Curtain (Pack Of 2)(Floral, Brown)
Original price was: ₹799.00.₹299.00Current price is: ₹299.00.
-
 Stella Creations 214 cm (7 ft) Polyester Room Darkening Door Curtain (Pack Of 2)(Abstract, Brown)
Original price was: ₹1,299.00.₹449.00Current price is: ₹449.00.
Stella Creations 214 cm (7 ft) Polyester Room Darkening Door Curtain (Pack Of 2)(Abstract, Brown)
Original price was: ₹1,299.00.₹449.00Current price is: ₹449.00.
-
 Homefab India 152.5 cm (5 ft) Polyester Room Darkening Window Curtain (Pack Of 2)(Floral, Light Blue)
Original price was: ₹1,199.00.₹319.00Current price is: ₹319.00.
Homefab India 152.5 cm (5 ft) Polyester Room Darkening Window Curtain (Pack Of 2)(Floral, Light Blue)
Original price was: ₹1,199.00.₹319.00Current price is: ₹319.00.
-
 Urban Home 214 cm (7 ft) PVC Transparent Door Curtain Single Curtain(Solid, Off White)
Original price was: ₹699.00.₹203.00Current price is: ₹203.00.
Urban Home 214 cm (7 ft) PVC Transparent Door Curtain Single Curtain(Solid, Off White)
Original price was: ₹699.00.₹203.00Current price is: ₹203.00.
-
 Panipat Textile Hub 213 cm (7 ft) Polyester Door Curtain (Pack Of 2)(Solid, Brown)
Original price was: ₹1,199.00.₹349.00Current price is: ₹349.00.
Panipat Textile Hub 213 cm (7 ft) Polyester Door Curtain (Pack Of 2)(Solid, Brown)
Original price was: ₹1,199.00.₹349.00Current price is: ₹349.00.
-
 Home Sizzler 214 cm (7 ft) Polyester Semi Transparent Door Curtain (Pack Of 2)(Floral, Brown)
Original price was: ₹999.00.₹349.00Current price is: ₹349.00.
Home Sizzler 214 cm (7 ft) Polyester Semi Transparent Door Curtain (Pack Of 2)(Floral, Brown)
Original price was: ₹999.00.₹349.00Current price is: ₹349.00.
-
 Panipat Textile Hub 213 cm (7 ft) Polyester Semi Transparent Door Curtain (Pack Of 2)(Floral, Brown)
Original price was: ₹899.00.₹299.00Current price is: ₹299.00.
Panipat Textile Hub 213 cm (7 ft) Polyester Semi Transparent Door Curtain (Pack Of 2)(Floral, Brown)
Original price was: ₹899.00.₹299.00Current price is: ₹299.00.
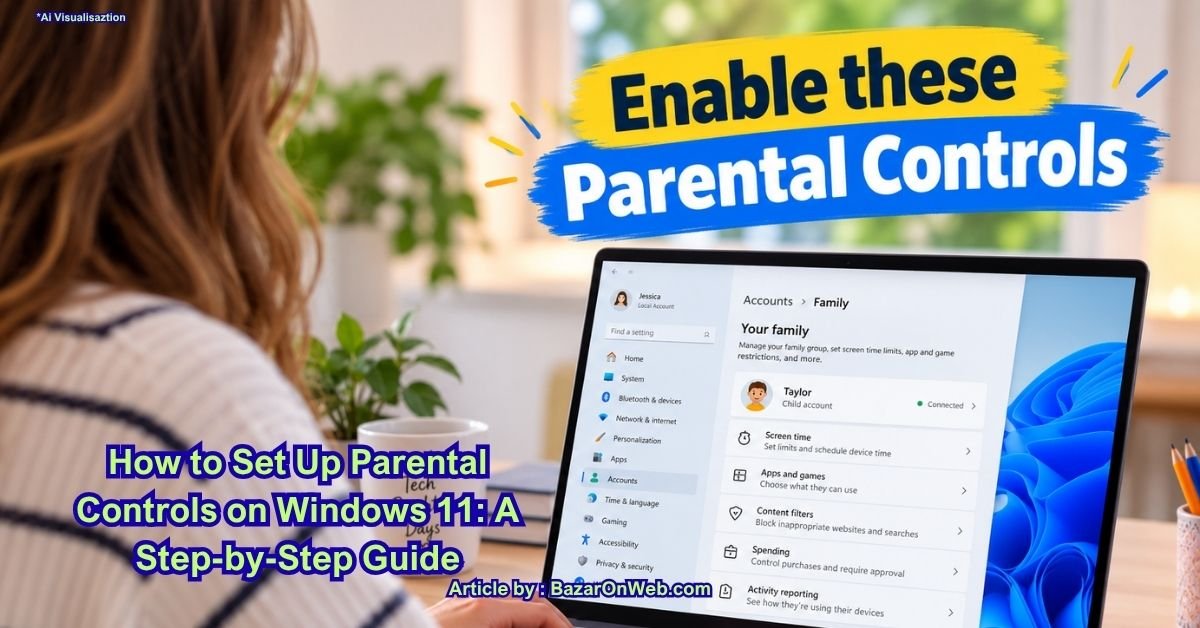
How Parental Controls Work on Windows 11
If you’re worried that your child spends too much time playing PC games or may come across inappropriate content online, Windows 11 gives you several tools to help manage their computer use.
The good news is that you don’t need to install a separate parental-control program just to get started. Microsoft provides parental controls through Microsoft Family Safety, which works with your Microsoft account and your child’s account.
You can use these controls to manage things such as:
- How long your child can use their Windows device
- When they’re allowed to use the computer
- Which apps and games they can use
- Websites they can visit
- Web searches
- Microsoft Store purchases
- Activity reports
- Certain online content and services
There’s one important thing to keep in mind: parental controls work best when your child uses their own Microsoft account rather than sharing your administrator account.
Let’s walk through the setup.
Create a Child Account in Windows 11
Before configuring restrictions, you’ll need a separate Microsoft account for your child.
If your child already has a Microsoft account, you can add that account to your Microsoft family. If they don’t have one, you can create a new child account during the setup.
Step 1: Open Windows Settings
Start by signing in to Windows 11 using your administrator account.
Then:
- Click the Start button.
- Select Settings.
- Click Accounts.
- Select Family.
Depending on your Windows 11 version, you may see options related to Family or Family & other users.
Step 2: Add Your Child
Look for the option to add a family member.
Select Add someone or Add a family member, depending on the version of Windows 11 you’re using.
Choose the option for a Child when Windows asks what type of family member you want to add.
If your child already has a Microsoft account, enter their email address.
If they don’t have an account, follow the prompts to create one.
Step 3: Complete the Account Setup
Windows may ask for some additional information while creating the child account.
Follow the on-screen instructions and complete the setup.
Once the account has been added to your Microsoft family, your child can use that account to sign in to the PC.
Tip: Avoid giving your child administrator privileges unless there’s a specific reason they need them. A standard child account gives you more control over the computer.
Set Up Screen Time Limits
One of the most useful parental-control features is screen-time management.
If you don’t want your child spending unlimited hours on the PC, you can create a schedule that determines when the device can be used and for how long.
Step 1: Open Microsoft Family Safety
You can manage family settings through Microsoft Family Safety.
Sign in with the Microsoft account you use as the family organizer.
Select your child’s profile.
Step 2: Open Screen Time
Look for Screen time in your child’s profile.
You should see options for managing the devices connected to their account.
Select the Windows device you want to manage.
Step 3: Create a Schedule
You can set different limits for different days.
For example, you might allow more computer time on weekends and less time on school days.
Depending on the available options, you can configure:
- Daily time limits
- Allowed hours
- Different schedules for different days
- Device-specific restrictions
This is more flexible than simply setting one fixed limit for every day.
For example, you could allow your child to use the PC for homework in the afternoon and then give them additional gaming time later.
Limit Specific Apps and Games
You may not want to restrict the entire computer.
Perhaps your child needs the PC for homework but you want to limit gaming.
Microsoft Family Safety can help you manage individual apps and games.
Step 1: Open Your Child’s Profile
Sign in to your Microsoft Family account and select your child.
Open the section for Apps and games.
Step 2: Find the App or Game
Look through the apps and games associated with your child’s Windows account.
You can then configure restrictions for supported apps and games.
For example, you could allow an educational application while setting a time limit for a particular game.
Step 3: Set an Age Limit
You can also use age-based restrictions to help prevent children from accessing games and apps that aren’t appropriate for their age.
This is particularly useful if your child frequently downloads games from the Microsoft Store.
Keep in mind that restrictions can depend on how an app or game is distributed and how Microsoft identifies it.
Block Inappropriate Websites
Another important part of parental controls is web filtering.
If your child uses Microsoft Edge, Microsoft Family Safety can provide tools for filtering inappropriate websites and searches.
Step 1: Open Content Filters
From your child’s Microsoft Family Safety profile, look for Content filters.
Open the web and search-related settings.
Step 2: Turn On Web Filtering
Enable the option that filters inappropriate websites.
You can also configure website restrictions depending on the controls available for your child’s account.
Step 3: Choose Allowed or Blocked Websites
For additional control, you can create lists of websites that should be allowed or blocked.
This can be useful if you want your child to access specific educational websites while restricting other types of content.
Important: Browser Choice Matters
There’s an important limitation here.
Microsoft’s web filtering features are designed to work particularly with Microsoft Edge. If your child can freely switch to another browser, some of the web restrictions may not work in the same way.
If web filtering is important to you, make sure the child’s account doesn’t have administrator access that would allow them to bypass your settings by installing other browsers or changing system configurations.
Manage Microsoft Store Purchases
Children can accidentally make purchases when using a PC, especially if payment information is already associated with a Microsoft account.
Microsoft’s family features can help parents manage purchases and approvals.
When available, turn on purchase-related controls so that your child needs your approval before making certain purchases.
This is especially useful for:
- Games
- Apps
- Add-ons
- In-game purchases
- Other Microsoft Store content
It’s also a good idea to review the payment methods associated with the family accounts.
View Your Child’s Activity
Microsoft Family Safety can also provide activity information for supported devices and services.
This can help you understand how your child is using the computer without having to constantly stand behind them and check everything manually.
Depending on the account, device, and current Microsoft Family Safety features, activity information can include things such as:
- Apps used
- Websites visited
- Search activity
- Screen-time information
Rather than treating this as a replacement for talking with your child, think of it as another tool for setting reasonable boundaries.
Allow More Time When Needed
Sometimes your child may reach their daily screen-time limit while they’re doing something important.
For example, they might be finishing homework, working on a school project, or watching an educational video.
In these situations, you can adjust the screen-time settings or allow additional time when supported.
This is one reason flexible limits can be more practical than simply blocking the computer completely.
You can establish a normal routine while still having the ability to make exceptions.
How to Change Parental Control Settings
Your child’s needs will probably change over time.
A screen-time limit that makes sense for a younger child may become unnecessarily restrictive for a teenager.
To update the settings:
- Sign in to your Microsoft family account.
- Select your child’s profile.
- Open the setting you want to change.
- Adjust the screen-time, app, game, web, or purchase controls.
- Save the changes if required.
The changes may take some time to appear on the child’s device.
If something doesn’t update immediately, make sure the child is connected to the internet and signed in with the correct Microsoft account.
What If Parental Controls Aren’t Working?
If you’ve configured everything correctly but the restrictions aren’t being enforced, don’t panic. There are a few things worth checking.
Make Sure Your Child Is Using the Correct Account
This is one of the first things I’d check.
Your child should be signing into Windows with the Microsoft child account that you added to your family group.
If they’re using your administrator account, the parental controls associated with their child account won’t necessarily apply.
Check Whether the Device Is Connected
Some family features require an internet connection to synchronize settings and activity.
Connect the computer to the internet and give the settings some time to synchronize.
Check the Browser
If you’re specifically trying to restrict websites, check which browser your child is using.
Microsoft’s web-filtering features are most closely tied to Microsoft Edge. A child using another browser may not receive the same filtering experience.
Check for Account Permissions
Make sure the child account hasn’t been given administrator privileges.
An administrator can make system-level changes that can interfere with the restrictions you’re trying to establish.
Update Windows
It’s also worth checking whether Windows 11 has pending updates.
Go to:
Settings → Windows Update
Select Check for updates and install available updates if appropriate.
A Few Things Parents Should Know
Parental controls can be helpful, but they aren’t a replacement for basic online-safety conversations.
No filtering system can guarantee that a child will never encounter inappropriate content online.
It’s also worth remembering that children may use other devices, websites, browsers, apps, or accounts outside the controls you’ve configured on the Windows PC.
For younger children especially, consider combining technical restrictions with simple rules about:
- Sharing personal information
- Talking to strangers online
- Downloading unknown files
- Clicking suspicious links
- Buying things online
- Reporting inappropriate content
- Asking an adult for help when something feels wrong
The goal isn’t necessarily to monitor every second your child spends online. It’s to create reasonable boundaries while giving them a safer environment to learn how to use technology responsibly.
Windows 11 Parental Controls: Quick Checklist
Before handing the PC over to your child, I’d quickly check these settings:
| Setting | What to Check |
|---|---|
| Child account | Created and added to your Microsoft family |
| Account type | Child account rather than administrator |
| Screen time | Daily limits and allowed hours configured |
| Apps and games | Appropriate restrictions enabled |
| Web filtering | Inappropriate-content filtering configured |
| Browser | Microsoft Edge settings checked |
| Purchases | Purchase approval settings reviewed |
| Activity | Activity reporting configured if desired |
| Windows Update | PC is up to date |
Final Thoughts
Setting up parental controls on Windows 11 doesn’t have to be complicated. You don’t need to immediately install a third-party monitoring application or configure dozens of complicated settings.
Start with a separate child Microsoft account, add it to your Microsoft family, and then configure the controls that actually matter for your household.
Screen-time limits can help establish healthier computer-use routines, while app, game, and web restrictions can provide another layer of protection against unsuitable content. Purchase controls can also prevent unexpected spending.
The important thing is to review these settings occasionally. Your child’s age, schoolwork, interests, and computer habits will change, so the restrictions that make sense today may need adjusting later.
And remember, technology works best as one part of the solution. A few sensible Windows 11 restrictions combined with open conversations about online safety can give your child a much safer and more manageable PC experience.
Disclaimer: Windows 11 and Microsoft Family Safety features can vary by Windows version, account type, device, region, and Microsoft updates. Menu names and available controls may change over time. Always verify the current settings on your child’s device before relying on them for safety or supervision.






Products
-
![Apple Watch Ultra 3 [GPS + Cellular 49mm] Running & Multisport Smartwatch w/Rugged Titanium Case w/Black Titanium Milanese Loop - M. Satellite Communications, Advanced Health & Fitness Tracking](https://bazaronweb.com/retailstores/wp-content/uploads/2025/09/apple-watch-320x320.jpg) Apple Watch Ultra 3 [GPS + Cellular 49mm] Running & Multisport Smartwatch w/Rugged Titanium Case w/Black Titanium Milanese Loop - M. Satellite Communications, Advanced Health & Fitness Tracking
Apple Watch Ultra 3 [GPS + Cellular 49mm] Running & Multisport Smartwatch w/Rugged Titanium Case w/Black Titanium Milanese Loop - M. Satellite Communications, Advanced Health & Fitness Tracking
-
 Apple iPad mini (A17 Pro): Apple Intelligence, 8.3-inch Liquid Retina Display, 256GB, Wi-Fi 6E, 12MP Front/12MP Back Camera, Touch ID, All-Day Battery Life — Purple
-
 Apple AirPods Max Wireless Over-Ear Headphones, Active Noise Cancelling, Transparency Mode, Personalized Spatial Audio, Dolby Atmos, Bluetooth Headphones for iPhone – Space Gray
-
 Apple AirPods Pro 2 Wireless Earbuds, Active Noise Cancellation, Hearing Aid Feature, Bluetooth Headphones, Transparency, Personalized Spatial Audio, High-Fidelity Sound, H2 Chip, USB-C Charging
-
Home Garage 210 TC Cotton King Floral Fitted (Elastic) Bedsheet(Pack of 1, Grey)
Original price was: ₹999.00.₹299.00Current price is: ₹299.00.
Leave a Reply