Discounted Products
-
 Home Garage 210 TC Cotton King Floral Fitted (Elastic) Bedsheet(Pack of 1, Grey)
Original price was: ₹999.00.₹299.00Current price is: ₹299.00.
Home Garage 210 TC Cotton King Floral Fitted (Elastic) Bedsheet(Pack of 1, Grey)
Original price was: ₹999.00.₹299.00Current price is: ₹299.00.
-
 Goodrik 140 TC Cotton Double 3D Printed Flat Bedsheet(Pack of 1, Brown)
Original price was: ₹499.00.₹229.00Current price is: ₹229.00.
Goodrik 140 TC Cotton Double 3D Printed Flat Bedsheet(Pack of 1, Brown)
Original price was: ₹499.00.₹229.00Current price is: ₹229.00.
-
 GLOBALSHOP 350 TC Microfiber Double Floral Flat Bedsheet(Pack of 1, Multicolor)
Original price was: ₹1,250.00.₹263.00Current price is: ₹263.00.
GLOBALSHOP 350 TC Microfiber Double Floral Flat Bedsheet(Pack of 1, Multicolor)
Original price was: ₹1,250.00.₹263.00Current price is: ₹263.00.
-
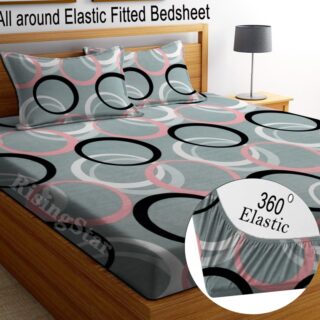 RisingStar 250 TC Microfiber King Printed Fitted (Elastic) Bedsheet(Pack of 1, FITTED-ROUND-CIRCLES-PREMIUM)
Original price was: ₹2,299.00.₹299.00Current price is: ₹299.00.
RisingStar 250 TC Microfiber King Printed Fitted (Elastic) Bedsheet(Pack of 1, FITTED-ROUND-CIRCLES-PREMIUM)
Original price was: ₹2,299.00.₹299.00Current price is: ₹299.00.
-
 Home Garage 210 TC Cotton King Floral Fitted (Elastic) Bedsheet(Pack of 1, Fitted Black Green)
Original price was: ₹1,299.00.₹299.00Current price is: ₹299.00.
Home Garage 210 TC Cotton King Floral Fitted (Elastic) Bedsheet(Pack of 1, Fitted Black Green)
Original price was: ₹1,299.00.₹299.00Current price is: ₹299.00.
-
 Home Garage 180 TC Cotton King 3D Printed Flat Bedsheet(Pack of 1, White)
Original price was: ₹999.00.₹229.00Current price is: ₹229.00.
Home Garage 180 TC Cotton King 3D Printed Flat Bedsheet(Pack of 1, White)
Original price was: ₹999.00.₹229.00Current price is: ₹229.00.
-
 Panipat Textile Hub 152.4 cm (5 ft) Polyester Window Curtain (Pack Of 2)(Solid, Aqua)
Original price was: ₹1,899.00.₹299.00Current price is: ₹299.00.
Panipat Textile Hub 152.4 cm (5 ft) Polyester Window Curtain (Pack Of 2)(Solid, Aqua)
Original price was: ₹1,899.00.₹299.00Current price is: ₹299.00.
-
 Home Sizzler 214 cm (7 ft) Polyester Semi Transparent Door Curtain (Pack Of 2)(Floral, Maroon)
Original price was: ₹1,199.00.₹399.00Current price is: ₹399.00.
Home Sizzler 214 cm (7 ft) Polyester Semi Transparent Door Curtain (Pack Of 2)(Floral, Maroon)
Original price was: ₹1,199.00.₹399.00Current price is: ₹399.00.
-
 Home Sizzler 153 cm (5 ft) Polyester Room Darkening Window Curtain (Pack Of 2)(Floral, Brown)
Original price was: ₹799.00.₹299.00Current price is: ₹299.00.
Home Sizzler 153 cm (5 ft) Polyester Room Darkening Window Curtain (Pack Of 2)(Floral, Brown)
Original price was: ₹799.00.₹299.00Current price is: ₹299.00.
-
 Stella Creations 214 cm (7 ft) Polyester Room Darkening Door Curtain (Pack Of 2)(Abstract, Brown)
Original price was: ₹1,299.00.₹449.00Current price is: ₹449.00.
Stella Creations 214 cm (7 ft) Polyester Room Darkening Door Curtain (Pack Of 2)(Abstract, Brown)
Original price was: ₹1,299.00.₹449.00Current price is: ₹449.00.
-
 Homefab India 152.5 cm (5 ft) Polyester Room Darkening Window Curtain (Pack Of 2)(Floral, Light Blue)
Original price was: ₹1,199.00.₹319.00Current price is: ₹319.00.
Homefab India 152.5 cm (5 ft) Polyester Room Darkening Window Curtain (Pack Of 2)(Floral, Light Blue)
Original price was: ₹1,199.00.₹319.00Current price is: ₹319.00.
-
 Urban Home 214 cm (7 ft) PVC Transparent Door Curtain Single Curtain(Solid, Off White)
Original price was: ₹699.00.₹203.00Current price is: ₹203.00.
Urban Home 214 cm (7 ft) PVC Transparent Door Curtain Single Curtain(Solid, Off White)
Original price was: ₹699.00.₹203.00Current price is: ₹203.00.
-
 Panipat Textile Hub 213 cm (7 ft) Polyester Door Curtain (Pack Of 2)(Solid, Brown)
Original price was: ₹1,199.00.₹349.00Current price is: ₹349.00.
Panipat Textile Hub 213 cm (7 ft) Polyester Door Curtain (Pack Of 2)(Solid, Brown)
Original price was: ₹1,199.00.₹349.00Current price is: ₹349.00.
-
 Home Sizzler 214 cm (7 ft) Polyester Semi Transparent Door Curtain (Pack Of 2)(Floral, Brown)
Original price was: ₹999.00.₹349.00Current price is: ₹349.00.
Home Sizzler 214 cm (7 ft) Polyester Semi Transparent Door Curtain (Pack Of 2)(Floral, Brown)
Original price was: ₹999.00.₹349.00Current price is: ₹349.00.
-
 Panipat Textile Hub 213 cm (7 ft) Polyester Semi Transparent Door Curtain (Pack Of 2)(Floral, Brown)
Original price was: ₹899.00.₹299.00Current price is: ₹299.00.
Panipat Textile Hub 213 cm (7 ft) Polyester Semi Transparent Door Curtain (Pack Of 2)(Floral, Brown)
Original price was: ₹899.00.₹299.00Current price is: ₹299.00.
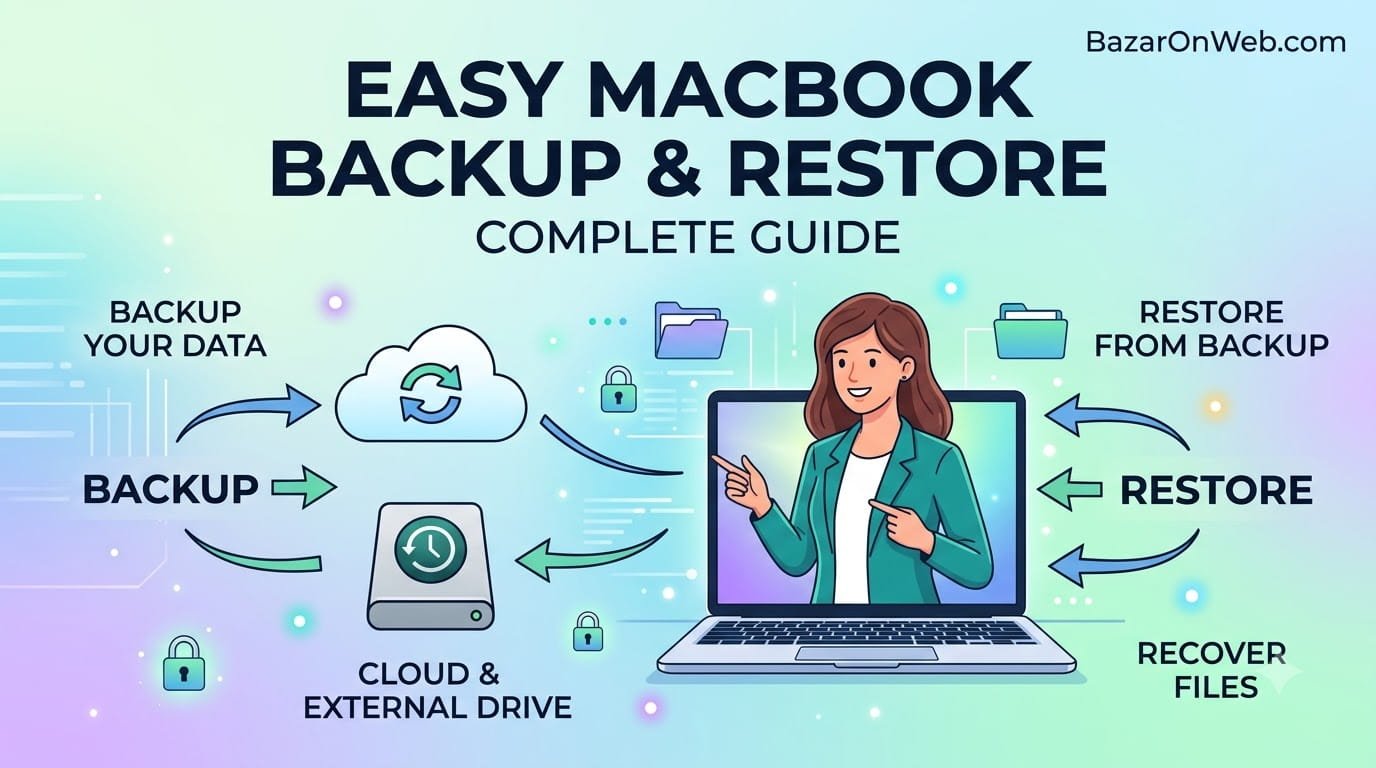
Losing important files from your MacBook can be stressful, especially when those files include work documents, family photos, videos, project files, or years of personal data. Fortunately, macOS provides several reliable ways to protect your information and restore it when needed.
Whether you are preparing to upgrade to a new MacBook, reinstalling macOS, dealing with a damaged system, or simply want better protection against accidental deletion, creating a backup should be part of your regular routine.
Apple provides built-in tools such as Time Machine and iCloud, while external storage devices offer another practical option for keeping a complete copy of your data. The right method depends on what you want to protect and how quickly you need to recover it.
In this guide, I’ll explain how to back up your MacBook data using different methods and how to restore your files when something goes wrong.
Why Should You Backup Your MacBook
Your MacBook stores much more than documents. Depending on how you use it, it may contain photos, videos, music, downloads, browser information, application data, project files, emails, and other important information.
A hardware failure, accidental deletion, software problem, theft, or corrupted storage drive can potentially make that information inaccessible.
A backup gives you another copy of your important data. If something happens to your MacBook, you can use that copy to recover your files instead of starting from scratch.
Regular backups are particularly important before performing major operations such as upgrading macOS, replacing a MacBook, resetting the system, or troubleshooting serious software problems.
What Is Time Machine on Mac
Time Machine is Apple’s built-in backup solution for macOS. It can automatically back up your files to an external storage device or compatible network backup destination.
One of its biggest advantages is that it can maintain historical versions of your files. This means you may be able to recover an earlier version of a document rather than only restoring the latest copy.
Time Machine can also be used to restore an entire Mac when setting up a replacement computer or recovering from a serious system problem.
For most MacBook users who want a straightforward full backup solution, Time Machine is one of the best places to start.
What You Need for a Time Machine Backup
Before creating a Time Machine backup, you will need a suitable external storage device.
An external HDD or SSD is commonly used. Ideally, the backup drive should have enough capacity to store your existing data and additional historical backups.
For example, if your MacBook contains 300GB of data, using a 500GB drive may work, but a larger drive gives Time Machine more room to maintain older versions of your files.
If you have a large photo, video, or project library, choosing a significantly larger backup drive is usually more practical.
How to Backup MacBook Data Using Time Machine
Connect your external storage device to your MacBook.
Depending on your macOS version and the drive, macOS may ask whether you want to use the drive for Time Machine. If prompted, follow the on-screen instructions.
You can also configure Time Machine manually.
Open System Settings from the Apple menu.
Select General and then choose Time Machine.
Select Add Backup Disk or the available option for adding a backup disk.
Choose your external storage device and follow the instructions shown on screen.
Once configured, Time Machine can automatically create backups according to its backup system.
You can leave the external drive connected if you want regular automatic backups.
How to Check Whether Your Backup Is Working
After configuring Time Machine, it is worth checking that backups are actually being created.
Go to System Settings > General > Time Machine and review the backup information displayed there.
You can also check the most recent backup time.
Don’t assume that having a backup drive connected automatically means your data is safely backed up. The backup process can fail because of storage problems, insufficient space, connection issues, or other errors.
Checking occasionally helps you catch problems before you actually need the backup.
How to Backup Important Files Manually
You don’t necessarily have to use Time Machine for every file.
You can manually copy important folders to an external SSD, HDD, or another storage location.
Connect your external storage device and open Finder.
Locate important folders such as Documents, Desktop, Downloads, Pictures, Movies, or project folders.
Select the files or folders you want to protect and copy them to the external drive.
Manual backups are useful when you only need to protect specific files. However, they don’t provide the same historical backup functionality as Time Machine.
For important data, I recommend combining a complete backup with an additional copy of especially valuable files.
How to Use iCloud to Protect MacBook Data
iCloud provides another way to synchronize and protect certain types of information.
Open System Settings and select your Apple Account.
Choose iCloud and review the services currently enabled.
Depending on your configuration, iCloud can synchronize information such as photos, contacts, calendars, notes, passwords, and files stored in iCloud Drive.
iCloud is particularly convenient because your data can be available across multiple Apple devices.
However, iCloud synchronization should not automatically be considered a complete replacement for a full Mac backup.
For example, if you delete a synchronized file, that deletion can also be reflected across your devices. A separate backup gives you another layer of protection.
How to Backup Photos From a MacBook
Photos are often some of the most valuable files stored on a MacBook.
If you use iCloud Photos, your photos can synchronize with your Apple devices through your Apple Account.
You can also create an additional local copy.
Open the Photos app and make sure your photo library is available on the Mac. You can then export selected photos or create a copy of the photo library on an external storage device.
Time Machine can also back up your Mac’s data, including supported photo library data.
For large photo collections, keeping both cloud synchronization and a separate local backup can provide stronger protection.
How to Restore Individual Files Using Time Machine
One of the most useful Time Machine features is the ability to restore individual files.
Connect your Time Machine backup drive to your MacBook.
Open the folder where the missing file was originally stored.
Open Time Machine from the menu bar if it is available, or access it through the Time Machine settings.
Time Machine provides a timeline of available backups.
Use the timeline or available backup versions to locate the file you need.
Select the file and choose the option to restore it.
The restored file should return to its original location.
This is particularly useful when you accidentally delete a document or overwrite an important file.
How to Restore MacBook From a Time Machine Backup
If you need to restore a larger amount of data, the process is different from restoring a single file.
If you are setting up a new MacBook, macOS provides migration and data-transfer options during setup. You can use your previous Mac or a Time Machine backup to transfer compatible information.
If your existing Mac has a serious software problem, you may need to access macOS Recovery.
The exact steps can vary depending on whether your MacBook uses Apple silicon or an Intel processor.
On supported Macs, start the Mac in macOS Recovery and use the available restore or migration options.
When prompted to select a backup, choose the appropriate Time Machine backup and follow the instructions.
Depending on the amount of information being restored, the process may take considerable time.
Do not disconnect the backup drive or shut down the MacBook while the restoration process is running unless macOS specifically instructs you to do so.
How to Transfer Data to a New MacBook
If you are replacing your MacBook, you don’t necessarily have to manually copy everything.
Apple provides Migration Assistant for transferring information from another Mac, a Time Machine backup, or another supported source.
During the setup process of the new Mac, follow the instructions for transferring information.
If you already completed setup, Migration Assistant can also be accessed later through macOS utilities.
Select the appropriate source and follow the on-screen instructions.
Depending on the amount of data, applications, user accounts, and other information being transferred, the process can take some time.
Before beginning, make sure both Macs or the backup source have sufficient power and remain connected throughout the transfer.
How to Restore Files From iCloud
If your files were stored in iCloud, restoring them can be relatively straightforward.
Sign in to your Apple Account on the MacBook.
Open Finder and select iCloud Drive from the sidebar.
Locate the required file or folder.
Depending on the file’s current state, macOS may download it from iCloud when you open or access it.
For accidentally deleted iCloud files, Apple’s recovery options may allow you to recover recently deleted information within the available recovery period.
The exact recovery options depend on the type of data and Apple’s current iCloud features.
What to Do Before Factory Resetting a MacBook
Never rush into erasing your MacBook before confirming that your important data is backed up.
First, create a current Time Machine backup or another complete backup.
Check that important documents are accessible from the backup.
Confirm that your photos, videos, projects, and other valuable files are included.
Make sure you know your Apple Account credentials because they may be required after resetting the Mac.
If you use applications that store important information locally, check whether their data requires a separate backup or export.
Only after confirming your backups should you proceed with erasing or reinstalling macOS.
How Often Should You Backup a MacBook
The ideal backup frequency depends on how frequently your data changes.
If you use your MacBook for work every day, automatic backups are preferable.
If you frequently create documents, edit videos, work with large projects, or manage business data, losing even one day of work could be inconvenient.
A practical approach is to use Time Machine for automatic local backups while keeping especially important files in another backup location.
The more important the data is, the less you should rely on a single copy.
Follow the 3 2 1 Backup Approach
A useful backup strategy is the 3-2-1 rule.
Keep at least three copies of important data.
Store those copies on at least two different types of storage or locations.
Keep at least one copy away from your MacBook, such as in cloud storage or another physical location.
For example, you could keep the original files on your MacBook, a Time Machine backup on an external SSD, and another copy of critical documents or photos in cloud storage.
This approach reduces the risk of losing everything because of a single hardware failure or accident.
Final Thoughts
Backing up your MacBook doesn’t have to be complicated. Time Machine provides a convenient way to create automatic backups, while iCloud can keep supported information synchronized across your Apple devices. External storage also gives you a simple way to maintain additional copies of important files.
The most important thing is to create your backup before something goes wrong.
I recommend setting up Time Machine, checking that backups are completing successfully, and keeping an additional copy of your most valuable files. If you’re moving to a new MacBook, Migration Assistant can make the transition much easier by transferring your existing information.
Remember that a backup is only useful if it actually works. Take a few minutes every so often to verify that your backups are current and that you can access the files you expect to recover.
A little preparation today can save you hours—or potentially years of lost data—later.

- How to Remotely Control Another Computer Using Windows Quick Assist

- 5 Must-Have Electronics Gadgets for a More Comfortable Living Room

- How to Create a Windows 11 System Backup on an External Hard Drive

- 10 Smart Home Ideas That Make Everyday Life Easier

- Gemini Live Avatar: How to Talk to Gemini Face-to-Face

Products
-
![Apple Watch Ultra 3 [GPS + Cellular 49mm] Running & Multisport Smartwatch w/Rugged Titanium Case w/Black Titanium Milanese Loop - M. Satellite Communications, Advanced Health & Fitness Tracking](https://bazaronweb.com/retailstores/wp-content/uploads/2025/09/apple-watch-320x320.jpg) Apple Watch Ultra 3 [GPS + Cellular 49mm] Running & Multisport Smartwatch w/Rugged Titanium Case w/Black Titanium Milanese Loop - M. Satellite Communications, Advanced Health & Fitness Tracking
Apple Watch Ultra 3 [GPS + Cellular 49mm] Running & Multisport Smartwatch w/Rugged Titanium Case w/Black Titanium Milanese Loop - M. Satellite Communications, Advanced Health & Fitness Tracking
-
 Apple iPad mini (A17 Pro): Apple Intelligence, 8.3-inch Liquid Retina Display, 256GB, Wi-Fi 6E, 12MP Front/12MP Back Camera, Touch ID, All-Day Battery Life — Purple
-
 Apple AirPods Max Wireless Over-Ear Headphones, Active Noise Cancelling, Transparency Mode, Personalized Spatial Audio, Dolby Atmos, Bluetooth Headphones for iPhone – Space Gray
-
 Apple AirPods Pro 2 Wireless Earbuds, Active Noise Cancellation, Hearing Aid Feature, Bluetooth Headphones, Transparency, Personalized Spatial Audio, High-Fidelity Sound, H2 Chip, USB-C Charging
-
Home Garage 210 TC Cotton King Floral Fitted (Elastic) Bedsheet(Pack of 1, Grey)
Original price was: ₹999.00.₹299.00Current price is: ₹299.00.
Leave a Reply