Discounted Products
-
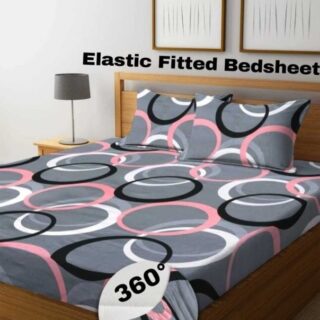 Home Garage 210 TC Cotton King Floral Fitted (Elastic) Bedsheet(Pack of 1, Grey)
Original price was: ₹999.00.₹299.00Current price is: ₹299.00.
Home Garage 210 TC Cotton King Floral Fitted (Elastic) Bedsheet(Pack of 1, Grey)
Original price was: ₹999.00.₹299.00Current price is: ₹299.00.
-
 Goodrik 140 TC Cotton Double 3D Printed Flat Bedsheet(Pack of 1, Brown)
Original price was: ₹499.00.₹229.00Current price is: ₹229.00.
Goodrik 140 TC Cotton Double 3D Printed Flat Bedsheet(Pack of 1, Brown)
Original price was: ₹499.00.₹229.00Current price is: ₹229.00.
-
 GLOBALSHOP 350 TC Microfiber Double Floral Flat Bedsheet(Pack of 1, Multicolor)
Original price was: ₹1,250.00.₹263.00Current price is: ₹263.00.
GLOBALSHOP 350 TC Microfiber Double Floral Flat Bedsheet(Pack of 1, Multicolor)
Original price was: ₹1,250.00.₹263.00Current price is: ₹263.00.
-
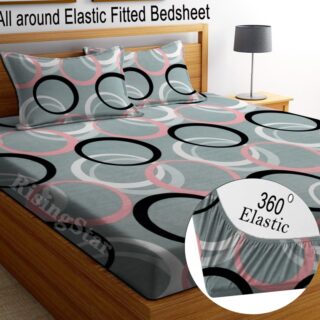 RisingStar 250 TC Microfiber King Printed Fitted (Elastic) Bedsheet(Pack of 1, FITTED-ROUND-CIRCLES-PREMIUM)
Original price was: ₹2,299.00.₹299.00Current price is: ₹299.00.
RisingStar 250 TC Microfiber King Printed Fitted (Elastic) Bedsheet(Pack of 1, FITTED-ROUND-CIRCLES-PREMIUM)
Original price was: ₹2,299.00.₹299.00Current price is: ₹299.00.
-
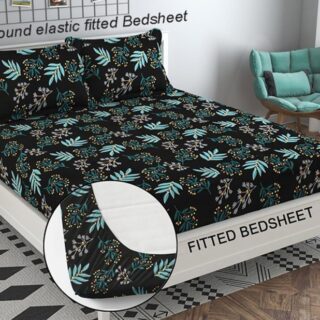 Home Garage 210 TC Cotton King Floral Fitted (Elastic) Bedsheet(Pack of 1, Fitted Black Green)
Original price was: ₹1,299.00.₹299.00Current price is: ₹299.00.
Home Garage 210 TC Cotton King Floral Fitted (Elastic) Bedsheet(Pack of 1, Fitted Black Green)
Original price was: ₹1,299.00.₹299.00Current price is: ₹299.00.
-
 Home Garage 180 TC Cotton King 3D Printed Flat Bedsheet(Pack of 1, White)
Original price was: ₹999.00.₹229.00Current price is: ₹229.00.
Home Garage 180 TC Cotton King 3D Printed Flat Bedsheet(Pack of 1, White)
Original price was: ₹999.00.₹229.00Current price is: ₹229.00.
-
 Panipat Textile Hub 152.4 cm (5 ft) Polyester Window Curtain (Pack Of 2)(Solid, Aqua)
Original price was: ₹1,899.00.₹299.00Current price is: ₹299.00.
Panipat Textile Hub 152.4 cm (5 ft) Polyester Window Curtain (Pack Of 2)(Solid, Aqua)
Original price was: ₹1,899.00.₹299.00Current price is: ₹299.00.
-
 Home Sizzler 214 cm (7 ft) Polyester Semi Transparent Door Curtain (Pack Of 2)(Floral, Maroon)
Original price was: ₹1,199.00.₹399.00Current price is: ₹399.00.
Home Sizzler 214 cm (7 ft) Polyester Semi Transparent Door Curtain (Pack Of 2)(Floral, Maroon)
Original price was: ₹1,199.00.₹399.00Current price is: ₹399.00.
-
 Home Sizzler 153 cm (5 ft) Polyester Room Darkening Window Curtain (Pack Of 2)(Floral, Brown)
Original price was: ₹799.00.₹299.00Current price is: ₹299.00.
Home Sizzler 153 cm (5 ft) Polyester Room Darkening Window Curtain (Pack Of 2)(Floral, Brown)
Original price was: ₹799.00.₹299.00Current price is: ₹299.00.
-
 Stella Creations 214 cm (7 ft) Polyester Room Darkening Door Curtain (Pack Of 2)(Abstract, Brown)
Original price was: ₹1,299.00.₹449.00Current price is: ₹449.00.
Stella Creations 214 cm (7 ft) Polyester Room Darkening Door Curtain (Pack Of 2)(Abstract, Brown)
Original price was: ₹1,299.00.₹449.00Current price is: ₹449.00.
-
 Homefab India 152.5 cm (5 ft) Polyester Room Darkening Window Curtain (Pack Of 2)(Floral, Light Blue)
Original price was: ₹1,199.00.₹319.00Current price is: ₹319.00.
Homefab India 152.5 cm (5 ft) Polyester Room Darkening Window Curtain (Pack Of 2)(Floral, Light Blue)
Original price was: ₹1,199.00.₹319.00Current price is: ₹319.00.
-
 Urban Home 214 cm (7 ft) PVC Transparent Door Curtain Single Curtain(Solid, Off White)
Original price was: ₹699.00.₹203.00Current price is: ₹203.00.
Urban Home 214 cm (7 ft) PVC Transparent Door Curtain Single Curtain(Solid, Off White)
Original price was: ₹699.00.₹203.00Current price is: ₹203.00.
-
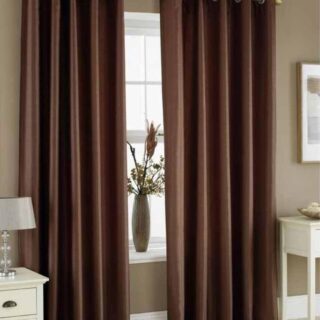 Panipat Textile Hub 213 cm (7 ft) Polyester Door Curtain (Pack Of 2)(Solid, Brown)
Original price was: ₹1,199.00.₹349.00Current price is: ₹349.00.
Panipat Textile Hub 213 cm (7 ft) Polyester Door Curtain (Pack Of 2)(Solid, Brown)
Original price was: ₹1,199.00.₹349.00Current price is: ₹349.00.
-
 Home Sizzler 214 cm (7 ft) Polyester Semi Transparent Door Curtain (Pack Of 2)(Floral, Brown)
Original price was: ₹999.00.₹349.00Current price is: ₹349.00.
Home Sizzler 214 cm (7 ft) Polyester Semi Transparent Door Curtain (Pack Of 2)(Floral, Brown)
Original price was: ₹999.00.₹349.00Current price is: ₹349.00.
-
 Panipat Textile Hub 213 cm (7 ft) Polyester Semi Transparent Door Curtain (Pack Of 2)(Floral, Brown)
Original price was: ₹899.00.₹299.00Current price is: ₹299.00.
Panipat Textile Hub 213 cm (7 ft) Polyester Semi Transparent Door Curtain (Pack Of 2)(Floral, Brown)
Original price was: ₹899.00.₹299.00Current price is: ₹299.00.

Windows 11 gives you plenty of ways to organize files and folders, but one useful feature isn’t exactly easy to find: adding comments to a folder.
Comments can be helpful when you have folders containing projects, documents, photos, work files, downloads, or anything else that needs a little extra context. For example, you might have a folder called “Client Documents” and want to add a note explaining what the folder contains, when it was created, or what still needs to be done.
The problem is that Windows 11 doesn’t provide a simple “Add Comment” option when you right-click a folder. Unlike some file-management applications, File Explorer doesn’t make folder comments obvious.
However, there is a workaround. You can use a folder’s customization settings and add a desktop.ini file containing the information you want Windows to display. It takes a few steps, but once you understand how it works, you can use the same method for other folders.
In this guide, I’ll walk you through the process step by step, including how to make hidden system files visible, create the necessary configuration file, and troubleshoot the most common problems.
Can You Add Comments Directly to a Folder in Windows 11?
Not in the same straightforward way you can rename a folder or change its icon.
Windows 11 doesn’t normally display a dedicated Comments field when you open the folder’s Properties window. That’s why searching through the standard right-click menu may leave you wondering where the option is.
The functionality is connected to Windows’ folder customization and metadata system. A special file called desktop.ini can be used to control certain properties and presentation details associated with a folder.
With the appropriate configuration, you can use this file to store a comment associated with the folder.
Before you begin, however, it’s important to understand that this isn’t a modern File Explorer feature with a simple graphical interface. You’re essentially customizing how Windows handles the folder.
So, if you’re comfortable following a few technical steps, here’s what to do.
Step 1: Turn on Hidden Items in File Explorer
The first thing you’ll need to do is make hidden files visible.
Windows normally hides certain system and configuration files because changing or deleting them accidentally can cause problems.
Open File Explorer by pressing:
Windows + E
Navigate to the folder where you want to add the comment.
Now select View from the toolbar at the top.
Choose:
Show > Hidden items
Windows will now display hidden files and folders.
Depending on your File Explorer configuration, you may see additional files that weren’t visible before.
Don’t worry if you don’t see anything immediately. The desktop.ini file we’ll be working with may also be treated as a protected operating-system file.
Step 2: Show Protected Operating System Files
If you need to create or modify a desktop.ini file, Windows may still hide it even after you’ve enabled hidden items.
To change this setting, click the three-dot menu in File Explorer and select:
Options
The Folder Options window will open.
Select the View tab.
Look through the Advanced settings until you find:
Hide protected operating system files (Recommended)
Uncheck this option.
Windows will display a warning explaining that protected operating-system files are important and that changing or deleting them could affect Windows.
Read the warning and select Yes if you’re sure you want to continue.
Then click Apply and OK.
You should now have access to protected files such as desktop.ini.
A quick warning
Don’t start deleting files simply because they have suddenly become visible.
Files such as desktop.ini are used by Windows to store folder customization information. Leave files alone unless you know exactly what you’re changing.
Once you’re finished with this process, you can turn protected operating-system files back on.
Step 3: Open the Folder You Want to Customize
Now navigate to the folder where you want to add a comment.
For example, suppose you have a folder called:
Important Documents
You can add a comment explaining what the folder contains, such as:
Contains tax documents, invoices, and financial records for 2026.
The comment itself isn’t necessarily going to appear as a large note inside the folder. Instead, you’re associating information with the folder through Windows’ configuration system.
This distinction is important because Windows 11 doesn’t work like a note-taking application here.
Step 4: Create or Locate desktop.ini
Inside the folder, look for a file called:
desktop.ini
If it already exists, don’t immediately create another one.
If there isn’t one, you can create a new text file and rename it.
Right-click an empty area inside the folder and choose:
New > Text Document
You’ll get a file similar to:
New Text Document.txt
Rename it to:
desktop.ini
Windows may display a warning asking whether you’re sure you want to change the file extension.
Select Yes.
If Windows doesn’t let you remove the .txt extension, you’ll need to make sure that file extensions are visible.
In File Explorer, select:
View > Show > File name extensions
Once enabled, you should be able to see the full filename.
Then rename the file from:
New Text Document.txt
to:
desktop.ini
Step 5: Open desktop.ini
Right-click the desktop.ini file and select:
Open with > Notepad
If Notepad isn’t shown immediately, choose another application and select Notepad.
You’ll probably see an empty file if you just created it.
This is where the folder customization information goes.
One important point: desktop.ini isn’t an ordinary notes file.
Windows expects specific formatting inside it, so you shouldn’t simply type a sentence and expect File Explorer to automatically treat it as a folder comment.
Step 6: Add the Folder Comment Information
Depending on the Windows configuration and the way you want the information displayed, desktop.ini can contain folder customization properties.
For example, you may encounter configurations using entries associated with folder information such as:
[.ShellClassInfo]
InfoTip=This folder contains important project documents.
The InfoTip value is used for tooltip information associated with the folder.
You can replace the text after InfoTip= with your own description.
For example:
[.ShellClassInfo]
InfoTip=Contains project files, client documents, and final reports.
Save the file after making the change.
The important part is preserving the structure.
Don’t remove:
[.ShellClassInfo]
unless you know that your particular configuration requires something different.
Step 7: Refresh the Folder
After saving desktop.ini, Windows may not immediately display the updated information.
Close File Explorer and open it again.
You can also refresh the current folder by pressing:
F5
If Windows still doesn’t display the information, don’t assume the process failed immediately.
Folder customization information can sometimes require Windows Explorer to reload the folder’s settings.
You can also restart Windows Explorer through Task Manager.
Press:
Ctrl + Shift + Esc
Find Windows Explorer in the list of running processes.
Right-click it and select:
Restart
Your taskbar and File Explorer windows may disappear briefly and then return.
Now navigate back to your folder and check whether the information is displayed.
Step 8: Check the Folder Tooltip
If the desktop.ini configuration has been recognized, hover your mouse over the folder in File Explorer.
Windows may display a tooltip containing information associated with the folder.
For example, if your configuration contains:
InfoTip=Contains final project documents.
you may see that description when hovering over the folder.
This is one reason the feature can be useful.
Instead of opening a folder just to find out what’s inside, you can provide a short description that gives you additional context.
For example:
Marketing Campaigns
could have a tooltip such as:
Contains campaign assets, ad creatives, and performance reports.
That can be especially useful when you have dozens or hundreds of similarly named folders.
What If the Comment Doesn’t Appear?
This is where things can become frustrating.
If you’ve followed the steps but don’t see your comment, check the following items.
Make sure the filename is correct
The file must be named:
desktop.ini
Not:
desktop.ini.txt
This is one of the most common problems.
Turn on File name extensions in File Explorer to verify the actual filename.
Check the formatting
The configuration should follow the expected desktop.ini format.
For example:
[.ShellClassInfo]
InfoTip=Your folder description here.
A spelling mistake in the section name or property can prevent Windows from recognizing the setting.
Restart Windows Explorer
Sometimes Explorer simply hasn’t reloaded the folder’s customization data.
Use Task Manager to restart Windows Explorer, then check again.
Check folder attributes
Desktop.ini is part of Windows’ folder customization system, and Windows may expect the folder to have appropriate attributes for certain desktop.ini behavior.
If you’re working with a customized folder and Windows isn’t recognizing the file, the folder’s attributes may need to be adjusted.
This is one reason I recommend using this method carefully rather than changing system settings across large numbers of folders.
Why Doesn’t Windows 11 Have an “Add Comment” Button?
You might reasonably wonder why Microsoft doesn’t simply provide a comments box in the folder Properties window.
Windows File Explorer has evolved over many years, and folder metadata isn’t handled as simply as something like a Word document comment.
There are also different types of metadata in Windows. Some information is associated with files, some with folders, and some with applications or Windows Explorer’s presentation of those items.
The desktop.ini mechanism is an older Windows feature that remains available for folder customization.
That’s why the process can feel much more complicated than it should.
You’re not missing an obvious button. There simply isn’t a normal folder-comment button in File Explorer.
An Easier Alternative: Rename Folders With More Information
If your main goal is organization rather than specifically using Windows’ comment functionality, there may be an easier solution.
Instead of adding comments, you could include important information directly in the folder name.
For example, instead of:
Project Files
you could use:
Project Files – Final – September 2026
Or:
Client Documents – Review Pending
This approach has one major advantage: the information is immediately visible.
You don’t need to hover over the folder or depend on desktop.ini.
You can also organize folders using prefixes, dates, and status indicators.
For example:
01 – Active Projects
02 – Completed Projects
03 – Archive
This can be much easier to maintain if you’re managing a large number of folders.
Another Option: Use a README File
If you need to store a longer explanation, a README file can be more practical.
Create a text document inside the folder called:
README.txt
Then add whatever information you need.
For example:
PROJECT INFORMATION

Client: Example Company
Status: In Progress
Last Updated: September 2026

This folder contains working documents,
images, reports, and final project files.
This is particularly useful for project folders where several people may need to understand the contents.
You can also use Microsoft Word, OneNote, or another note-taking application if the information is more detailed.
Can You Add Comments to Every Folder This Way?
Technically, you can customize multiple folders using desktop.ini, but I wouldn’t recommend doing it manually for hundreds of folders.
The more folders you customize, the more difficult it becomes to maintain the configuration files.
Remember that desktop.ini is a Windows system configuration mechanism, not a dedicated folder-notes database.
If you need extensive tagging, descriptions, categorization, or metadata, specialized file-management software may be a better solution.
Windows itself also provides other organizational features, including folder naming, sorting, grouping, and search.
Should You Hide Protected System Files Again?
Yes.
Once you’ve finished modifying the folder, I recommend restoring the default Explorer setting.
Open File Explorer and select:
Three dots > Options > View
Then enable:
Hide protected operating system files (Recommended)
You can also leave Hidden items disabled unless you specifically need to work with hidden files.
This reduces the possibility of accidentally changing or deleting an important Windows configuration file later.
Final Thoughts
Adding a comment to a folder in Windows 11 isn’t as straightforward as it should be.
There isn’t a simple Add Comment button in the folder’s right-click menu or Properties window. Instead, Windows relies on its older folder customization mechanism, including the desktop.ini file.
The basic process is to make hidden and protected files visible, create or edit the folder’s desktop.ini file, add the appropriate information, save it, and then refresh Windows Explorer.
For a short folder description, an InfoTip entry can be useful. However, if you need detailed notes, project instructions, or information that other people need to read, a README file or dedicated note-taking tool may be easier and safer.
I’d also recommend making a backup before experimenting with system-related files, particularly if you’re unfamiliar with desktop.ini.
Once you understand how the system works, though, you can use it to add useful descriptions to folders and make large collections of files easier to understand.
And if you’re only trying to remember what’s inside a folder, don’t overlook the simplest option: give the folder a descriptive name. Sometimes that’s still the quickest and most reliable solution in Windows 11.






Products
-
![Apple Watch Ultra 3 [GPS + Cellular 49mm] Running & Multisport Smartwatch w/Rugged Titanium Case w/Black Titanium Milanese Loop - M. Satellite Communications, Advanced Health & Fitness Tracking](https://bazaronweb.com/retailstores/wp-content/uploads/2025/09/apple-watch-320x320.jpg) Apple Watch Ultra 3 [GPS + Cellular 49mm] Running & Multisport Smartwatch w/Rugged Titanium Case w/Black Titanium Milanese Loop - M. Satellite Communications, Advanced Health & Fitness Tracking
Apple Watch Ultra 3 [GPS + Cellular 49mm] Running & Multisport Smartwatch w/Rugged Titanium Case w/Black Titanium Milanese Loop - M. Satellite Communications, Advanced Health & Fitness Tracking
-
 Apple iPad mini (A17 Pro): Apple Intelligence, 8.3-inch Liquid Retina Display, 256GB, Wi-Fi 6E, 12MP Front/12MP Back Camera, Touch ID, All-Day Battery Life — Purple
-
 Apple AirPods Max Wireless Over-Ear Headphones, Active Noise Cancelling, Transparency Mode, Personalized Spatial Audio, Dolby Atmos, Bluetooth Headphones for iPhone – Space Gray
-
 Apple AirPods Pro 2 Wireless Earbuds, Active Noise Cancellation, Hearing Aid Feature, Bluetooth Headphones, Transparency, Personalized Spatial Audio, High-Fidelity Sound, H2 Chip, USB-C Charging
-
Home Garage 210 TC Cotton King Floral Fitted (Elastic) Bedsheet(Pack of 1, Grey)
Original price was: ₹999.00.₹299.00Current price is: ₹299.00.
Leave a Reply