Discounted Products
-
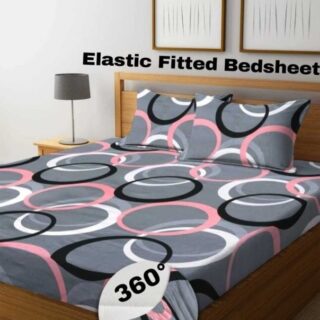 Home Garage 210 TC Cotton King Floral Fitted (Elastic) Bedsheet(Pack of 1, Grey)
Original price was: ₹999.00.₹299.00Current price is: ₹299.00.
Home Garage 210 TC Cotton King Floral Fitted (Elastic) Bedsheet(Pack of 1, Grey)
Original price was: ₹999.00.₹299.00Current price is: ₹299.00.
-
 Goodrik 140 TC Cotton Double 3D Printed Flat Bedsheet(Pack of 1, Brown)
Original price was: ₹499.00.₹229.00Current price is: ₹229.00.
Goodrik 140 TC Cotton Double 3D Printed Flat Bedsheet(Pack of 1, Brown)
Original price was: ₹499.00.₹229.00Current price is: ₹229.00.
-
 GLOBALSHOP 350 TC Microfiber Double Floral Flat Bedsheet(Pack of 1, Multicolor)
Original price was: ₹1,250.00.₹263.00Current price is: ₹263.00.
GLOBALSHOP 350 TC Microfiber Double Floral Flat Bedsheet(Pack of 1, Multicolor)
Original price was: ₹1,250.00.₹263.00Current price is: ₹263.00.
-
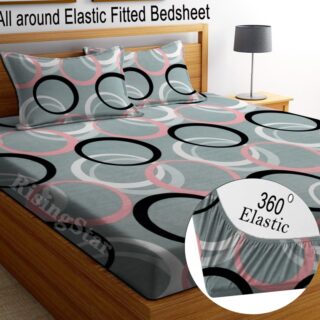 RisingStar 250 TC Microfiber King Printed Fitted (Elastic) Bedsheet(Pack of 1, FITTED-ROUND-CIRCLES-PREMIUM)
Original price was: ₹2,299.00.₹299.00Current price is: ₹299.00.
RisingStar 250 TC Microfiber King Printed Fitted (Elastic) Bedsheet(Pack of 1, FITTED-ROUND-CIRCLES-PREMIUM)
Original price was: ₹2,299.00.₹299.00Current price is: ₹299.00.
-
 Home Garage 210 TC Cotton King Floral Fitted (Elastic) Bedsheet(Pack of 1, Fitted Black Green)
Original price was: ₹1,299.00.₹299.00Current price is: ₹299.00.
Home Garage 210 TC Cotton King Floral Fitted (Elastic) Bedsheet(Pack of 1, Fitted Black Green)
Original price was: ₹1,299.00.₹299.00Current price is: ₹299.00.
-
 Home Garage 180 TC Cotton King 3D Printed Flat Bedsheet(Pack of 1, White)
Original price was: ₹999.00.₹229.00Current price is: ₹229.00.
Home Garage 180 TC Cotton King 3D Printed Flat Bedsheet(Pack of 1, White)
Original price was: ₹999.00.₹229.00Current price is: ₹229.00.
-
 Panipat Textile Hub 152.4 cm (5 ft) Polyester Window Curtain (Pack Of 2)(Solid, Aqua)
Original price was: ₹1,899.00.₹299.00Current price is: ₹299.00.
Panipat Textile Hub 152.4 cm (5 ft) Polyester Window Curtain (Pack Of 2)(Solid, Aqua)
Original price was: ₹1,899.00.₹299.00Current price is: ₹299.00.
-
 Home Sizzler 214 cm (7 ft) Polyester Semi Transparent Door Curtain (Pack Of 2)(Floral, Maroon)
Original price was: ₹1,199.00.₹399.00Current price is: ₹399.00.
Home Sizzler 214 cm (7 ft) Polyester Semi Transparent Door Curtain (Pack Of 2)(Floral, Maroon)
Original price was: ₹1,199.00.₹399.00Current price is: ₹399.00.
-
 Home Sizzler 153 cm (5 ft) Polyester Room Darkening Window Curtain (Pack Of 2)(Floral, Brown)
Original price was: ₹799.00.₹299.00Current price is: ₹299.00.
Home Sizzler 153 cm (5 ft) Polyester Room Darkening Window Curtain (Pack Of 2)(Floral, Brown)
Original price was: ₹799.00.₹299.00Current price is: ₹299.00.
-
 Stella Creations 214 cm (7 ft) Polyester Room Darkening Door Curtain (Pack Of 2)(Abstract, Brown)
Original price was: ₹1,299.00.₹449.00Current price is: ₹449.00.
Stella Creations 214 cm (7 ft) Polyester Room Darkening Door Curtain (Pack Of 2)(Abstract, Brown)
Original price was: ₹1,299.00.₹449.00Current price is: ₹449.00.
-
 Homefab India 152.5 cm (5 ft) Polyester Room Darkening Window Curtain (Pack Of 2)(Floral, Light Blue)
Original price was: ₹1,199.00.₹319.00Current price is: ₹319.00.
Homefab India 152.5 cm (5 ft) Polyester Room Darkening Window Curtain (Pack Of 2)(Floral, Light Blue)
Original price was: ₹1,199.00.₹319.00Current price is: ₹319.00.
-
 Urban Home 214 cm (7 ft) PVC Transparent Door Curtain Single Curtain(Solid, Off White)
Original price was: ₹699.00.₹203.00Current price is: ₹203.00.
Urban Home 214 cm (7 ft) PVC Transparent Door Curtain Single Curtain(Solid, Off White)
Original price was: ₹699.00.₹203.00Current price is: ₹203.00.
-
 Panipat Textile Hub 213 cm (7 ft) Polyester Door Curtain (Pack Of 2)(Solid, Brown)
Original price was: ₹1,199.00.₹349.00Current price is: ₹349.00.
Panipat Textile Hub 213 cm (7 ft) Polyester Door Curtain (Pack Of 2)(Solid, Brown)
Original price was: ₹1,199.00.₹349.00Current price is: ₹349.00.
-
 Home Sizzler 214 cm (7 ft) Polyester Semi Transparent Door Curtain (Pack Of 2)(Floral, Brown)
Original price was: ₹999.00.₹349.00Current price is: ₹349.00.
Home Sizzler 214 cm (7 ft) Polyester Semi Transparent Door Curtain (Pack Of 2)(Floral, Brown)
Original price was: ₹999.00.₹349.00Current price is: ₹349.00.
-
 Panipat Textile Hub 213 cm (7 ft) Polyester Semi Transparent Door Curtain (Pack Of 2)(Floral, Brown)
Original price was: ₹899.00.₹299.00Current price is: ₹299.00.
Panipat Textile Hub 213 cm (7 ft) Polyester Semi Transparent Door Curtain (Pack Of 2)(Floral, Brown)
Original price was: ₹899.00.₹299.00Current price is: ₹299.00.

Recording high-quality sound on a Mac is easier than you might think. Whether you want to create a voiceover, record a podcast, capture an interview, produce music, or simply save a voice note, macOS provides several built-in tools that can handle basic recording tasks without requiring additional software.
Your Mac’s built-in microphone is also good enough for many everyday recordings. However, if you want cleaner and more professional audio, you can connect an external microphone and use applications that provide greater control over recording settings and editing.
The quality of your final recording depends on several factors. Your microphone, room acoustics, microphone placement, input level, recording format, and background noise can all affect the result. Even the best recording software cannot completely fix a poor-quality recording captured in a noisy environment.
Fortunately, you have several options on a Mac. QuickTime Player is excellent for simple recordings, Voice Memos is convenient for quick voice notes, and GarageBand provides much more control for music and professional voice recordings.
Here are some of the best ways to record high-quality sound on your Mac.
1. Use QuickTime Player
One of the easiest ways to record audio on a Mac is with QuickTime Player.
QuickTime Player comes preinstalled with macOS, so you don’t normally need to download anything.
Open QuickTime Player from the Applications folder or search for it using Spotlight.
Once it opens, select File > New Audio Recording.
A small recording window will appear.
Before starting, click the options next to the Record button and choose your preferred microphone.
If you’ve connected an external USB microphone, you should see it listed alongside your Mac’s built-in microphone.
Select the microphone you want to use and adjust the input volume if the option is available.
Click the Record button to begin.
When you’re finished, click Stop.
You can then save the recording to your Mac.
QuickTime Player is a great choice when you need a straightforward recording without editing features or complicated settings.
It works particularly well for voice notes, short voiceovers, interviews, demonstrations, and other basic recordings.
2. Record Voice With Voice Memos
If you want something even simpler, try the Voice Memos application included with macOS.
Open Voice Memos from your Applications folder or search for it with Spotlight.
Click the Record button and start speaking.
When you’re finished, click the Stop button.
Your recording will be saved automatically in Voice Memos.
One advantage of Voice Memos is its simplicity. You don’t have to configure a complicated audio project just to record your voice.
It’s particularly useful for:
- Quick ideas
- Meeting notes
- Interviews
- Reminders
- Voice notes
- Short spoken recordings
If you use Apple devices with the same Apple Account, Voice Memos can also make it convenient to access recordings across supported devices when iCloud syncing is enabled.
For casual recordings, this can be all you need.
3. Use GarageBand for More Control
If you’re looking for more control over your recordings, GarageBand is one of the most useful options available to Mac users.
GarageBand is designed for music production, but you don’t have to be a musician to use it.
You can create a new project, select an audio track, choose your microphone, and start recording.
GarageBand gives you significantly more control than Voice Memos or QuickTime Player.
You can trim recordings, adjust volume, apply effects, edit tracks, and combine multiple audio sources.
For example, you could record a voiceover on one track and add background music on another.
You can also use GarageBand to create podcast-style recordings, music projects, voiceovers, and other audio content.
If you’re new to GarageBand, the interface may initially look complicated. However, you don’t need to learn every feature. For basic voice recording, you can start with a single audio track and gradually explore the additional tools.
4. Connect an External Microphone
If you want genuinely high-quality audio, your microphone is one of the most important parts of the setup.
The built-in microphone on a Mac can produce good results, especially for video calls and casual recordings. However, an external microphone can provide better clarity and more control.
A USB microphone is usually the easiest option.
Connect the microphone to your Mac and open:
System Settings > Sound
Under the input section, select your external microphone.
You can then test the input and adjust the input level if necessary.
After selecting the microphone in macOS, open your recording application and make sure it is using the same device.
If you’re using a professional XLR microphone, you will generally need an appropriate audio interface to connect it to your Mac.
You don’t necessarily need expensive equipment. A properly positioned USB microphone can be more than enough for podcasts, YouTube videos, tutorials, voiceovers, and online courses.
5. Choose the Right Recording Environment
One of the biggest mistakes people make is focusing entirely on software and equipment while ignoring the room they’re recording in.
Your recording environment can make a huge difference.
A room with hard walls, bare floors, and large windows can produce noticeable echoes. That reflected sound can make your voice sound distant or unnatural.
Instead, try recording in a quieter room containing soft furnishings.
Curtains, carpets, sofas, beds, and other soft surfaces can help reduce reflections.
You don’t need to build a professional recording studio.
Simply choosing a quieter room and moving away from noisy appliances can dramatically improve your results.
Turn off unnecessary fans and air conditioners if possible. Close windows if outside traffic or other environmental noise is entering the room.
Before recording your actual content, make a short test recording.
Listen carefully using headphones.
If you hear a lot of background noise or echo, improve the room before changing your software settings.
6. Position Your Microphone Correctly
Microphone placement is another simple way to improve sound quality.
Avoid placing the microphone extremely far away from you. A distant microphone captures more of the room and background noise.
At the same time, don’t put it directly against your mouth.
A reasonable distance will depend on your microphone, but a position roughly several inches away is a good starting point for many voice recordings.
Speak naturally toward the microphone rather than turning your head constantly.
You should also be careful with plosive sounds.
Words containing strong P and B sounds can create bursts of air that hit the microphone diaphragm and produce an unpleasant popping sound.
A pop filter or windscreen can help reduce these sounds.
The microphone doesn’t need to be perfectly positioned from the beginning. Record a few test samples, listen to them, and adjust the position until your voice sounds clear and natural.
7. Adjust Your Mac’s Input Settings
Before recording, check your Mac’s microphone settings.
Open:
Apple menu > System Settings > Sound
Under Input, select the microphone you want to use.
Check the input level while speaking.
If the input level is too low, your recording may be difficult to hear. Increasing the volume later can also make background noise more noticeable.
If the input is too high, loud parts of your speech can become distorted.
The ideal recording level leaves enough room for louder moments without constantly reaching the maximum level.
It’s a good idea to speak at the same volume you intend to use during the actual recording while testing the microphone.
If you change your speaking distance or volume significantly after testing, you may need to adjust the input level again.
8. Record at an Appropriate Quality
If you’re using GarageBand or another advanced recording application, you may have control over audio quality settings such as sample rate, bit depth, file format, and compression.
For many voice and video projects, 44.1 kHz or 48 kHz is sufficient.
If your recording will be used with video, 48 kHz is commonly used in video-production workflows.
For music production, your requirements may be different.
You should also consider the final format.
Lossless formats such as WAV or AIFF preserve the original recording quality but produce larger files. Compressed formats such as AAC require less storage but discard some audio information.
If you’re editing the recording later, keeping a high-quality source file can be useful. You can export a compressed version after editing when necessary.
Don’t automatically select the highest possible setting, though. Higher-quality audio consumes more storage and may not provide a noticeable improvement if your microphone or recording environment is the limiting factor.
9. Use Headphones While Monitoring
Headphones can help you identify problems that aren’t obvious while you’re recording.
If your recording application supports monitoring, listen to the microphone through headphones.
This can help you notice:
- Background noise
- Electrical interference
- Echo
- Distortion
- Excessive microphone volume
- Popping sounds
- Unwanted sounds from your environment
Avoid using speakers while recording because the microphone can pick up the sound coming from the speakers and create feedback or an echo.
Closed-back headphones are often useful for recording because they reduce the amount of sound escaping from the headphones into the microphone.
10. Edit the Recording Afterward
Even a well-recorded audio file may benefit from some basic editing.
GarageBand provides several editing tools, while other Mac-compatible audio applications can offer more advanced options.
You can remove unwanted sections, trim silence, adjust volume, and apply effects.
If there is constant background noise, noise-reduction tools can sometimes help.
However, avoid aggressive noise reduction.
Applying too much processing can make your voice sound artificial, metallic, or robotic.
Whenever possible, fix the source of the problem instead.
For example, if your air conditioner is creating constant noise, moving to a quieter room before recording will generally produce a better result than trying to remove the noise afterward.
QuickTime Player vs. Voice Memos vs. GarageBand
Each recording method has a different purpose.
QuickTime Player is best when you want a quick, straightforward audio recording without a complicated interface.
Voice Memos is ideal for casual voice notes, reminders, ideas, and short recordings.
GarageBand is better when you want editing, multiple tracks, effects, and greater control over your audio.
If you’re only recording a short note, using GarageBand may be unnecessary.
On the other hand, if you’re producing a podcast or professional voiceover, Voice Memos may not provide enough control.
Choose the simplest tool that provides the features you actually need.
Tips for Professional-Sounding Mac Recordings
You can improve your recordings considerably with a few simple habits.
First, record in the quietest environment available.
Second, keep the microphone at a consistent distance from your mouth.
Third, avoid touching the microphone or desk while recording.
Fourth, use headphones to monitor your recording when possible.
Fifth, make a short test recording before starting the main session.
And finally, don’t rely too heavily on audio effects.
A clean recording captured in a good environment usually requires much less editing.
If you’re recording long-form content, take short breaks between sections. This makes it easier to edit the recording later.
You can also keep your phone and other noisy devices away from the microphone to reduce unexpected notification sounds.
What Is the Best Way to Record High-Quality Sound on a Mac?
For a quick recording, Voice Memos or QuickTime Player is probably the easiest choice.
For more advanced work, GarageBand provides considerably more control.
If audio quality is your priority, combine the right software with a good external microphone and a quiet recording environment.
The application alone cannot turn poor-quality source audio into a professional recording.
Final Thoughts
Your Mac already gives you several convenient ways to record audio.
For basic recordings, Voice Memos and QuickTime Player are simple, fast, and easy to use. If you need more editing and production capabilities, GarageBand provides a much more flexible environment.
However, the biggest improvements often come from your recording setup rather than the software.
Choose a quiet room, position your microphone correctly, monitor your input level, and make a short test recording before beginning the real session. If you regularly create podcasts, videos, tutorials, or voiceovers, consider investing in an external microphone.
You don’t need an expensive studio to achieve good results. With the right microphone placement, a reasonably quiet environment, and appropriate recording settings, your Mac can become a capable audio-recording workstation.
Start with the tools already available on your Mac, experiment with your setup, and upgrade your equipment only when you identify a specific limitation.

- How to Remotely Control Another Computer Using Windows Quick Assist
- 5 Must-Have Electronics Gadgets for a More Comfortable Living Room

- How to Create a Windows 11 System Backup on an External Hard Drive

- 10 Smart Home Ideas That Make Everyday Life Easier

- Gemini Live Avatar: How to Talk to Gemini Face-to-Face

Products
-
![Apple Watch Ultra 3 [GPS + Cellular 49mm] Running & Multisport Smartwatch w/Rugged Titanium Case w/Black Titanium Milanese Loop - M. Satellite Communications, Advanced Health & Fitness Tracking](https://bazaronweb.com/retailstores/wp-content/uploads/2025/09/apple-watch-320x320.jpg) Apple Watch Ultra 3 [GPS + Cellular 49mm] Running & Multisport Smartwatch w/Rugged Titanium Case w/Black Titanium Milanese Loop - M. Satellite Communications, Advanced Health & Fitness Tracking
Apple Watch Ultra 3 [GPS + Cellular 49mm] Running & Multisport Smartwatch w/Rugged Titanium Case w/Black Titanium Milanese Loop - M. Satellite Communications, Advanced Health & Fitness Tracking
-
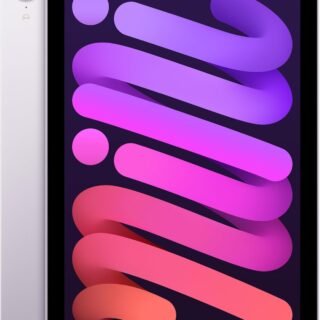 Apple iPad mini (A17 Pro): Apple Intelligence, 8.3-inch Liquid Retina Display, 256GB, Wi-Fi 6E, 12MP Front/12MP Back Camera, Touch ID, All-Day Battery Life — Purple
-
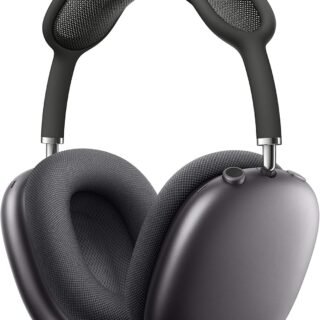 Apple AirPods Max Wireless Over-Ear Headphones, Active Noise Cancelling, Transparency Mode, Personalized Spatial Audio, Dolby Atmos, Bluetooth Headphones for iPhone – Space Gray
-
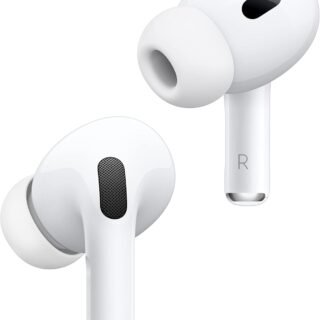 Apple AirPods Pro 2 Wireless Earbuds, Active Noise Cancellation, Hearing Aid Feature, Bluetooth Headphones, Transparency, Personalized Spatial Audio, High-Fidelity Sound, H2 Chip, USB-C Charging
-
Home Garage 210 TC Cotton King Floral Fitted (Elastic) Bedsheet(Pack of 1, Grey)
Original price was: ₹999.00.₹299.00Current price is: ₹299.00.
Leave a Reply