Discounted Products
-
 Home Garage 210 TC Cotton King Floral Fitted (Elastic) Bedsheet(Pack of 1, Grey)
Original price was: ₹999.00.₹299.00Current price is: ₹299.00.
Home Garage 210 TC Cotton King Floral Fitted (Elastic) Bedsheet(Pack of 1, Grey)
Original price was: ₹999.00.₹299.00Current price is: ₹299.00.
-
 Goodrik 140 TC Cotton Double 3D Printed Flat Bedsheet(Pack of 1, Brown)
Original price was: ₹499.00.₹229.00Current price is: ₹229.00.
Goodrik 140 TC Cotton Double 3D Printed Flat Bedsheet(Pack of 1, Brown)
Original price was: ₹499.00.₹229.00Current price is: ₹229.00.
-
 GLOBALSHOP 350 TC Microfiber Double Floral Flat Bedsheet(Pack of 1, Multicolor)
Original price was: ₹1,250.00.₹263.00Current price is: ₹263.00.
GLOBALSHOP 350 TC Microfiber Double Floral Flat Bedsheet(Pack of 1, Multicolor)
Original price was: ₹1,250.00.₹263.00Current price is: ₹263.00.
-
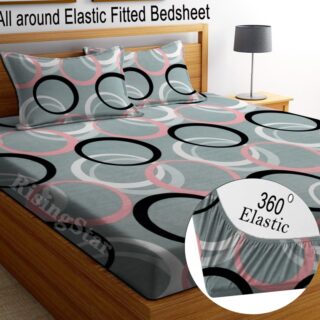 RisingStar 250 TC Microfiber King Printed Fitted (Elastic) Bedsheet(Pack of 1, FITTED-ROUND-CIRCLES-PREMIUM)
Original price was: ₹2,299.00.₹299.00Current price is: ₹299.00.
RisingStar 250 TC Microfiber King Printed Fitted (Elastic) Bedsheet(Pack of 1, FITTED-ROUND-CIRCLES-PREMIUM)
Original price was: ₹2,299.00.₹299.00Current price is: ₹299.00.
-
 Home Garage 210 TC Cotton King Floral Fitted (Elastic) Bedsheet(Pack of 1, Fitted Black Green)
Original price was: ₹1,299.00.₹299.00Current price is: ₹299.00.
Home Garage 210 TC Cotton King Floral Fitted (Elastic) Bedsheet(Pack of 1, Fitted Black Green)
Original price was: ₹1,299.00.₹299.00Current price is: ₹299.00.
-
 Home Garage 180 TC Cotton King 3D Printed Flat Bedsheet(Pack of 1, White)
Original price was: ₹999.00.₹229.00Current price is: ₹229.00.
Home Garage 180 TC Cotton King 3D Printed Flat Bedsheet(Pack of 1, White)
Original price was: ₹999.00.₹229.00Current price is: ₹229.00.
-
 Panipat Textile Hub 152.4 cm (5 ft) Polyester Window Curtain (Pack Of 2)(Solid, Aqua)
Original price was: ₹1,899.00.₹299.00Current price is: ₹299.00.
Panipat Textile Hub 152.4 cm (5 ft) Polyester Window Curtain (Pack Of 2)(Solid, Aqua)
Original price was: ₹1,899.00.₹299.00Current price is: ₹299.00.
-
 Home Sizzler 214 cm (7 ft) Polyester Semi Transparent Door Curtain (Pack Of 2)(Floral, Maroon)
Original price was: ₹1,199.00.₹399.00Current price is: ₹399.00.
Home Sizzler 214 cm (7 ft) Polyester Semi Transparent Door Curtain (Pack Of 2)(Floral, Maroon)
Original price was: ₹1,199.00.₹399.00Current price is: ₹399.00.
-
 Home Sizzler 153 cm (5 ft) Polyester Room Darkening Window Curtain (Pack Of 2)(Floral, Brown)
Original price was: ₹799.00.₹299.00Current price is: ₹299.00.
Home Sizzler 153 cm (5 ft) Polyester Room Darkening Window Curtain (Pack Of 2)(Floral, Brown)
Original price was: ₹799.00.₹299.00Current price is: ₹299.00.
-
 Stella Creations 214 cm (7 ft) Polyester Room Darkening Door Curtain (Pack Of 2)(Abstract, Brown)
Original price was: ₹1,299.00.₹449.00Current price is: ₹449.00.
Stella Creations 214 cm (7 ft) Polyester Room Darkening Door Curtain (Pack Of 2)(Abstract, Brown)
Original price was: ₹1,299.00.₹449.00Current price is: ₹449.00.
-
 Homefab India 152.5 cm (5 ft) Polyester Room Darkening Window Curtain (Pack Of 2)(Floral, Light Blue)
Original price was: ₹1,199.00.₹319.00Current price is: ₹319.00.
Homefab India 152.5 cm (5 ft) Polyester Room Darkening Window Curtain (Pack Of 2)(Floral, Light Blue)
Original price was: ₹1,199.00.₹319.00Current price is: ₹319.00.
-
 Urban Home 214 cm (7 ft) PVC Transparent Door Curtain Single Curtain(Solid, Off White)
Original price was: ₹699.00.₹203.00Current price is: ₹203.00.
Urban Home 214 cm (7 ft) PVC Transparent Door Curtain Single Curtain(Solid, Off White)
Original price was: ₹699.00.₹203.00Current price is: ₹203.00.
-
 Panipat Textile Hub 213 cm (7 ft) Polyester Door Curtain (Pack Of 2)(Solid, Brown)
Original price was: ₹1,199.00.₹349.00Current price is: ₹349.00.
Panipat Textile Hub 213 cm (7 ft) Polyester Door Curtain (Pack Of 2)(Solid, Brown)
Original price was: ₹1,199.00.₹349.00Current price is: ₹349.00.
-
 Home Sizzler 214 cm (7 ft) Polyester Semi Transparent Door Curtain (Pack Of 2)(Floral, Brown)
Original price was: ₹999.00.₹349.00Current price is: ₹349.00.
Home Sizzler 214 cm (7 ft) Polyester Semi Transparent Door Curtain (Pack Of 2)(Floral, Brown)
Original price was: ₹999.00.₹349.00Current price is: ₹349.00.
-
 Panipat Textile Hub 213 cm (7 ft) Polyester Semi Transparent Door Curtain (Pack Of 2)(Floral, Brown)
Original price was: ₹899.00.₹299.00Current price is: ₹299.00.
Panipat Textile Hub 213 cm (7 ft) Polyester Semi Transparent Door Curtain (Pack Of 2)(Floral, Brown)
Original price was: ₹899.00.₹299.00Current price is: ₹299.00.
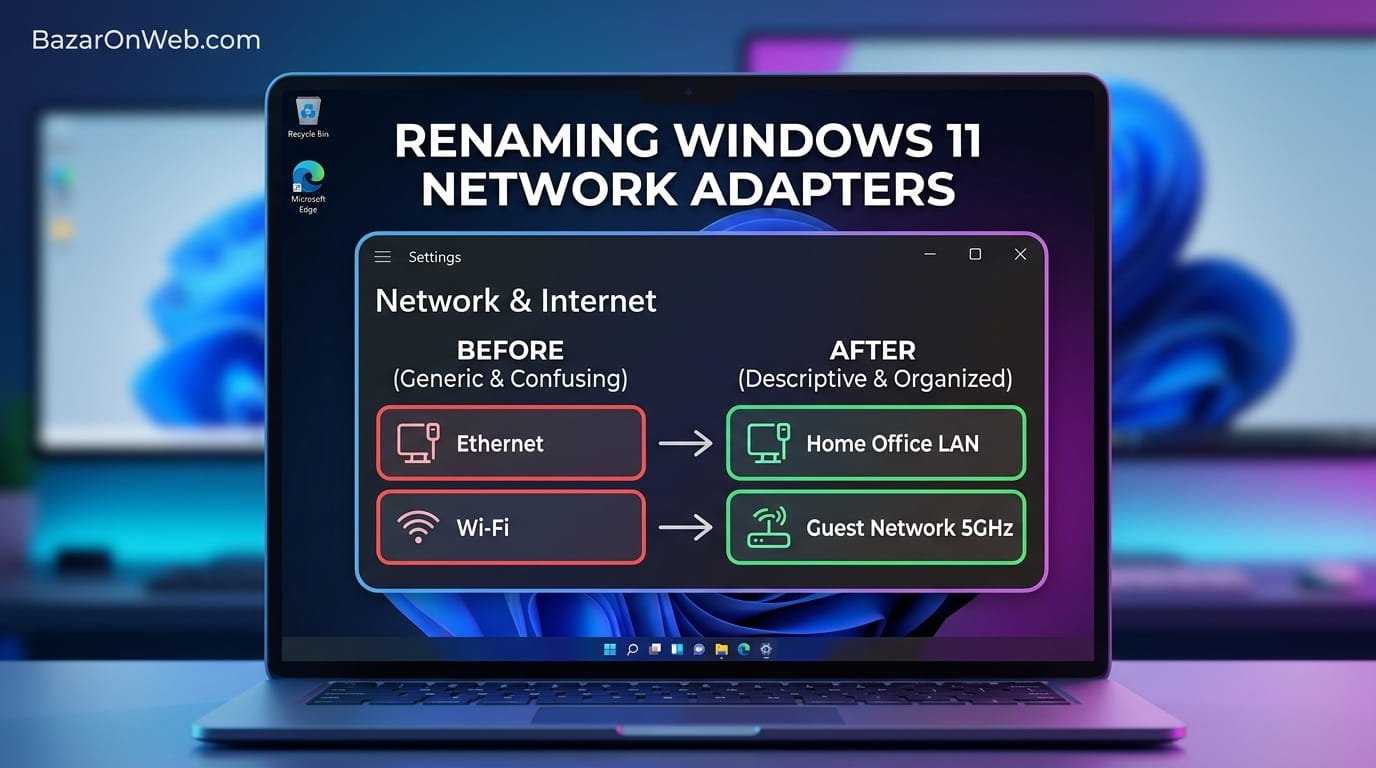
My home office has gotten complicated over the years. I have multiple computers, a printer that connects via Ethernet, a WiFi mesh network system, an old USB WiFi adapter I keep for backup, and sometimes I connect to a mobile hotspot. My laptop somehow acquired multiple network adapters—some built-in, some added through various adapters I’ve tried, some I’m not even sure still work.
One day I needed to troubleshoot a connection issue. I opened network settings to disable WiFi temporarily and use Ethernet instead. But when I looked at my network adapters list, I saw: “Ethernet,” “Ethernet 2,” “WiFi,” “WiFi 2,” and something called “Realtek PCIe GBE Family Controller.”
Which one was actually my active connection? Which Ethernet was the cable I just plugged in? Was WiFi 2 the main network or the backup hotspot? I literally couldn’t tell.
I ended up disabling the wrong adapter, which knocked out my connection for 20 minutes while I figured out what I’d done. Sitting there frantically trying different adapters, re-enabling things, testing connections, I thought: there has to be a better way to identify these.
And there is. You can rename your network adapters to something meaningful. Instead of “Ethernet” and “Ethernet 2,” you could have “Office Printer Connection” and “Garage WiFi Backup.” Instead of “WiFi” and “WiFi 2,” you could have “Main Network” and “Mobile Hotspot.”
This seems like a small quality-of-life improvement, but when you’re troubleshooting network issues at 2 AM and you need to know exactly which adapter you’re disabling, meaningful names save enormous amounts of frustration.
Why You’d Actually Want to Rename Network Adapters
Most people never rename their network adapters because most people only have one or two and it’s obvious which is which. But certain situations make renaming genuinely useful.
You have multiple adapters because you’ve added external network devices over time (USB WiFi adapters, USB Ethernet adapters, docking stations with built-in network connections). Your computer has accumulated multiple options and you can’t remember which is which.
You’re troubleshooting network issues and need to identify exactly which adapter is causing problems. Meaningful names make it immediately obvious which one you’re working with.
You have a complex home network setup with multiple WiFi networks (main network, guest network, IoT devices network) and you want to connect each device to different networks. Clear naming makes managing these easier.
You’re setting up network priorities or failover systems where traffic routes through specific adapters in specific order. You need to know exactly which adapter you’re configuring.
You have a laptop with WiFi and Ethernet and you frequently switch between them depending on location. Renaming them helps you quickly identify which one you’re currently using and which one to switch to.
You’re working in IT or tech support and manage multiple machines. Clear naming conventions help you troubleshoot faster and document systems better.
Method 1: The Simple Settings Route (If It Works)
Windows 11 has a straightforward way to rename adapters through Settings, but it’s sometimes finicky and doesn’t always show the rename option.
Open Settings (Windows Key + I). Navigate to Network & Internet > Advanced network settings > View your network devices (or similar wording depending on your Windows 11 version—Microsoft reorganizes these screens constantly).
You’ll see a list of your network adapters. Each shows the adapter type (Ethernet, WiFi, etc.) and its current name.
Try right-clicking on an adapter. If you’re lucky, you’ll see an option like “Rename” or “Properties.” Click it and you can rename the adapter directly.
If the rename option doesn’t appear (which happens surprisingly often), try another method. Sometimes the interface is just broken for this particular action and you need to go a different route.
If right-clicking shows “Properties” instead of “Rename,” click Properties and look for a name field within the properties dialog. Some adapters allow renaming through Properties, others don’t.
This method is simple when it works. It’s frustrating when it doesn’t, which is often enough that I’d call this method unreliable.
Method 2: Device Manager (More Reliable)
Device Manager is where Windows stores information about all your hardware, including network adapters. Renaming through Device Manager is more reliable than Settings.
Right-click the Start button and select “Device Manager.” (Or search for “Device Manager” in the Start menu.)
Device Manager opens showing your system’s hardware. Look for “Network adapters” category. Click the arrow to expand it.
You’ll see a list of all your network adapters. This list sometimes shows adapters that don’t currently work but are still installed (old devices you added months ago, disabled adapters, etc.). All appear here.
Right-click the adapter you want to rename. Select “Rename” from the context menu.
A text field appears with the current name. Delete the current name and type your new name. Press Enter to save.
The adapter immediately shows the new name. It’s effective and straightforward.
The advantage of Device Manager is that it shows ALL adapters, including disabled ones and old ones you forgot about. This helps you identify which adapters are actually active and which are legacy devices you could probably uninstall.
Method 3: Network Connections Panel (The Old School Way)
Windows 11 inherited a network connections panel from Windows 10 and earlier. It’s less prominent now, but it still exists and still works for renaming adapters.
Right-click the Start button and search for “Network Connections.” Select “View network connections” or similar.
Alternatively, you can navigate manually: Settings > Network & Internet > Advanced network settings > More network adapter options.
This opens an older-style Windows panel showing your active network connections (active adapters only, not disabled ones).
Right-click the connection you want to rename. Select “Rename this connection.”
Type your new name and press Enter.
This method is simpler than Device Manager because it only shows active adapters, so you don’t have to sift through disabled hardware. But Device Manager is generally more reliable for the rename operation itself.
Method 4: Command Prompt (For People Who Aren’t Afraid of Command Line)
If graphical interfaces fail, command line always works. Command Prompt gives you direct control over adapter naming.
Right-click Start and select “Windows Terminal (Admin)” or “Command Prompt (Admin).” (Windows Terminal is the newer version, Command Prompt is the older one—both work.)
In the terminal, type: netsh interface show interface
This shows a list of all your network adapters with their current names and status (up/down/disabled).
To rename an adapter, use: netsh interface set interface name="Old Name" newname="New Name"
For example: netsh interface set interface name="Ethernet" newname="Office Printer Connection"
After running the command, the adapter’s name changes immediately. You can verify the change by running the first command again to see the updated list.
This method is reliable because it directly modifies the system’s network configuration. If graphical interfaces fail, command line usually works.
The downside is that if you’re not comfortable with command line, typing the exact syntax correctly is intimidating. But the syntax is straightforward and hard to get wrong.
Method 5: PowerShell (For Serious Tinkering)
PowerShell is Windows’s more advanced scripting tool. It also allows renaming network adapters and is sometimes more powerful than standard command line.
Right-click Start and select “Windows Terminal (Admin).” (You want the admin version for permission to make changes.)
In PowerShell, type: Get-NetAdapter | Select-Object Name, Status
This shows all adapters with their current names and status.
To rename an adapter, use: Rename-NetAdapter -Name "Old Name" -NewName "New Name"
For example: Rename-NetAdapter -Name "Ethernet" -NewName "Office Printer Connection"
PowerShell is slightly more elegant than command line, and many tech people prefer it. But the end result is identical—your adapter gets renamed.
When Renaming Fails: Troubleshooting
Sometimes you try to rename an adapter and it doesn’t work. The rename command executes without error, but the name doesn’t actually change.
Adapter is disabled: You can’t rename a disabled adapter through some methods. Enable the adapter first, then rename it. In Device Manager, right-click the disabled adapter and select “Enable device.”
Permissions issue: Some rename methods require administrator access. Make sure you’re running your command prompt or terminal as administrator (right-click > Run as administrator).
Adapter is in use or locked: If Windows is actively using the adapter, renaming might fail or not take effect until you restart. Disable the adapter, rename it, then enable it again. Or restart your computer for the name change to fully apply.
Corrupted adapter configuration: Rarely, an adapter’s configuration becomes corrupted and renaming fails entirely. Uninstall and reinstall the adapter: Device Manager > right-click adapter > Uninstall device > check “Delete the driver software for this device” > restart computer > Windows automatically reinstalls the adapter.
Special characters in name: Some special characters (asterisks, quotes, slashes, etc.) can’t be used in adapter names. Stick to letters, numbers, spaces, and hyphens.
Network connection active: If you’re actively using the network connection you’re trying to rename, disconnect first, rename, then reconnect. Some systems don’t allow renaming active connections.
Naming Conventions That Actually Make Sense
Once you can rename adapters, the question becomes: what should you name them?
The goal is naming them so that looking at the name immediately tells you what the adapter is and what it’s for.
Bad names: “Ethernet,” “WiFi,” “Ethernet 2,” “Network Adapter”
These are the defaults and they’re not helpful when you have multiples.
Good names:
- “Main WiFi Network”
- “Office Ethernet Cable”
- “Mobile Hotspot Backup”
- “IoT Devices Network”
- “Guest WiFi Network”
- “Garage Printer WiFi”
- “VPN Connection”
- “Old USB WiFi Adapter”
The pattern is: include what the adapter is (WiFi, Ethernet, USB) and what it’s for or where it connects. This immediately tells you whether to use it and why it exists.
For complex setups, you might also include speed or priority: “Fast Office Ethernet” vs “Slow Backup WiFi,” for example.
Document what you named everything. Write down your adapter naming scheme. This is useful for future you when you’ve forgotten why you named something what you did.
Identifying Which Adapter Is Actually Active
Renaming adapters is useful, but you also need to know which one is currently your active internet connection.
In Settings > Network & Internet, you can see which connection is currently active. It’s usually shown at the top or marked with a “connected” indicator.
Alternatively, in Device Manager or Network Connections panel, your active connection is usually marked as “Connected” or shows its status as “Up.”
You can also check by looking at your network icon in the system tray (bottom right). It shows which connection is active.
In command line, running ipconfig shows all adapters and which ones have IP addresses assigned (assigned = active connection).
When You Have Multiple Active Connections
Sometimes you have multiple network adapters actively connected simultaneously. Your laptop might have both WiFi and Ethernet connected at the same time.
Windows prioritizes connections in order: Ethernet typically has higher priority than WiFi, for example. So if both are connected, Windows prefers the Ethernet connection.
You can change this priority through Settings > Network & Internet > Advanced network settings > Advanced options (or similar wording). You can see and adjust the network priority order.
Clear adapter names help manage this. If you have multiple active connections, naming them clearly shows which is which and helps you understand which one Windows is currently using for your internet traffic.
Advanced: Network Profile Names vs Adapter Names
Important distinction: adapter names (what we’ve been discussing) are different from network profile names (the names of the WiFi networks or VPN profiles you connect to).
Your adapter name is “Main WiFi” (the hardware device).
Your network profile name is “My Home Network” (the specific WiFi network you connect through that adapter).
These are separate. Renaming adapters doesn’t change network profiles. If you want to rename your actual WiFi network (what appears in the list of available networks), that’s done through your router settings, not Windows.
Understanding this distinction prevents confusion. When people say “rename my WiFi,” they usually mean rename their WiFi network (through router settings). When they mean rename their network adapter (the hardware device), they mean what we’ve been discussing.
Cleaning Up Old Unused Adapters
As you rename adapters, you might discover old adapters you installed months ago and forgot about. Old USB adapters you tried but don’t use, disabled adapters from previous devices, etc.
You can delete these unused adapters to clean up your system.
Open Device Manager. Expand “Network adapters.” Right-click the old adapter you don’t need. Select “Uninstall device.” Check “Delete the driver software for this device” and click OK.
Windows removes the adapter from your system. It’s gone. If you later need it, you’d have to reinstall the hardware and drivers.
This cleanup doesn’t harm anything. It just removes clutter. If you’re unsure whether you still need an adapter, leave it alone. You can always uninstall it later.
Why Your Built-In Adapter Has a Long Weird Name
Sometimes your built-in network adapter has a name like “Realtek PCIe GBE Family Controller” or “Intel Ethernet Connection.” These are manufacturer-provided names and are usually difficult to rename through some methods.
These built-in adapters are often locked against renaming for technical reasons. Device Manager usually allows renaming them, but command line might not.
If you’re stuck with a weird built-in name and can’t rename it, don’t worry. It’s usually obvious which adapter is the built-in one anyway. The ones you should rename are the additional adapters you’ve added.
Network Adapter Names After Windows Updates
Sometimes after Windows updates, network adapter names revert to defaults. Windows Update occasionally resets network settings as part of installation.
After major updates, check your network adapters and re-rename them if necessary. This is rare but happens often enough to be aware of.
If this bothers you, you can manually document your adapter setup (screenshot your adapter names and what they represent) so you can quickly restore them if needed.
When Renaming Adapters Actually Matters Most
Renaming adapters seems trivial until you need it. Then it becomes invaluable.
You’re troubleshooting network issues at midnight. You’re frantically testing different adapters to isolate which one is broken. Meaningful names save minutes of confusion.
You’re setting up network failover where your computer should automatically switch to backup internet if primary fails. You need to clearly identify which is primary and which is backup.
You’re managing a network in a business environment with multiple devices. Clear naming conventions help everyone understand the system faster.
You’re teaching someone how to troubleshoot their own internet issues. Clear adapter names make explaining what to do much simpler than saying “disable the second Ethernet one, not the WiFi one.”
These scenarios might seem far-fetched, but they happen more often than you’d think.
The Reality
Renaming network adapters is a small technical tweak that doesn’t matter most of the time. Your internet works fine regardless of adapter names.
But when you need it, when you’re in a situation where you need to know exactly which adapter is which, the names suddenly matter enormously.
Taking five minutes to rename your adapters meaningfully prevents frustration later. Future you will appreciate past you for this small bit of clarity.
It’s not essential. Your computer works fine with default names. But it’s a small thing that improves quality of life for anyone managing complex network setups.
Quick Reference: Methods Ranked by Ease
Need to rename an adapter?
- Device Manager – Most reliable, works for all adapters, straightforward process
- Network Connections Panel – Simple, only shows active adapters (simpler if you have many)
- Command Prompt – Reliable, straightforward syntax, requires comfort with terminal
- Settings – Simplest if it works, but often doesn’t—unreliable
- PowerShell – Most powerful, requires comfort with PowerShell, overkill for simple renaming
Start with Device Manager. If that doesn’t work, try command line. Most of the time, one of these works.
Disclaimer: This article provides educational troubleshooting guidance. Procedures may have unintended consequences including data loss or system damage. Results vary by device model, OS version, and configuration. Always backup critical data before attempting system modifications. Seek professional support if problems persist or you’re uncomfortable with technical procedures. Users assume full responsibility for outcomes.

- How to Remotely Control Another Computer Using Windows Quick Assist
- 5 Must-Have Electronics Gadgets for a More Comfortable Living Room

- How to Create a Windows 11 System Backup on an External Hard Drive

- 10 Smart Home Ideas That Make Everyday Life Easier

- Gemini Live Avatar: How to Talk to Gemini Face-to-Face

Products
-
![Apple Watch Ultra 3 [GPS + Cellular 49mm] Running & Multisport Smartwatch w/Rugged Titanium Case w/Black Titanium Milanese Loop - M. Satellite Communications, Advanced Health & Fitness Tracking](https://bazaronweb.com/retailstores/wp-content/uploads/2025/09/apple-watch-320x320.jpg) Apple Watch Ultra 3 [GPS + Cellular 49mm] Running & Multisport Smartwatch w/Rugged Titanium Case w/Black Titanium Milanese Loop - M. Satellite Communications, Advanced Health & Fitness Tracking
Apple Watch Ultra 3 [GPS + Cellular 49mm] Running & Multisport Smartwatch w/Rugged Titanium Case w/Black Titanium Milanese Loop - M. Satellite Communications, Advanced Health & Fitness Tracking
-
 Apple iPad mini (A17 Pro): Apple Intelligence, 8.3-inch Liquid Retina Display, 256GB, Wi-Fi 6E, 12MP Front/12MP Back Camera, Touch ID, All-Day Battery Life — Purple
-
 Apple AirPods Max Wireless Over-Ear Headphones, Active Noise Cancelling, Transparency Mode, Personalized Spatial Audio, Dolby Atmos, Bluetooth Headphones for iPhone – Space Gray
-
 Apple AirPods Pro 2 Wireless Earbuds, Active Noise Cancellation, Hearing Aid Feature, Bluetooth Headphones, Transparency, Personalized Spatial Audio, High-Fidelity Sound, H2 Chip, USB-C Charging
-
Home Garage 210 TC Cotton King Floral Fitted (Elastic) Bedsheet(Pack of 1, Grey)
Original price was: ₹999.00.₹299.00Current price is: ₹299.00.
Leave a Reply