Discounted Products
-
 Home Garage 210 TC Cotton King Floral Fitted (Elastic) Bedsheet(Pack of 1, Grey)
Original price was: ₹999.00.₹299.00Current price is: ₹299.00.
Home Garage 210 TC Cotton King Floral Fitted (Elastic) Bedsheet(Pack of 1, Grey)
Original price was: ₹999.00.₹299.00Current price is: ₹299.00.
-
 Goodrik 140 TC Cotton Double 3D Printed Flat Bedsheet(Pack of 1, Brown)
Original price was: ₹499.00.₹229.00Current price is: ₹229.00.
Goodrik 140 TC Cotton Double 3D Printed Flat Bedsheet(Pack of 1, Brown)
Original price was: ₹499.00.₹229.00Current price is: ₹229.00.
-
 GLOBALSHOP 350 TC Microfiber Double Floral Flat Bedsheet(Pack of 1, Multicolor)
Original price was: ₹1,250.00.₹263.00Current price is: ₹263.00.
GLOBALSHOP 350 TC Microfiber Double Floral Flat Bedsheet(Pack of 1, Multicolor)
Original price was: ₹1,250.00.₹263.00Current price is: ₹263.00.
-
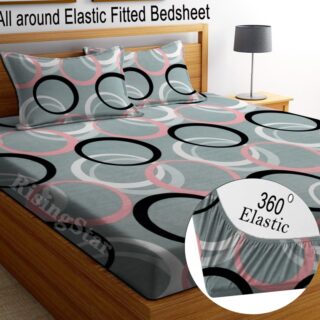 RisingStar 250 TC Microfiber King Printed Fitted (Elastic) Bedsheet(Pack of 1, FITTED-ROUND-CIRCLES-PREMIUM)
Original price was: ₹2,299.00.₹299.00Current price is: ₹299.00.
RisingStar 250 TC Microfiber King Printed Fitted (Elastic) Bedsheet(Pack of 1, FITTED-ROUND-CIRCLES-PREMIUM)
Original price was: ₹2,299.00.₹299.00Current price is: ₹299.00.
-
 Home Garage 210 TC Cotton King Floral Fitted (Elastic) Bedsheet(Pack of 1, Fitted Black Green)
Original price was: ₹1,299.00.₹299.00Current price is: ₹299.00.
Home Garage 210 TC Cotton King Floral Fitted (Elastic) Bedsheet(Pack of 1, Fitted Black Green)
Original price was: ₹1,299.00.₹299.00Current price is: ₹299.00.
-
 Home Garage 180 TC Cotton King 3D Printed Flat Bedsheet(Pack of 1, White)
Original price was: ₹999.00.₹229.00Current price is: ₹229.00.
Home Garage 180 TC Cotton King 3D Printed Flat Bedsheet(Pack of 1, White)
Original price was: ₹999.00.₹229.00Current price is: ₹229.00.
-
 Panipat Textile Hub 152.4 cm (5 ft) Polyester Window Curtain (Pack Of 2)(Solid, Aqua)
Original price was: ₹1,899.00.₹299.00Current price is: ₹299.00.
Panipat Textile Hub 152.4 cm (5 ft) Polyester Window Curtain (Pack Of 2)(Solid, Aqua)
Original price was: ₹1,899.00.₹299.00Current price is: ₹299.00.
-
 Home Sizzler 214 cm (7 ft) Polyester Semi Transparent Door Curtain (Pack Of 2)(Floral, Maroon)
Original price was: ₹1,199.00.₹399.00Current price is: ₹399.00.
Home Sizzler 214 cm (7 ft) Polyester Semi Transparent Door Curtain (Pack Of 2)(Floral, Maroon)
Original price was: ₹1,199.00.₹399.00Current price is: ₹399.00.
-
 Home Sizzler 153 cm (5 ft) Polyester Room Darkening Window Curtain (Pack Of 2)(Floral, Brown)
Original price was: ₹799.00.₹299.00Current price is: ₹299.00.
Home Sizzler 153 cm (5 ft) Polyester Room Darkening Window Curtain (Pack Of 2)(Floral, Brown)
Original price was: ₹799.00.₹299.00Current price is: ₹299.00.
-
 Stella Creations 214 cm (7 ft) Polyester Room Darkening Door Curtain (Pack Of 2)(Abstract, Brown)
Original price was: ₹1,299.00.₹449.00Current price is: ₹449.00.
Stella Creations 214 cm (7 ft) Polyester Room Darkening Door Curtain (Pack Of 2)(Abstract, Brown)
Original price was: ₹1,299.00.₹449.00Current price is: ₹449.00.
-
 Homefab India 152.5 cm (5 ft) Polyester Room Darkening Window Curtain (Pack Of 2)(Floral, Light Blue)
Original price was: ₹1,199.00.₹319.00Current price is: ₹319.00.
Homefab India 152.5 cm (5 ft) Polyester Room Darkening Window Curtain (Pack Of 2)(Floral, Light Blue)
Original price was: ₹1,199.00.₹319.00Current price is: ₹319.00.
-
 Urban Home 214 cm (7 ft) PVC Transparent Door Curtain Single Curtain(Solid, Off White)
Original price was: ₹699.00.₹203.00Current price is: ₹203.00.
Urban Home 214 cm (7 ft) PVC Transparent Door Curtain Single Curtain(Solid, Off White)
Original price was: ₹699.00.₹203.00Current price is: ₹203.00.
-
 Panipat Textile Hub 213 cm (7 ft) Polyester Door Curtain (Pack Of 2)(Solid, Brown)
Original price was: ₹1,199.00.₹349.00Current price is: ₹349.00.
Panipat Textile Hub 213 cm (7 ft) Polyester Door Curtain (Pack Of 2)(Solid, Brown)
Original price was: ₹1,199.00.₹349.00Current price is: ₹349.00.
-
 Home Sizzler 214 cm (7 ft) Polyester Semi Transparent Door Curtain (Pack Of 2)(Floral, Brown)
Original price was: ₹999.00.₹349.00Current price is: ₹349.00.
Home Sizzler 214 cm (7 ft) Polyester Semi Transparent Door Curtain (Pack Of 2)(Floral, Brown)
Original price was: ₹999.00.₹349.00Current price is: ₹349.00.
-
 Panipat Textile Hub 213 cm (7 ft) Polyester Semi Transparent Door Curtain (Pack Of 2)(Floral, Brown)
Original price was: ₹899.00.₹299.00Current price is: ₹299.00.
Panipat Textile Hub 213 cm (7 ft) Polyester Semi Transparent Door Curtain (Pack Of 2)(Floral, Brown)
Original price was: ₹899.00.₹299.00Current price is: ₹299.00.

What happens when your Mac Starts Refusing to Work:
I was working on a document when a notification appeared: “Your Mac storage is almost full.”
I thought that was weird. I didn’t have that many files. I hadn’t been hoarding photos or videos. I’d deleted things recently. Yet macOS was insisting I was running out of space.
I checked System Settings > General > Storage. My 256GB drive showed only 5GB free. Everything else was consumed by… what exactly? The system wouldn’t tell me.

I started digging. My Applications folder only showed a few gigabytes. My Documents folder was relatively small. My Downloads folder was empty. My Pictures folder had maybe 20GB.
Where was the other 200GB going?
Then things got worse. My Mac started behaving strangely. Applications became sluggish. Saving files took forever. Creating new files would hang momentarily. My Mac was essentially choking from lack of free space.
I realized that full storage doesn’t just mean you can’t download new things—it actually breaks your Mac’s performance because the system needs free space to function properly.
After investigation, I discovered my storage was being consumed by things I didn’t even realize existed: old backups, cached files, duplicate photos, temporary downloads that never deleted, language files for languages I don’t speak, old installation files from applications I’d uninstalled.
Once I understood what was consuming space, freeing it up was straightforward. But the frustrating part was that macOS doesn’t obviously show you where storage is going or provide easy ways to clean it up.
Most Mac users just accept storage issues and buy external drives or upgrade to higher storage. But understanding what’s actually consuming space often reveals gigabytes of removable clutter.
Understanding Mac Storage: Why It Fills Up
Before clearing storage, understanding what consumes Mac storage helps prevent this happening again.
System Files and macOS itself: Several gigabytes. You can’t delete this.
Applications: Programs you’ve installed. Varies widely but easily dozens of gigabytes if you install many apps.
Photos and Videos: Media files take significant space, especially 4K videos or large photo libraries.
Documents and Files: User files you create and save.
Downloads: Files you download stay in Downloads folder by default until manually deleted.
Caches: Applications store temporary cached data. This accumulates over time and rarely auto-deletes.
Duplicates: Accidentally duplicated files multiply over time.
Old Backups: Time Machine and application backups consume space.
Language Files: macOS includes language files for dozens of languages. You probably only need one or two.
Temporary Files: Incomplete downloads, temporary working files, old versions of files.
Trash Bin: Deleted files stay in Trash until you empty it.
Other: Miscellaneous data from various sources.
Each of these can consume significant space. The issue is that macOS doesn’t make it obvious where storage is going.
Checking Storage Usage: Understanding Where Space Goes
First, see where your storage is actually going.
Click the Apple menu > About This Mac > Storage tab.
You’ll see a visual breakdown showing different categories consuming space:
- System
- Applications
- Photos
- Documents
- Audio
- Video
- Other
Hover over each category to see subcategories and file counts.
This gives you a high-level view but doesn’t show specific files.
For more detailed breakdown, use a third-party tool:
Storage Analyzer Applications:
Apps like Disk Diag, CleanMyMac, or DiskSight scan your drive and show exactly which files and folders consume the most space.
Download a free or trial version to see storage breakdown in detail.
These tools often show which single files or folders are consuming the most space, helping you identify targets for deletion.
Method 1: Empty Trash and Downloads Folder
The simplest and fastest way to free space.
First, empty your Trash. Open Finder > go to Trash (in sidebar).
All deleted files are here. They consume space even in Trash until Trash is emptied.
Right-click in Trash > “Empty Trash” (or Command+Shift+Delete).
Alternatively, right-click the Trash icon in Dock > “Empty Trash.”
This often frees several gigabytes immediately.
Next, clean your Downloads folder.
Open Finder > go to Downloads folder.
Most files here can be deleted. Downloads are often installers or temporary files you don’t need after installation.
Sort by date. Older downloads are likely no longer needed.
Select files you haven’t opened in weeks or months. Delete them.
This often frees additional gigabytes.
Method 2: Remove Unused Applications
Installed applications consume space. Removing apps you don’t use frees significant storage.
Open Finder > go to Applications folder.
Look through installed applications. Identify ones you don’t use.
For each unused application, drag it to Trash, or right-click > Move to Trash.
For some applications, complete removal requires using an uninstaller. Check if the application has an uninstaller in its folder.
Or use AppCleaner (free utility) which completely removes applications including supporting files.
Uninstalling just a few large applications can free 10-20GB or more depending on what you had installed.
Method 3: Manage Photos and Videos
Media files are often the largest storage consumers.
Open Photos application. Check library size. Photos app shows total storage used.
If your photo library is enormous and you don’t need all photos:
Delete old photos: Sort by date. Delete old photos you won’t look at again.
Remove duplicates: Photos often has duplicate detection. File > Library > Find Duplicates > Remove Duplicates.
Optimize storage: Settings > iCloud > Photos > Optimize Mac Storage.
This stores full-resolution photos in iCloud and keeps lower-resolution versions locally. Frees significant space if you have large photo library.
Move videos elsewhere: Videos consume enormous space. Consider moving old videos to external storage or cloud storage.
Method 4: Clear Caches and Temporary Files
Applications store cache files that accumulate over time.
Clear browser cache:
If using Chrome: Settings > Privacy and Security > Clear browsing data > select “All time” > clear cache.
If using Safari: Settings > Privacy > Manage Website Data > Remove All.
Browser caches often consume several gigabytes.
Clear application caches:
Open Finder > Press Command+Shift+G to open “Go to Folder” dialog.
Type: ~/Library/Caches
This folder contains cached files from applications. Most of these can be safely deleted—applications recreate them.
Select all files (Command+A) and move to Trash.
This can free 5-10GB or more depending on cache size.
Clear Trash again after clearing caches:
Empty Trash to permanently delete these files.
Method 5: Remove Language Files You Don’t Need
macOS includes language files for dozens of languages. If you only use English, the other language files are just taking space.
Use a utility like Monolingual to remove unnecessary language files.
Or manually navigate to System applications and remove language files:
Open Finder > Applications folder > select an application > Right-click > “Show Package Contents” > Contents > Resources > look for language files (folders with names like “en.lproj”, “fr.lproj”, “de.lproj”, etc.)
Delete language files you don’t need.
Warning: Only delete language files for languages you don’t use. Deleting the wrong files can break applications.
This typically frees 1-5GB depending on how many languages are installed.
Method 6: Manage Time Machine Backups
Time Machine (macOS backup system) stores multiple backup versions consuming significant space.
If Time Machine backups are stored locally (not on external drive), they consume internal storage.
System Settings > General > Time Machine > Options.
Check what’s being backed up. Exclude folders you don’t need backed up:
- Large media libraries you can restore from original source
- External drives (they shouldn’t backup to themselves)
- Cache folders
Or, disable Time Machine if you have backups elsewhere:
System Settings > General > Time Machine > toggle off.
If you need Time Machine but it’s consuming too much space:
System Settings > General > Time Machine > select backup disk > delete old backups.
This often frees 10-20GB or more.
Method 7: Remove Old Application Support Files
When you uninstall applications, their supporting files sometimes remain.
Open Finder > Press Command+Shift+G > type: ~/Library/Application Support
This folder contains support files for applications. Folders for applications you’ve uninstalled can be safely deleted.
Look for folders for applications you no longer have installed.
Drag them to Trash.
This cleanup often frees several gigabytes.
Method 8: Clear Old Downloads
Even after clearing Downloads folder, some download remnants remain.
Check ~/Downloads folder in Finder and delete old files.
Also check browser download folders:
Chrome: ~/Downloads (usually)
Safari: ~/Downloads (usually)
Delete archived downloads, old installers, files you no longer need.
Method 9: Use CleanMyMac or Similar Utility
While caution is warranted with third-party “cleaning” software, legitimate utilities can identify and remove unused files.
CleanMyMac, Disk Diag, or similar tools scan your drive and identify:
- Duplicate files
- Large old files
- Broken application support files
- Cache that can be safely deleted
These tools make it easier to identify what to delete without manual hunting through folders.
Be cautious: some cleaning utilities are scams or malware. Use only well-reviewed, legitimate utilities from reputable developers.
Method 10: Optimize System Storage
macOS has built-in optimization that can free space automatically.
System Settings > General > Storage > Recommendations.
macOS shows recommendations for freeing space:
- Remove old downloads
- Empty trash
- Delete old iOS device backups
- Optimize photos
Click each recommendation to apply.
Additionally, enable “Optimize Storage” in settings:
System Settings > General > Storage > enable “Optimize Storage” for photos, documents, and other cloud-synced data.
This stores files in cloud when local space is needed.
When Storage Is Still Full After Cleanup
If you’ve tried these methods and storage is still critically low:
Check for massive hidden files:
Use a storage analyzer tool to identify very large files. Sometimes you’ll find massive old video files, abandoned disk images, or other large items you can delete.
Move large files to external storage:
Music libraries, video libraries, or photo archives can be moved to external drives.
Connect external drive > select large folders > move to external drive.
This frees internal storage while keeping files accessible.
Disable or reduce iCloud sync:
If iCloud is syncing large amounts of data, disable it for specific folders.
System Settings > [Your Name] > iCloud > toggle off syncing for folders you don’t need synced.
Upgrade storage:
If you’ve deleted everything possible and still need more space, consider:
- Upgrading to Mac with larger drive (most expensive)
- Adding external storage (cheapest, least convenient)
- Using cloud storage more extensively
Preventing Storage From Filling Again
After freeing space:
Regular maintenance:
Monthly, check Downloads folder and delete old files.
Empty Trash regularly.
Disable automatic downloads:
System Settings > Software Update > disable “Automatic updates” if downloads are filling storage.
Manage browser cache:
Periodically clear browser cache and history.
Archive old files:
Move old photos, videos, or documents to external storage or cloud storage periodically.
Monitor storage:
Check storage status monthly: Apple menu > About This Mac > Storage.
Act before reaching critical levels.
Be selective installing apps:
Only install applications you actually use. Uninstall large apps you don’t use regularly.
When Low Storage Affects Performance
Important to understand: when storage is critically low (under 5% free), your Mac’s performance degrades significantly.
macOS needs free space for:
- Virtual memory (swap files)
- Temporary file operations
- System functions
- Application operations
When storage is full, your Mac becomes slow, unresponsive, and applications crash.
Maintaining at least 10-15% free space keeps your Mac running smoothly.
If your Mac is sluggish even after startup, low storage is often the cause. Free up space and performance usually improves.
The Reality
Mac storage fills up gradually from everyday use. Most people don’t notice until the system warning appears.
By that point, storage is critical and your Mac’s performance suffers.
The good news is that cleaning storage is usually straightforward. Most space is consumed by identifiable items: unused apps, cached files, old downloads, media files.
Once you identify what’s consuming space, freeing it is simple.
Regular maintenance prevents storage from becoming critical. Check storage monthly and clean up as needed.
Your Mac will run better with adequate free space. Storage cleaning isn’t just about creating room for new files—it’s about maintaining system performance.
Disclaimer: This article provides guidance on managing Mac storage. Results vary by macOS version and configuration. Some methods require technical knowledge. Deleting system files can break your Mac—only delete files you’re certain are safe to remove. Third-party cleaning utilities vary in quality and safety—use only well-reviewed utilities from reputable sources. Some “cleaning” software is malware or scams. Moving files or changing backups could result in data loss if done incorrectly. Time Machine backup configurations should be understood before modification. Users assume responsibility for understanding what they’re deleting. Create backups before making major storage changes. If unsure about deleting specific files, seek professional assistance rather than deleting randomly. Professional data recovery is expensive—caution is warranted when deleting files.

- How to Remotely Control Another Computer Using Windows Quick Assist

- 5 Must-Have Electronics Gadgets for a More Comfortable Living Room

- How to Create a Windows 11 System Backup on an External Hard Drive

- 10 Smart Home Ideas That Make Everyday Life Easier

- Gemini Live Avatar: How to Talk to Gemini Face-to-Face

Products
-
![Apple Watch Ultra 3 [GPS + Cellular 49mm] Running & Multisport Smartwatch w/Rugged Titanium Case w/Black Titanium Milanese Loop - M. Satellite Communications, Advanced Health & Fitness Tracking](https://bazaronweb.com/retailstores/wp-content/uploads/2025/09/apple-watch-320x320.jpg) Apple Watch Ultra 3 [GPS + Cellular 49mm] Running & Multisport Smartwatch w/Rugged Titanium Case w/Black Titanium Milanese Loop - M. Satellite Communications, Advanced Health & Fitness Tracking
Apple Watch Ultra 3 [GPS + Cellular 49mm] Running & Multisport Smartwatch w/Rugged Titanium Case w/Black Titanium Milanese Loop - M. Satellite Communications, Advanced Health & Fitness Tracking
-
 Apple iPad mini (A17 Pro): Apple Intelligence, 8.3-inch Liquid Retina Display, 256GB, Wi-Fi 6E, 12MP Front/12MP Back Camera, Touch ID, All-Day Battery Life — Purple
-
 Apple AirPods Max Wireless Over-Ear Headphones, Active Noise Cancelling, Transparency Mode, Personalized Spatial Audio, Dolby Atmos, Bluetooth Headphones for iPhone – Space Gray
-
 Apple AirPods Pro 2 Wireless Earbuds, Active Noise Cancellation, Hearing Aid Feature, Bluetooth Headphones, Transparency, Personalized Spatial Audio, High-Fidelity Sound, H2 Chip, USB-C Charging
-
Home Garage 210 TC Cotton King Floral Fitted (Elastic) Bedsheet(Pack of 1, Grey)
Original price was: ₹999.00.₹299.00Current price is: ₹299.00.
Leave a Reply